Advertisement
S T E P BY S T E P A S S E M B LY I N S T R U C T I O N S , C o n t ' d
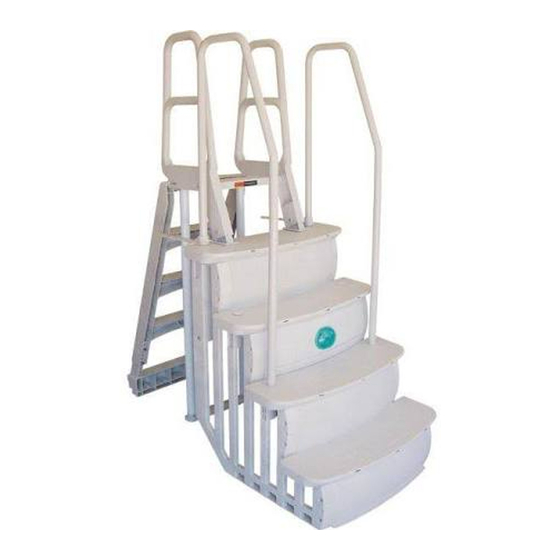
Step 6 Handrail/Deck Supports
E1
Secure each Upper Handrail (E1) to the Lower Handrail (E2) by using the
Handrail Connector (J). Use a #8 x 1" screw to secure the connector to
H
the lower and upper handrail. To secure your Easy Step to your deck or
pool top seat, be sure to position the Deck Connectors (H) around the
upper handrails prior to inserting the handrails in the step sockets. Insert
the upper and lower handrail assembly into the sockets located on the
top step and third step from the top. Secure the handrails to the side risers
with eight (8) #14 x 1-1/4" screws (N). Screw holes are located on the
E2
outside of the left and right risers.
L
Step 7 Socket Caps / Tread Screws
Plug the two remaining handrail sockets located on the third step by using
two of the Socket Caps (L).
Notice the four screw locations on the surface of the second tread. Secure
each location with one #8 x 1" screw.
Step 8 Pool Installation
Note: Two (2) people are required for installation.
A total weight of approximately 125 lbs., is required to keep the step from
moving once in place. With the assistance of another person, carefully
place the step into the pool. Place the three Ballast Bags (M) or other
ballast over the Ballast Tray (D) to hold the step into place. Again, with
the assistance of another person, walk back and position the step against
the pool wall to prevent swim behind hazards.
Step 9 Deck Mount Installation
With the step in position close to the pool wall, slide the Deck Connectors
(H) into installation position on either the pool top seat or pool deck.
Secure to the deck with two (2) #8 x 1" screws (N). Use a minimum of
two screws per deck connector. Now secure each Deck Connector (H) to
each Upper Handrail (E1) by using a single #8 x 1" screw as shown.
1004 Jaycox Road • Avon, Ohio 44011
REV 031108
888-333-1134
• Can be used with Model #200700T (Smart Choice Ladder) to create the Easy Entry System
SAFETY INSTRUCTIONS:
• Install step per manufacturer's instructions.
• Locate Easy Entry Step on a solid base.
• Easy Entry Step is designed for use by one person at a time.
• This step is intended for use as a swimming pool entry/exit only.
• Face the step when entering and exiting the pool.
• No jumping, no diving from the step.
• Do not swim through, behind or around the step.
Tools Required
Cordless Screwgun/Drill, 1/8" Drill Bit,
Standard Phillips Bit, Safety Glasses
SAND NOT INCLUDED. FLAT BOTTOM POOLS ONLY.
Note: Before you begin the assembly
of your ladder/step please insure you
have all components and hardware.
Note: Contact our customer service
department to request any missing
or damaged parts or hardware at
888-333-1134.
EASY ENTRY STEP
ASSEMBLY INSTRUCTIONS
Model #200400T
Shown with
Easy Entry System
#200800T
(200700T/200400T)
Optional
Smart Light
Advertisement
Table of Contents

Related Manuals for Main Access 200400T


Summary of Contents for Main Access 200400T
- Page 1 Secure each Upper Handrail (E1) to the Lower Handrail (E2) by using the Handrail Connector (J). Use a #8 x 1" screw to secure the connector to Model #200400T the lower and upper handrail. To secure your Easy Step to your deck or pool top seat, be sure to position the Deck Connectors (H) around the upper handrails prior to inserting the handrails in the step sockets.
- Page 2 EASY ENTRY STEP ASSEMBLY INSTRUCTIONS Model #200400T A second person will be of assistance in holding the side risers in place as it is being secured to the step treads. Easy Entry Step Components A1) Upper Step Tread Step 2 Right Riser Assembly Position the Step Tread Assembly on its side as shown.
Need help?
Do you have a question about the 200400T and is the answer not in the manual?
Questions and answers