Table of Contents
Advertisement
Available languages
Available languages
Advertisement
Table of Contents

Related Manuals for Yeelight Staria Bedside Lamp Pro


Summary of Contents for Yeelight Staria Bedside Lamp Pro
- Page 2 Yeelight Staria Nachttischleuchte Pro Yeelight Staria Bedside Lamp Pro Benutzerhandbuch User Manual...
- Page 3 Leben. Im besten Licht! See the world in a new light, Yeelight!
- Page 4 Read this manual carefully before use, and retain it for future reference. Mehr Informationen unter www.yeelight.com Hersteller: Yeelight Europe (WEEE-Reg.) Anschrift: Yeelight Germany GmbH, Flurweg 11, 82402 Seeshaupt, Deutschland E-Mail: support_de@yeelight.com Learn more at www.yeelight.com Manufactured by: Qingdao Yeelink Information Technology Co., Ltd.
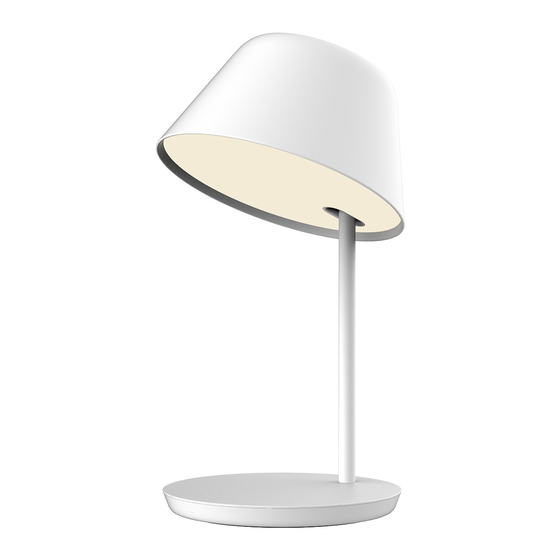
- Page 5 Produktübersicht Lampenschirm Drehgelenk (Drehwinkel 30°) Leuchtenarm Drahtloses Ladepad Anzeigelämpchen Kabelloses Laden Ein-/Ausschaltknopf Standfuß...
- Page 6 Inbetriebnahme Stecken Sie den Adapterstecker in den Netzgeräteanschluss an der Leuchte und schließen Sie das Kabel ans Stromnetz an.
- Page 7 2. Ist das Licht eingeschaltet, halten Sie den Ein-/Ausschaltknopf länger gedrückt, um die Farbtemperatur und die Helligkeit einzustellen. Weitere personalisierte Einstellungen nden Sie in der Yeelight App. 3. Ist das Licht eingeschaltet, drücken Sie zweimal den Ein-/Ausschaltknopf, um die Timer-Funktion zu aktivieren.
- Page 8 Kabelloses Laden 1. Das Anzeigelämpchen für kabelloses Laden leuchtet dreimal auf, sobald die Nachttischleuchte mit dem Original-Netzteil ans Stromnetz angeschlossen wird. 2. Legen Sie das Mobiltelefon auf das Ladepad. Leuchtet das Anzeigelämpchen gelb, wird das Telefon aufgeladen. Wenn nicht, sollten Sie sicherstellen, dass das Handy richtig positioniert ist.
- Page 9 Stellen Sie sicher, dass eine stabile WLAN-Verbindung besteht. Yeelight Gerät mit dem Google Assistant verbinden Fügen Sie den Yeelight Service zu Ihrer Google Assistant App hinzu, um mit Yeelight verbundene Geräte über Ihren Google Assistant zu steuern. 1. Tippen Sie auf in der Google Assistant App und suchen Sie nach „Yeelight“.
- Page 10 Yeelight Gerät mit Apple HomeKit verbinden 1. Ö nen Sie die Home App auf Ihrem iPhone oder iPad. 2. Tippen Sie auf „+“, und fügen Sie gemäß den Anweisungen in der App ein Gerät hinzu. Scannen Sie den rechts abgebildeten QR-Code oder den QR-Code auf dem Standfuß...
- Page 11 Produktdetails 1,5A...
- Page 12 Produkteigenschaften Erkennung fremder Einstellbare Dimmbar Nachtlichtmodus Objekte Farbtemperatur Steuerung über App Personalisierte Timer-Funktion Schnelles Laden Zeitpläne und Sprachassistent Zurücksetzen auf Werkeinstellungen Halten Sie den Ein-/Ausschaltknopf gedrückt und stecken Sie den Adapterstecker erneut in den Netzgeräteanschluss, bis das Licht zu blinken beginnt. Dann lassen Sie den Knopf los. Bitte setzen Sie die Leuchte auf Werkeinstellungen zurück, bevor sie sie mit einem anderen WLAN-Netzwerk verbinden.
- Page 13 Sicherheitshinweise 1. Stellen Sie sicher, dass die verwendete Spannung der vorgegebenen Spannung des Produkts entspricht. Die Verwendung einer ungeeigneten Spannung kann das Produkt beschädigen und die Sicherheit gefähr- den. 2. Das Leuchtmittel kann nicht ausgetauscht werden. 3. Die Lampe erzeugt während des Betriebs Wärme. Sorgen Sie daher für eine ausreichende Belüftung. 4.
- Page 14 Produkt umweltgerecht entsorgt. Über Yeelight Yeelight ist eine weltweit führende Qualitätsmarke für smarte Beleuchtung, die sich vor allem der Erforschung des Zusammenspiels von smarter Interkation, distinktivem Design und Beleuchtungserfahrung widmet. Wir setzen immer wieder neue Höchststandards in der Beleuchtungsindustrie, und begeistern mit unserem reichen Portfolio an Smarthome Leuchten – von Wohn- und Tischleuchten über Stimmungslichter bis hin zu intelligenten Steuerungselementen.
- Page 15 Product Description Lamp cap Rotary sha (rotation angle 30°) Lamp arm Wireless charging area Wireless charging indicator ON/OFF Base...
- Page 16 Installation Plug the adaptor connector into the DC ternimal, then connect the power.
- Page 17 Set your own night mode in the app. The lamp will turn on automatically with cozy nightlight during the preset night mode period. If not in the preset period, the lamp will return to the default state saved in the APP. The Night Mode is o by default. Please activate it in Yeelight APP.
- Page 18 Wireless charging 1. The wireless charging indicator will ash 3 times when the lamp is connected to the power supply with its original adaptor. 2. Put the mobile phone in the wireless charging area. The mobile phone is charging when yellow indicator light is on. If not, please adjust the phone to proper position.
- Page 19 Make sure that the Wi-Fi network is available and is able to access the Internet properly. Link a Yeelight Device with Google Assistant Add the Yeelight service to the Google Assistant app, to control devices connected to Yeelight from Google Assistant. 1. Tap in the Google Assistant app, search for “Yeelight”, tap “Link”, and sign in with your...
- Page 20 Add the Yeelight skill to the Amazon Alexa app, to control devices connected to Yeelight from Amazon Alexa. 1. Tap in the Amazon Alexa app, then tap “Skills & Games”, search for “Yeelight”, select the correct skill and tap “Enable”. Then sign in with your Yeelight account.
- Page 21 Basic Parameters 1,5A...
- Page 22 Product Features Foreign object Adjustable Adjustable Brightness Cozy Nightlight detection Color Temperature Voice Control and Personalized Schedules Timer Fast Charging Control via App How to Reset Tap and hold the ON/OFF button, and he re-insert the adaptor connector into th DC terminal till th light is breathing, and then release the ON/OFF button.
- Page 23 Warnings 1. Check the voltage before using the product. Improper voltage may damage the product and cause potential safety hazards. 2. The light source of the luminaire is irreplaceable. 3. The light will produce heat during operation. Please keep proper ventilation. 4.
- Page 24 Qingdao Yeelink Information Technology Co., Ltd. hereby declares that the Yeelight Staria Bedside Lamp Pro is in compliance with the essential requirements and other relevant provisions of Radio Equipment Directive 2014/53/EU. The full text of the EU declaration of conformity is available at the following address: Yeelight Germany GmbH, Flurweg 11, 82402 Seeshaupt.
- Page 25 CE marking–Veri cation of Conformity...
Need help?
Do you have a question about the Staria Bedside Lamp Pro and is the answer not in the manual?
Questions and answers