Advertisement
Table of Contents
- 1 Limited Warranty
- 2 Table of Contents
- 3 Owner Information
- 4 Getting to Know Your Appliance
- 5 Checklist before You Begin
- 6 Maximum Efficiency
- 7 Precautions
- 8 Installation
- 9 Optional Plumbing Procedures
- 10 Setting the Controller
- 11 Assembly and Parts
- 12 Troubleshooting
- 13 Efficiency Statements
- 14 Performance and Specifications
- Download this manual
Advertisement
Table of Contents

Subscribe to Our Youtube Channel
Summary of Contents for WellSoft WS80
- Page 1 MODELS WS80 | WS100 Version 1.2 Owner’s Manual & Installation Guide...
-
Page 2: Limited Warranty
WellSoft® will not be liable for, nor will number and model number of the product, and date of purchase. -
Page 3: Table Of Contents
Maximum Efficiency ........................8 Precautions ............................9 Installation ..........................10-14 Optional Plumbing Procedures ....................15 Setting The Controller ......................16-19 Assembly and Parts ....................... 20-21 Troubleshooting ........................22-23 Efficiency Statements ........................ 24 Performance and Specifications .................... 25 4/7/2017 WellSoft Owner’s Manual... -
Page 4: Owner Information
Owner Information General Information Congratulations on choosing a WellSoft water treatment appliance! Soon you and your family will be enjoying clean, clear water. Use this guide to attain the maximum benefit from your appliance. As an owner, you may find the first few pages to be the most helpful in solving your needs. If you have trouble with the operation of your appliance, see Troubleshooting in the back of this manual or contact the HelpLine at 1-844-375-6917. -
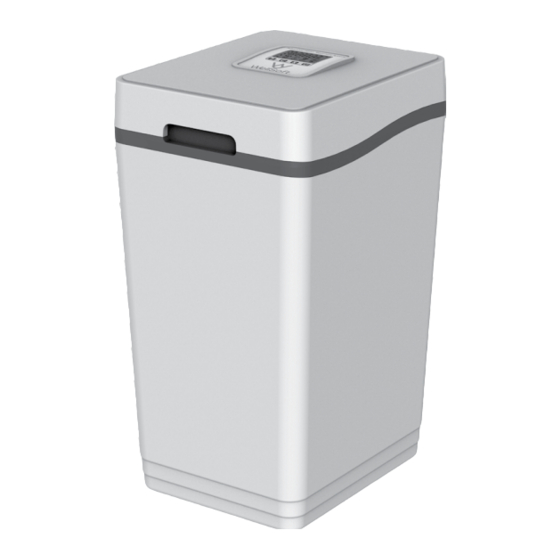
Page 5: Getting To Know Your Appliance
Bypass mode. Ensure that the appliance is returned to Service mode when the appliance is repaired or the use of untreated water is complete by turning the gray knob clockwise until it hits the stop. Figure 1: Bypass Valve Bypass Position Service Position 4/7/2017 WellSoft Owner’s Manual... -
Page 6: Checklist Before You Begin
An appropriate Water Filter can address these water shortcomings. ‰ Water Characteristics - Models WS80 and WS100 require a pH of 7 or above to function properly. An iron test to determine iron levels is also necessary. - Page 7 Actual Hardness (use your test results for hardness) Ferrous Iron (x5 for standard) or (x86 for metric) Compensated Hardness (add first two results for result) If you have any questions, call the HelpLine. (see General Information) 4/7/2017 WellSoft Owner’s Manual...
-
Page 8: Maximum Efficiency
9. Adhere to all operational, maintenance, and placement requirements. 10. Inspect and clean the brine tank and air check/draw tube assembly annually or when sediment is present in the brine tank. WellSoft Owner’s Manual 4/7/2017... -
Page 9: Precautions
8. Do not connect the drain and the overflow (gravity drain) lines together. 9. Do not use to treat water that is micro-biologically unsafe or of unknown quality without adequate disinfection before or after the appliance. 10. Do not allow your appliance or drain line to freeze. 4/7/2017 WellSoft Owner’s Manual... -
Page 10: Installation
H. For outside installations, the appliance should be enclosed so it is protected from the weather. Step 4 Turn Off Water Supply A. Turn off the water supply. B. Open the hot and cold water taps to depressurize the lines. WellSoft Owner’s Manual 4/7/2017... - Page 11 Hard Water To Outside Faucets Ground Wire and Clamps Well Water (Copper Pipe Only) Cold Soft Water Shut Off Hot Soft Water Valve City Water Meter Electrical Inlet Outlet Outlet Water Heater Drain and Overflow Lines 2"Air Gap 4/7/2017 WellSoft Owner’s Manual...
- Page 12 Connect Water Lines Connect water lines in compliance with all state and local, building, plumbing, and electrical codes. The Wellsoft valve connection fittings on the back of the unit are 1” NPT. They can be connected to your home’s plumbing supply with a variety of connectors / fittings (sold separately).
- Page 13 C. Ensure that the outlet selected is not operated by an On/Off switch. Power Sensor Cord Wire Step 11 Set Up the Controller A. Program the appliance controller before moving to step 12. (see Setting The Controller) 4/7/2017 WellSoft Owner’s Manual...
- Page 14 D. Open a cold water tap and allow the appliance to flush for 20 minutes or until approximately 72 gallons (270 liters) have passed through the appliance. This procedure is required to meet NSF compliance. Verify the controller indicates water flow. (see Setting The Controller) E. Place the cover on the cabinet. WellSoft Owner’s Manual 4/7/2017...
-
Page 15: Optional Plumbing Procedures
Allow adequate time for the joint to cure properly. Exact drying time is hard to predict because of environmental variables. Follow the recommended joint curing times on the primer and cement container labels. 4/7/2017 WellSoft Owner’s Manual... -
Page 16: Setting The Controller
Use this feature every six months as a part of your routine maintenance procedure to ensure a long service life for your water treatment appliance. The Iron Purge Icon will display when this feature is activated. WellSoft Owner’s Manual 4/7/2017... - Page 17 This setting is recommended to be used when iron is present in your water supply. The clock icon will display when setting the time of day. The clock icon with an “R” on it will display when setting the regeneration time of day. 4/7/2017 WellSoft Owner’s Manual...
- Page 18 These frequent regenerations help to break up and remove iron build up. This feature should stay turned on for 2 weeks at a time. Depending on the iron levels in your water, you should perform this feature at least once a year. WellSoft Owner’s Manual 4/7/2017...
- Page 19 B. Press to change the regeneration minutes. Press to save the minutes and the controller will return to the home screen. Time of day is stored in 24 hour format. 4/7/2017 WellSoft Owner’s Manual...
-
Page 20: Assembly And Parts
Assembly and Parts 3/8" Poly Tube 3/8" Plastic Gripper 3/8" Nut 3/8" Retainer Sleeve 3/8" Plastic Insert 1/2" Nut Wrist Pin 1/2" Nut Aircheck/draw Tube WellSoft Owner’s Manual 4/7/2017... - Page 21 Safety Shutoff 123119 Gear 56018 Float 123117 Injector Cap 123300 WS100 Controller - English 93806 O-Ring 123301 WS80 Controller - English 53224 Injector Nozzle 123302 WS100 Controller - Metric 93223 Injector Throat 123303 WS80 Controller - Metric 123113 Brine Lever 123803...
-
Page 22: Troubleshooting
With 12 VAC present at controller, replace the Defective circuit board controller High ambient room temperature. If temperature exceeds 120°F (49°C), the display No action necessary will blank out. This does not affect the operation of the controller WellSoft Owner’s Manual 4/7/2017... - Page 23 Gear teeth are not engaged, gear is stripped, “E4” Home latched or something is jammed in the valve. Cycle the power to reset “E5” Memory error Replace controller 4/7/2017 WellSoft Owner’s Manual...
-
Page 24: Efficiency Statements
Reduction Capabilities for Specific Contaminants USEPA Max. Name of Substance Influent Challenge Level Contaminant Level Barium 2.0 mg/L 10 +/- 10% mg/L Radium 226/228 5 pCi/L 226/228: 25 pCi/L WellSoft Owner’s Manual 4/7/2017... -
Page 25: Performance And Specifications
Rinse - 0.5 gpm (1.9 L/min) min) may compromise performance. Intermittent flow rate must not exceed 9.3 gpm (35.2 L/min). System conforms to NSF/ANSI 44 for the specific performance claims as verified and substantiated by test data. 4/7/2017 WellSoft Owner’s Manual... - Page 26 Notes Notes WellSoft Owner’s Manual 4/7/2017...
- Page 27 Notes Notes 4/7/2017 WellSoft Owner’s Manual...
- Page 28 Made In System Tested and Certified by NSF International against NSF/ANSI 44 for the reduction of the claims specified on the Performance Data Sheet and at www.nsf.org ® WellSoft 4343 S Hamilton Road 1-844-375-6917 Groveport, OH 43125 www.wellsoftwatersoftener.com ©2015 120900 Version 1.2...
Need help?
Do you have a question about the WS80 and is the answer not in the manual?
Questions and answers