
Summary of Contents for Pros'Kit Probbie The Robot GE-893
- Page 1 GE-893 Probbie The Robot 寶比 Your adorable smart friend Manual Assembly Instruction & 組裝說明手冊...
-
Page 3: Table Of Contents
目 錄 Contents ................Product Introduction 產品介紹 ................Tools You May Need 自備工具 ................Mechanical Parts List 零件清單 ................Plastic Parts 塑膠模型零件 ........Tip:Cut Off The Burrs Before Assembly 小技巧提醒 ................Body Module Assembly 身體組裝 ........Head Module Assembly 頭部組裝... -
Page 4: 產品介紹 Product Introduction
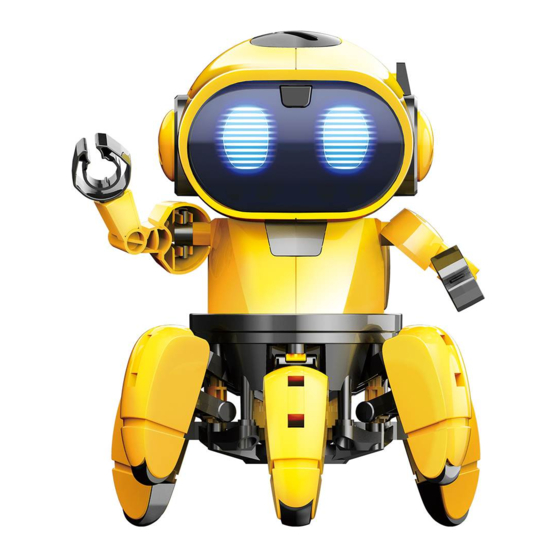
A I 智 能 寶 比 Probbie The Robot 產 品 介 紹 Product Introduction Probbie寶比是一個智能的六腳機器人,設計有兩個遊戲模式 ”跟隨”或”探索” 跟小朋友們一起玩 - 在 “跟隨”模式中,寶比能跟隨著主人,聽話的像個你專屬好朋友;而在”探索”模式中,寶比可以避開障礙 物並找到一個新的路線繼續前進。同時,寶比會發出美妙的聲音和燈光,展現自己的情緒,活靈活現的像 是你的寵物。 聲光效果十足的寶比,讓您在玩樂中體會紅外線感測與AI機器人的最貼近的互動效果。 Probbie is an intelligent six legs robot which provides great interaction with children. Probbie has two programmed modes to follow or avoid objects. - Page 5 齒輪(粉紅色) 出力齒輪(橘色) 自攻螺絲 Gear 40/10T(Pink) Tapping Screw Gear 10T(Orange) 數量 數量 數量 華司螺絲 圓軸(短) 圓軸(長) Tapping Screw Shaft ( Short ) Shaft ( Long ) 數量 數量 數量 (1:1) (1:1) 馬達端子組 馬達端子組 Motor With Connector Motor With Connector 數量 數量 藍...
-
Page 6: 塑膠模型零件 Plastic Parts
塑 膠 模 型 零 件 Plastic Parts 請依照組裝步驟將所需的零件剪下,以免組裝時造成零件混淆。 Cut the plastic parts when they are required. Do not cut them in advance. 15 16 17 19 小技巧提醒: 請將毛邊剪切乾淨,以免產生間隙導致運作不良 Tip:cut off the burrs before assembly 毛邊 毛邊 burr burr 毛邊 burr... -
Page 7: Body Module Assembly
身 體 組 裝 Body Module Assembly 藍色 黑色 P11x3 Black Blue (短) Short (橘色) Orange (白色) (橘色) White Orange 藍色 黑色 Black Blue (粉紅色) Pink... - Page 8 P9x3...
- Page 9 請將4個P10皆轉緊至底 Fasten P10 x4 to the bottom entirely. 取下 REMOVE 注意: A15僅為輔助工具,以 上步驟皆完成後請將A15取下 Important : Remove assistance tool-A15 after above steps are finished.
- Page 10 紅色 黑色 Black (長) Long (白色) White (綠色) Green 側視圖 (長) Long (灰色) Gray (藍色) Blue (橘色) Orange P5(白) P2(灰) White Gray P4(綠) Green P3(藍) Blue P8(橘) Orange...
- Page 11 P9x3...
- Page 12 於進行步驟14前,請先確認A15是否已移除 Important : Ensure A15 was removed before assembly of step 14. P9x4...
-
Page 13: 頭部組裝 Head Module Assembly
頭 部 組 裝 Head Module Assembly Body Module 身體 D2&D3 D2&D3 請 注意 ! Important! 請將P17 沿著A10缺口貼齊 *請先將P17 自白色離型紙取下 P17 is on a white sticker sheet Post P17 against corner of indent in A10... - Page 14 P9x2 請將2個P9 轉緊,至上圖 ” ” 所示位置 Fasten P9 x 2 as illustrated above with 請將毛邊剪切乾淨 Cut off the burrs before assembly. 毛邊 burr 毛邊 毛邊 burr burr 毛邊 burr...
- Page 15 藍色 黑色 Blue Black 黑色 紅色 Black 壓下電線 Press Down The Wires...
- Page 16 AAA(x4)
- Page 18 側視圖 Side View...
- Page 20 A18x2 請確定A18安裝有發出’’ 噠’’聲 Make sure to snap on A18 with a “Click” 咔噠Click 咔噠Click 俯視圖...
- Page 21 請勿將 A1與A2混淆 Don’t mix up A1 & A2. 比例 1:1 推 push 推 push 請勿將尾部微微突出的卡榫修平, 會導致無法固定B13底座。 Notice: Do not trim the projection of the bottom side; or B13 may not be fixed properly. 俯視圖 俯視圖...
- Page 23 俯視圖 俯視圖...
- Page 24 請確認A19開口朝向正確方向 Ensure the right direction of A19. 請確認A17開口朝向正確方向 Ensure the right direction of A17.
- Page 25 比例 1:1 請勿將A2與A1混淆 Don’t mix A2 & A1. A1+B1 A2+B15 A2+B15 A1+B1 A1+B1 A2+B15...
- Page 26 P9x2 P9x2 P9x2...
-
Page 27: Feet & Arms Module Assembly
腳 / 手 組 裝 Feet & Arms Module Assembly... - Page 28 手臂 右 毛邊 burr 請將毛邊剪切乾淨 Cut off the burrs before assembly. 毛邊 burr 手臂 右 手臂 左 手臂 左 手臂 毛邊 burr 請將毛邊剪切乾淨 Cut off the burrs 毛邊 before assembly. burr...
-
Page 29: 更換電池 How To Replace Batteries
恭 喜 完 成 Finish 更 換 電 池 How To Replace Batteries 取下 REMOVE 取下 REMOVE 電池( AAA) x 4 Battery( AAA) x 4... -
Page 30: How To Play
遊 戲 方 式 How To Play 開機-待機模式 Power On - " Standby " Phase 1.長按開關鍵兩秒,寶比的眼睛(LED)將伴隨開機音效亮起 Long-press the switch for 2 secs. Probbie's eyes (LED) light up with sound effects 2.寶比眼睛 (LED) 閃爍 進入待機狀態 選擇遊戲模式 LED flashes enter " Standby " phase select playing mode. - Page 31 遊戲模式 Funway Follow-me 跟隨 mode 遊戲模式 Funway Explore 探索 mode...
-
Page 32: Warning
關機 Power Off 1. 長按開關鍵三秒 Long-press the switch for 3 secs. 2. 寶比活動力減緩,眼睛亮光 (LED) 伴隨關機音效漸滅 關機 Probbie becomes inactive, its LED eyes/Sound effects fade and then power off. Probbie goes into " power off " mode. 注意 Warning 拿取時,請小心握住寶比的頭部位置。 抓取錯誤的位置 ( 如右圖 ) 將可能導致故障。 Be gentle when holding Probbie by its head, any improper motions(as shown to the right) might cause malfuction. -
Page 33: Trouble Shooting
簡 易 故 障 排 除 Trouble Shooting 1. 請確保電池安裝位置是否正確 (見第13頁,步驟 Ensure batteries are placed in correct polarity. ( refer to page 13, step 2. 開機後寶比仍無法動作 (眼睛LED 燈不亮), 請確認螺絲是否鎖到底 (見第11頁,步驟 If P r obbie does not work ( LED doesn’t flash ) when pressing " power switch ", check and ensure the screws are fastened to the bottom entirely ( refer to page 11, step 3. - Page 35 若需要購買零件,請參照以下零件表 When ordering parts, please include the following 1. 請留下訂購人姓名、寄送地址、連絡電話、E-mail Name, address (no P.O. Box), telephone number, and email address. 2. 請註明產品名稱、產品型號、零件名稱、零件型號以及數量 Model name and model number.Part number, part name, and quantity. 3. 如有任何需求,請洽您的經銷商 Please contact local distributor if any query. GE-893 AI 智能寶比...
- Page 36 Probbie The Robot 寶比 Your adorable smart friend 電池移除或更換應由成人或在成人監督下進行。 Removal and replacement of batteries should be carried out by adult or under adult supervision. 請避免電池或電池連接器端子短路。 Avoid short circuiting the contacts in the battery compartment or the battery terminals. 電池長期不用或電力耗盡時請取出以避免電池漏液。 Remove exhausted batteries from the product to avoid leakage. 請勿混用新舊電池及不同廠牌、種類的電池,以免造成危險或電器損耗。...
Need help?
Do you have a question about the Probbie The Robot GE-893 and is the answer not in the manual?
Questions and answers