
Subscribe to Our Youtube Channel
Summary of Contents for Wyco Sure Speed 2.0
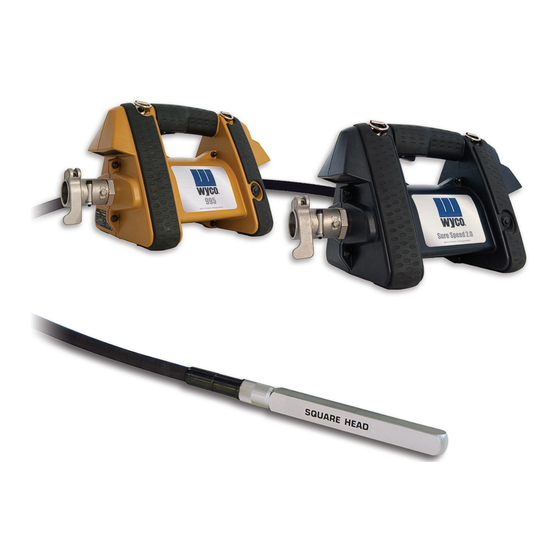
- Page 1 Flex Shaft Concrete Vibrators Sure Speed 2.0 and 995 User Manual VBR-UM-02653-EN-05 (February 2020)
- Page 2 Flex Shaft Concrete Vibrators, Sure Speed 2.0 and 995 Page ii VBR-UM-02653-EN-05 February 2020...
-
Page 3: Table Of Contents
User Manual CONTENTS General Power Tool Safety Warnings Work Area Safety Electrical Safety Personal Safety Power Tool Use and Care Service Emissions Safety Symbol Explanations Additional Safety Note Introduction Operation Before Starting the Motor Operating the Motor Setup Connecting the Vibrating Casing (Quick-Disconnect Connections) Disconnecting the Vibrator Casing (Quick-Disconnect) - Page 4 Flex Shaft Concrete Vibrators, Sure Speed 2.0 and 995 Restrictions of Hazardous Substances (Rohs) Directive Waste Electrical and Electronic Equipment (WEEE) Directive Model Number Serial Number Date Purchased Page iv VBR-UM-02653-EN-05 February 2020...
-
Page 5: General Power Tool Safety Warnings
General Power Tool Safety Warnings WARNING: This product can expose you to chemicals including lead, which are known to the State of California to cause cancer, and Chromium, which are known to the State of California to cause birth defects and/or other reproductive harm For more information go to www.P65Warnings.ca.gov 6 If operating a power tool in a damp location is... -
Page 6: Service
Safety Symbol Explanations SAFETY SYMBOL EXPLANATIONS 6 Keep cutting tools sharp and clean 7 Use the power tool, accessories, tool bits, and like equipment in accordance with these instructions, taking into account the working conditions and the work Volts to be performed Amperes Service Have your power tool serviced by a qualified repair person... -
Page 7: Introduction
THE VIBRATOR FOR DAMAGE BEFORE USING THIS mixture resulting in significantly reduced voids EQUIPMENT. READ, UNDERSTAND AND FOLLOW ALL This motor can be used with any valid Wyco vibrator head SAFETY AND MAINTENANCE INSTRUCTIONS IN THIS and shaft combination See... -
Page 8: Setup
Setup SETUP 6 Align the arrows on the casing end with the unlock icon on the quick-disconnect connector The unlock and lock positions are shown by the unlock and lock icons (see The motor has several options for connecting the core and Figure 4) on the side of the quick-disconnect fitting casing assembly to the motor housing For all available... -
Page 9: Disconnecting The Vibrator Casing (Quick-Disconnect)
Setup Connecting the Vibrating Casing OTEE: If the casing feels loose or too tight after pushing down on the locking lever, raise the lever until the (Threaded Connections) lever is horizontal then rotate the hex head screw OTEE: The casing must be fitted with a thread with a #4 Allen wrench in either direction to tighten connector end or loosen Be careful to not loosen the lever too... -
Page 10: Disconnecting The Vibrator Casing (Threaded Connector)
Setup Disconnecting the Vibrator Casing 2 Hold the casing assembly in one hand while carefully rotating the motor counterclockwise until motor is snug (Threaded Connector) to the shaft See Figure 9 1 Carefully loosen the hex motor connector, using a crescent wrench on the motor and a pipe wrench on the flex shaft assembly, until the motor assembly can be rotated by hand in a counterclockwise direction... -
Page 11: Parts
Parts PARTS Item Kit Number Description Parts Included (Parts Quantity) W423114 Brush cap with O-ring, 115V Brush cap (2); O-ring, brush cap (2) W423144 Bolt and nut with D-ring kit (housing) Acorn nut, 10-32 unf, self locking (9); Carriage screw, 10-32 unf × 3/4 in (9); D-ring (2) W423130 Intake screen W423132... - Page 12 Available for Model Numbers WSS2G1Q and WSS2G1T Available for Model Numbers WSS2G1Q and WSS2G2Q Available for Model Numbers WSS2G2Q and WSS2G2T Available for Model Numbers WSS2G1T and WSS2G2T Figure 13: Repair parts for Sure Speed 2.0 Page 12 VBR-UM-02653-EN-05 February 2020...
- Page 13 Parts Item Kit Number Description Parts Included (Parts Quantity) W423603 Field; 15 Amp; 115 Volt W423605 Field; 7 5 Amp; 230 Volt W423650 115 Volt armature kit Assembly, armature, 115 Volt, with bearings, fan and magnet; 115V brush, cap and o-ring kit (not shown) W423651 230 Volt armature kit Assembly, armature, 230 Volt, with bearings, fan and magnet;...
-
Page 14: Preventive Maintenance
Preventive Maintenance PREVENTIVE MAINTENANCE ELECTRIC VIBRATOR HEAD SERVICE AND MAINTENANCE Wyco vibrator motors are designed to operate 50…100 hours between normal preventive maintenance intervals MPORTANT The service instructions below should be followed to perform the preventive maintenance Service the vibrator head after every 50 hours of operation for trouble-free running on the job. -
Page 15: Flexible Shaft Lubrication And Break-In
See Figure 16 every 50 hours Lubrication Procedure To lubricate, lightly coat the core with grease (Wyco shaft lubricant) while inserting it into the casing MPORTANT Do not over lubricate. Surplus lubricant may get past the seal in the vibrator head. -
Page 16: Extension Cords
Electric Vibrator Head Assembly Drawings and Parts Lists Extension Cords When selecting an extension cord for use with Wyco electric motor cord sets using a three-prong polarized plug, an equivalent plug set must be used for the grounded or earthed version MPORTANT A grounded or earthed motor requires a grounded or earthed extension cord. -
Page 17: Vibrator Head Model 750-D
Electric Vibrator Head Assembly Drawings and Parts Lists Vibrator Head Model 750-D LOCTITE 545 PERMATEX #2 LOCTITE 545 Item Description Quantity Part No. Item Description Quantity Part No. Nut, Hex Jam W435638 Holder, Seal Bearing, Ball W097011 Seal, Oil Housing, Square W587320 Bushing Rotor... -
Page 18: Vibrator Head Models 750-Fi, 750-Gi, 750-Li And 750-Mi
Electric Vibrator Head Assembly Drawings and Parts Lists Vibrator Head Models 750-FI, 750-GI, 750-LI and 750-MI PERMATEX #2 LOCTITE 545 LOCTITE 545 LOCTITE 545 Part No. for Part No. for Part No. for Part No. for Item Description Quantity 750-FI (1.38B) 750-GI (1.75B) 750-LI (2.00B) 750-MI (2.25B) - Page 19 Restrictions of Hazardous Substances (Rohs) Directive RESTRICTIONS OF HAZARDOUS SUBSTANCES (ROHS) DIRECTIVE This product is compliant with the RoHS Directive identified on the Declaration of Conformity associated with this product This product does not contain lead, mercury, cadmium, hexavalent chromium, polybrominated biphenyls or polybrominated diphenyl ethers in quantities exceeding the following maximum concentration value levels: Lead 0 1% by weight in homogenous materials...
- Page 20 Flex Shaft Concrete Vibrators, Sure Speed 2.0 and 995 ® Trademarks appearing in this document are the property of their respective entities Due to continuous research, product improvements and enhancements, Badger Meter reserves the right to change product or system specifications without notice, except to the extent an outstanding contractual obligation exists ©...
Need help?
Do you have a question about the Sure Speed 2.0 and is the answer not in the manual?
Questions and answers