Table of Contents
Advertisement
Quick Links
CARE INSTRUCTIONS:
TO BE ASSEMBLED ON A CLEAN, DRY AND SMOOTH SURFACE. WIPE CLEAN WITH A SOFT DAMP CLOTH. NEVER USE SCOURERS, ABRASIVES OR CHEMICAL SOLVENTS. CHECK AND
TIGHTEN ALL PARTS REGULARLY. KEEP AWAY FROM MOISTURE AND DIRECT SUNLIGHT. STORE IN A DRY PLACE. FOR INDOOR USE ONLY.
WARNING!
DO NOT STAND, SIT OR LEAN ON THIS UNIT. DO NOT USE THIS UNIT AS A STEP LADDER OR AS A CHOPPING SURFACE. ENSURE THIS UNIT IS USED ONLY ON A FLAT SURFACE. DO NOT
USE THIS UNIT UNLESS ALL BOLTS AND SCREWS ARE FIRMLY SECURED. DO NOT PLACE HOT ITEMS SUCH AS COFFEE CUPS DIRECTLY ON THE SURFACE OF THIS FURNITURE ITEM. KEEP
AWAY FROM CHILDREN AND BABIES. THIS PACKAGE CONTAINS SMALL PARTS AND SHARP POINTS. ADULT ASSEMBLY REQUIRED. A MILD ODOUR MAY BE PRESENT WHEN FIRST OPENING
THIS CARTON. SIMPLY ALLOW TO AIR OUTSIDE AND THIS WILL FADE. MAXIMUM SAFE LOAD: 10KGS FOR TOP PANEL, 5KGS FOR INSIDE DRAWER.
6 x 35 mm
A
15 x 9.5 mm
B
6 x 30 mm
C
4 x 40 mm
D
4 x 30 mm
1
10
3
2
11
11
Assembly Instructions
8 PCS
E
20x150mm
4x14mm
6x30mm
F
4x35mm
8 PCS
G
4x12mm
H
4 PCS
75x73x14mm
4 PCS
4
6
9
7
5
11
11
2
1 PCS
1 PCS
20 PCS
4 PCS
1
2
5
8
8
1 PCS
11
1 PC
3
1 PC
1 PC
1 PCS
6
1 PCS
1 PCS
9
10
4 PCS
4
1 PC
7
1 PCS
1 PC
Advertisement
Table of Contents

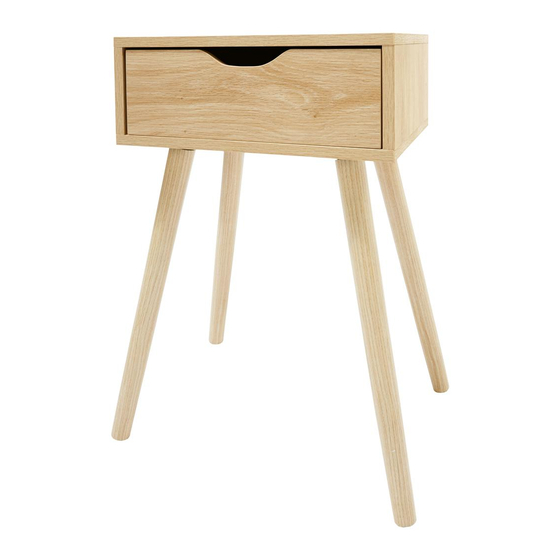
Related Manuals for KMART Side Drawer Oak Look 42619673


Summary of Contents for KMART Side Drawer Oak Look 42619673
- Page 1 Assembly Instructions CARE INSTRUCTIONS: TO BE ASSEMBLED ON A CLEAN, DRY AND SMOOTH SURFACE. WIPE CLEAN WITH A SOFT DAMP CLOTH. NEVER USE SCOURERS, ABRASIVES OR CHEMICAL SOLVENTS. CHECK AND TIGHTEN ALL PARTS REGULARLY. KEEP AWAY FROM MOISTURE AND DIRECT SUNLIGHT. STORE IN A DRY PLACE. FOR INDOOR USE ONLY. WARNING! DO NOT STAND, SIT OR LEAN ON THIS UNIT.
- Page 2 Step 1: Fix the screws from Part A onto board 1 , and put Part B into Step 3: Put part B in corresponding position (as per below diagram), the corresponding position (as per below diagram). Attach board 3 & Attach board 2 with screws (Part C), using a screwdriver.
- Page 3 Step 5: Screw the legs (Part 11 ) into Part H from step 4. Step 7: Fix the screws from Part A onto board 5 . Attach this piece to the part from step 6 (as per below diagram), and then fix the round screws from Part A with a screwdriver.
Need help?
Do you have a question about the Side Drawer Oak Look 42619673 and is the answer not in the manual?
Questions and answers