Table of Contents
Advertisement
Quick Links
Advertisement
Table of Contents

Subscribe to Our Youtube Channel
Summary of Contents for Roots & Branches JOHNNY APPLE PEELER VKP1010
- Page 1 Instruction Manual...
-
Page 2: Table Of Contents
Table of Contents Parts Diagram ....................3 Warning......................4 Assembly......................4 Mounting to a suitable surface ..............5 Align, adjust, and secure blades..............5 Align the coring/slicing blade ..............5 Test alignment....................6 Adjust peeling blade..................6 Adjust peeling arm ..................7 Place apple on fork ..................7 To peel, slice, and core.................8 Peeling only ....................8 Slicing and coring without peeling.............8 Cleaning and care ..................9... -
Page 3: Parts Diagram
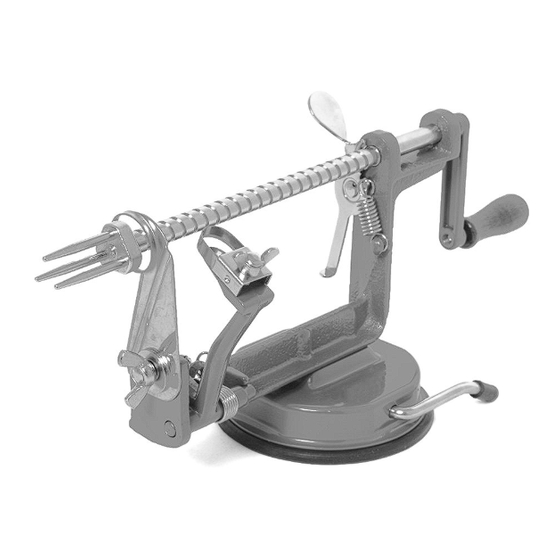
Johnny Apple Peeler (Suction Base) Model VKP1010 Parts Diagram Your complete Johnny Apple Peeler everything shown below: (11) (10) (13) (12) Parts List (1) VKP1010-1 Peeling Blade (2) VKP1010-2 Coring Slicing Blade (3) VKP1010-3 Fork (4) VKP1010-5 Handle Arm (5) VKP1010-6 Wood Handle (6) VKP1010-7 Handle Screw (7) VKP1010-8 Lever Spring (8) VKP1010-9 Wing Nut for Coring Blade... -
Page 4: Warning
Congradulations! You now own the world’s finest apple and potato peeler, the Johnny Apple Peeler. It’s designed to save you time, effort, and money by performing several tasks at once. Before plunging right in and peeling a bushel of apples or a bag of potatoes, you will want to get acquainted with your peeler. -
Page 5: Mounting To A Suitable Surface
Mounting to a suitable surface Before using, the peeler needs to be properly secured to a suitable surface so it will stay firmly in place during use. Otherwise, the peeler will not work properly. Suction Base: The suction mount must be used with a smooth and non-porous surface. -
Page 6: Test Alignment
Test alignment Test alignment by pressing down on the thumb lever. While holding the thumb lever down, move the driveshaft forward and backward. Watch the fork as it is passing through the center of the coring/slicing blade. Observe carefully to make sure the fork doesn’t touch the sides of the coring blade. -
Page 7: Adjust Peeling Arm
Adjust peeling arm The peeling arm has been factory adjusted to have approximately 1/4 inch clearance between the peeling blade and the widest part of the fork. To adjust the position of the peeling arm, either tighten or loosen the adjustable screw to achieve proper spacing. Turn the screw clockwise to adjust it away from the fork. -
Page 8: To Peel, Slice, And Core
To peel, slice, and core To peel, turn the handle slowly clockwise to advance the apple into the blades. The peeling blade will automatically adjust to the contour of the apple as it advances forward. To remove the core, push down the thumb lever and pull back on the handle. -
Page 9: Cleaning And Care
Cleaning and care • When cleaning the entire unit, hand washing is recommended. • After washing, dry all parts thoroughly by hand. Do not allow to air dry. • Peeling and coring/slicing blades can be washed in a dishwasher. • A drop of vegetable oil on the moving parts will insure smooth operation for next use. -
Page 10: Making Shoestring Potatoes
4. Slice/core/peel apples (peeling the apples are optional). Using a paring knife, slice down opposite sides of the apple to make uniform slices. 5. Place slices in the water mixture until all apples have been sliced. 6. Lay slices evenly, without touching one another, on the trays of your food dehydrator. -
Page 11: Troubleshooting Guide
TROUBLESHOOTING GUIDE PROBLEM SOLUTION Peeler is taking off too much flesh with Adjust the peeling blade to remove the peel. less flesh with the peel. See page 6 for instructions. Peeling arm and/or peeling blade Peeling blade is digging in/gouging needs to be adjusted. -
Page 12: Product Warranty
Product Warranty Register your warranty online at: VKPbrands.com/Warranty Model VKP1010 - Johnny Apple Peeler (Suction Base): 5 years We are confident in the quality of our products and back each one with a limited warranty for the length of time specified above. Should you experience any problems with your product, please contact our Customer Service Department.
Need help?
Do you have a question about the JOHNNY APPLE PEELER VKP1010 and is the answer not in the manual?
Questions and answers