
Summary of Contents for LEM 688
- Page 1 MEAT SAW OPERATING MANUAL For your safety read all instructions carefully LEM PRODUCTS West Chester, OH 45011 Phone: Toll Free 1-877-536-7763 Revised 7/2012...
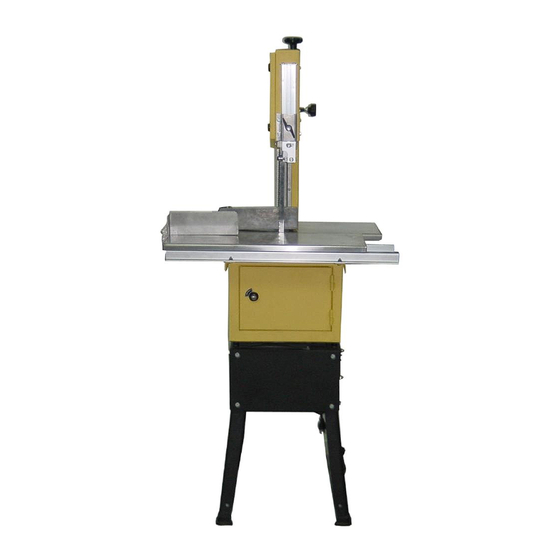
- Page 2 Pg 2 SPECIFICATIONS ITEM DESCRIPTION Motor 120 V, 60 HZ, ¾ HP, 1700 RPM Blade Speed RPM/FPM 372 / 970 ( 60 Hz ) Blade Size 76 - 13/16” x 5/8” ( 1950mm x 15mm ) Table Dimensions Stationary Table 9 1/4" x 22 3/8” Sliding Table 8 x 22 3/8”...
-
Page 3: Specific Product Warnings And Precautions
6. DRESS SAFELY. Non–skid–footwear or safety shoes should be used when working with this product. Do not wear loose clothing, gloves or jewelry as they can become caught in moving parts. Wear a protective hair covering to prevent long hair from becoming caught in moving parts. 7. - Page 4 Pg 4 2. MAKE SURE THE POWER SWITCH IS IN THE “OFF” POSITION BEFORE PLUGGING IN THE POWER CORD. 3. DO NOT ABUSE THE POWER CORD. Do not use the cord to pull the 3-prong plug from a power outlet. Keep cord away from heat, oil, sharp edges, and moving parts.
- Page 5 Pg 5 10. BEFORE USING THE MEAT SAW, MAKE SURE THE SAW BLADE IS PROPERLY MOUNTED. Make sure the saw blade is balanced, its tension and tracking are properly adjusted, and its teeth point downward and toward the front side of the table, and it is not bent or cracked. CAUTION: ALWAYS WEAR HEAVY DUTY GLOVES WHEN HANDLING AND ADJUSTING THE SAW BLADE.
-
Page 6: Leg Assembly
When unpacking, check to make sure all parts shown on the parts lists (pages 14 & 15) are included. If any parts are missing or broken, please call LEM Products at the number shown on the cover of this manual as soon as possible. - Page 7 Pg 7 Table attachment: Stationary table All the pieces to mount the stationary table (part #100) are located in one small bag. First, attach each of the two yellow table extensions (yellow angle iron approx 1¼” × 1¼” × 10¼” inches. Part #150) to the top of the meat saw frame by aligning the three round holes in the table extensions with the 3 square holes directly in front and behind the saw blade.
- Page 8 Pg 8 Sliding Table Attachment: The sliding table (part #97) fits into the left and right rails (part #61 and #60 respectively). The rails bolt through the last remaining holes of the table extensions. Each rail has a black stop pin (part #87) through it at one end to stop the sliding table. Pair the rails such that the black stop pins are facing one another and both are in front of the saw blade.
- Page 9 Pg 9 To Raise and Lower The Blade Guide Assembly: 1. The blade guide assembly (part #37) should always be set to about ½” above the height of the meat being cut. (See Figure F). 2. To adjust the height of the blade guide assembly, loosen the wing nut (part #34), raise or lower the assembly, then securely retighten the wing nut.
- Page 10 Pg 10 To Adjust The Saw Blade: 1. Turn the Two Slotted Inserts (part #20) counterclockwise to unlock the Upper Door (part#2) (See Figure G and H) 2. Turn the slotted insert (part #20) counterclockwise to unlock the lower door (part #3) (See Figure H ).
- Page 11 Pg 11 5. Turn the blade tensioner knob (part #30) clockwise to raise the upper wheel (part #4) and add tension to the saw blade. NOTE: To determine the correct saw blade tension continue turning the blade tensioner knob clockwise, while at the body (part #45).
- Page 12 Pg 12 Meat Cutting Procedure: Facing the right side of the saw, place the meat on the sliding table (part #97) in front of the meat pusher. Adjust the-depth-of-cut-fence to the desired thickness of cut. Thickness of cut will be the distance between the saw blade and the fence. Tighten the wing nut on the fence to set the thickness of cut.
-
Page 13: Cleaning, Inspection, And Maintenance
Pg 13 CLEANING, INSPECTION, AND MAINTENANCE 1. Caution: Always disconnect this meat saw from its electrical power supply source before performing any cleaning, inspection, or maintenance. Warning: Always wear heavy-duty gloves when adjusting and handling the saw blade. 2. Do not introduce water into the electric motor through the motor vents. 3. -
Page 14: Parts List
Pg 14 PARTS LIST Meat Saw Item Description Item Description Meat Saw Frame Washer - 8 Upper Door Nut M8 Lower Door Upper Guide body Upper Wheel Socket Set Screw M6 x 10 Bearing 80202 Upper Guide Shaft Wing Nut Special Screw Tap Screw ST4.8 x 22 Bearing 80026... - Page 15 Pg 15 PARTS LIST (CONTINUED) Meat Saw Item Description Item Description Washer Chip Container Rail – 1 Nut M8 Chip container Rail – 2 External Washer 8 Spacer Bush Drive Belt Washer - 6 Blade 1950 Hexagon Bolt M6 x 40 Socket Set Screw M8 x 12 Spring Washer - 6 Stand Rod (10”)
- Page 16 Revised 7/2012...
- Page 17 Pg 16 Instructions Revised 6/19/06...
- Page 18 Pg 17 Instructions Revised 6/19/06...
- Page 19 Pg 18 Instructions Revised 6/19/06...
- Page 20 Pg 19 Instructions Revised 6/19/06...
Need help?
Do you have a question about the 688 and is the answer not in the manual?
Questions and answers