Advertisement
Assembly INSTRUCTIONS
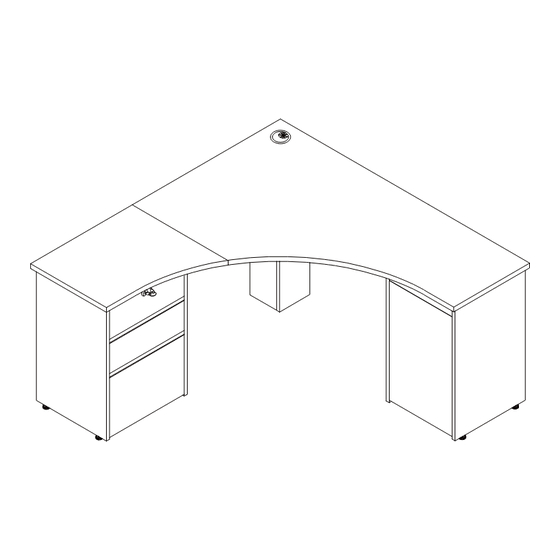
WASHINGTON 1500 x 1500MM CORNER
WORKSTATION OPTION1
JBWASHWSWK / JBWASHWSBK
This design and instruction booklet is subject to copyright.
3 Cartons
www.officeworks.com.au
For spare parts or hardware call (03) 9310 3011 or email hardware@kyvas.com.au
1/36
Advertisement
Table of Contents

Related Manuals for J.Burrows WASHINGTON JBWASHWSWK


Summary of Contents for J.Burrows WASHINGTON JBWASHWSWK
- Page 1 ASSEMBLY INSTRUCTIONS WASHINGTON 1500 x 1500MM CORNER WORKSTATION OPTION1 JBWASHWSWK / JBWASHWSBK This design and instruction booklet is subject to copyright. 3 Cartons www.officeworks.com.au For spare parts or hardware call (03) 9310 3011 or email hardware@kyvas.com.au 1/36...
- Page 2 To view an assembly video, go to https://www.officeworks.com.au/ Search the product by item code or name: Click on the icon to watch the video. People Required General Advice Customer Service Contact Details More Than One Person Is Required Spare Parts & Hardware Assemble On A Clean Flat To Safely Assemble The Item (03) 9310 3011...
- Page 3 Part Overview 3/36...
- Page 4 Part List Parts located in Carton - JBWASHWSB1 / JBWASHWSO1 Parts located in Carton - JBWASHWSB2 / JBWASHWSO2 4/36...
- Page 5 Parts located in Carton - JBWASHWSB3 / JBWASHWSO3 5/36...
- Page 6 Hardware List Hardware Pack located in Carton - JBWASHWSB3 / JBWASHWSO3 (Ø15 x 12mm) (Ø12 x 10mm) (Ø7.8 x 30mm) (Ø6 x 35mm) X 61pcs X 21pcs X 46pcs X 81pcs (Extra 1pc) (Extra 1pc) (Extra 1pc) (Extra 1pc) (Ø5.8 x 30mm) (Ø4 x 30mm) Shelf Support (Ø4 x 16mm)
- Page 7 Assembly Remark: Press the plastic slider in the indicated direction to separate drawer runner H1 and H2 before assembling 7/36...
- Page 8 8/36...
- Page 9 Remark: Press the plastic slider in the indicated direction to separate drawer runner G1 and G2 before assembling 9/36...
- Page 10 10/36...
- Page 11 11/36...
- Page 12 12/36...
- Page 13 Tighten cam locks once panel 19 is in place. 13/36...
- Page 14 Tighten cam locks once panel 11 is in place. 14/36...
- Page 15 15/36...
- Page 16 Tighten cam locks once panel 22 is in place. 16/36...
- Page 17 Tighten cam locks once panel 22 is in place. 17/36...
- Page 18 Tighten cam lock s once panel 23 is in place. 18/36...
- Page 19 Tighten cam locks once panel 6 is in place. 19/36...
- Page 20 Tighten cam locks once panel 6 is in place. Tighten cam locks once panel 7 is in place. 20/36...
- Page 21 21/36...
- Page 22 22/36...
- Page 23 Tighten cam locks once panel 1 is in place. Tighten cam locks once panel 1 is in place. 23/36...
- Page 24 Tighten cam locks once panel 4 is in place. 24/36...
- Page 25 25/36...
- Page 26 Tighten cam locks once panel 28 is in place. Tighten cam locks once panel 26 is in place. 26/36...
- Page 27 Tighten cam locks once panel 27 is in place. 27/36...
- Page 28 Tighten cam locks once panel 4 & 27 is in place. 28/36...
- Page 29 Tighten cam locks once panel 6 & 26 is in place. 29/36...
- Page 30 Tighten cam locks once panel 13 & 14 is in place. 30/36...
- Page 31 Front Front 31/36...
- Page 32 32/36...
- Page 33 Hinge adjustment 33/36...
- Page 34 34/36...
- Page 35 Care Advice Care Instructions - PVC/ Melamine Finish Desk Keep away and protect from direct sunlight and heat. Do not place sharp materials(knife, fork, etc) directly onto your furniture as sharp material may scrape and damage the finish. Clean up spills quickly. Water left over a prolonged period of time may cause damage.
- Page 36 ¾ ¿ À Á Â Ã Ä Å Ã Æ Â Ã Ä Æ Ç Ä Æ È ¾ ¿ É Ê Ë Ì Í Ê ¿ É Ê Æ Ê Î ¿ Ï À Â Ã Ä Æ Æ Ê...
Need help?
Do you have a question about the WASHINGTON JBWASHWSWK and is the answer not in the manual?
Questions and answers
Hi I'm trying to locate just where I screw in H1 on the desk. I don't seem to have any pre drilled holes that correspond with where the instructions are telling me to put the slide
If there are no pre-drilled holes for H1 on the J.Burrows WASHINGTON desk, refer to the manual's instruction to press the plastic slider to separate drawer runner H1 and H2 before assembly. This suggests H1 is part of a drawer runner system. Align H1 based on the matching position of H2 and the drawer structure, using visual alignment or measurements from other parts. If unsure, contact the manufacturer for guidance.
This answer is automatically generated