Advertisement
Quick Links
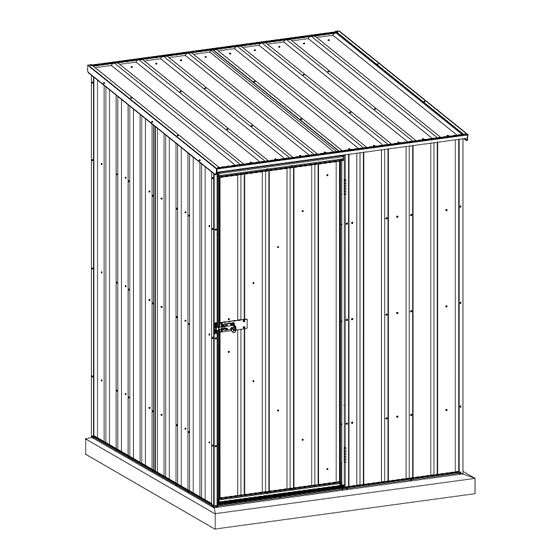
CyclonicKit
Suitable for 1.5W x 1.5D x 2.0Hm Garden Shed
1.5m Skillion Series
Assembly instructions
Congratulations on purchasing your new Pinnacle Cyclonic Kit. Before assembling, we
recommend you read the instructions thoroughly. This Cyclonic kit need to be installed with a
specific Pinnacle shed. We recommend you assemble the shed using a trestle table or sawhorses
and planks. This will ensure that you are working off the ground and make it easier for you.
Assembly is a two-person job and should not be attempted in windy conditions.
Tools required: Drill, measuring tape, phillips-head screw driver, rivet gun, rubber mallet, sturdy ladder, shifting spanner, 2 saw horses,
3mm steel drill bit, 4mm steel drill bit and a 10mm masonry drill bit.
Advertisement

Summary of Contents for Pinnacle Outdoor 1.5m Skillion Series
- Page 1 CyclonicKit Suitable for 1.5W x 1.5D x 2.0Hm Garden Shed 1.5m Skillion Series Assembly instructions Congratulations on purchasing your new Pinnacle Cyclonic Kit. Before assembling, we recommend you read the instructions thoroughly. This Cyclonic kit need to be installed with a specific Pinnacle shed.
- Page 2 CyclonicKit 1.5 x 1.5 x 2.0m Build your garden shed in 7 easy steps! Please Note: 1. The cyclonic kit needs to be installed with the Step 1: Check all parts against the component list components in our 1.5m x 1.5m garden shed. Step 2: Assemble the rear wall panels 2.
- Page 3 Step 1: Check all parts against the component list Lay out all parts with number facing outwards and check off against parts list. Part Picture Description Component Location QTY Check Jamb Length: 1798mm - right Corners JZ03 Jamb Length: 1798mm - left Corners JZ04 Jamb...
- Page 4 CyclonicKit 1.5 x 1.5 x 2.0m Part Picture Description Component Location QTY Check Jamb Length: 1875mm Side wall ZZ12 Jamb Length: 1845mm Side wall ZZ02 Jamb Length: 1830mm Side wall ZZ03 Jamb Length: 1798mm Front ZZ04 Jamb Length: 1798mm Front ZZ05 Jamb Length: 1741mm...
- Page 5 Fittings part list: Picture Component Picture Component Self-tapping screws (16mm) 3 x 10mm Rivet 5/16 Hexagonal Nut 5/16 x 19mm Hexagonal bolt Bracket Sleeve anchor bolt Mid wall brace bracket Channel safety cover (L type) Channel safety cover (R type) Qty checking date: ____ / ____ / _____ Qty checking personal badge number: _______________ Signature: _________________________________________...
- Page 6 CyclonicKit 1.5 x 1.5 x 2.0m Garden shed overview: D18R Original Part New Part JZ03 JZ04 Note: Replace the original JZ05 garden shed parts (highlighted in black) with new Cyclonic kit JZ06 parts as indicated in the table.
- Page 7 Cyclonic Kit overview: ZZ13 ZZ13 ZZ13 ZZ09 ZZ09 ZZ09 ZZ10 ZZ11 ZZ12 ZZ06 ZZ02 ZZ07 ZZ03 JZ06 LZ01 JZ05 LZ01 JZ03 LZ01 ZZ10 ZZ04 ZZ05 ZZ11 ZZ12 ZZ02 JZ04 ZZ04 ZZ03...
- Page 8 CyclonicKit 1.5 x 1.5 x 2.0m Step 2: Assemble the rear wall panels You will find it easier to assemble your shed using sawhorses with timber studs attached (timber needs to be the same length as the shed (1.5m) or alternatively, a trestle table. Place 2 x part S87 (Sheet) on your worktable and join them together with the self-tapping screws as per diagram below.
- Page 9 Once the middle pre-drilled holes are fixed, holding the jambs in place you will need to drill holes through the sheet using a 3mm drill bit to fix the jambs through the top and bottom pre-drilled holes as per diagrams below. RIDGES FACING UP Please note: Drill holes from the inside of the sheet through the...
- Page 10 CyclonicKit 1.5 x 1.5 x 2.0m RIDGES FACING UP Now fit part 20B (top channel) and 20C (bottom channel) to the sheeting by tapping or sliding it in. Make sure that the small lip of the channel is always facing out. This ensures rain water cannot build up inside your shed. Note: All screws marked with a cross should not be fixed at this stage.
- Page 11 Now fit 3 x part 31 (channel) to the sheeting and position it with the provided self-tapping screws. Please note the groove should face downwards. The middle channel will have pre-punched holes although you will need to drill the holes for the top and bottom channels using a drill with a 3mm bit.
- Page 12 CyclonicKit 1.5 x 1.5 x 2.0m Once holes have been drilled, fix through the outside of the sheet with the provided self tapping screws as per the diagram below.
- Page 13 Step 3: Assemble the side wall panels Place parts S88 and S90 (sheet) on your worktable and join them together with part ZZ12 (jamb) and the provided self-tapping screws as per diagram below. Now position the remaining 4 jambs, parts ZZ03, ZZ02, ZZ11 and ZZ10 to the sheets by sliding them in from the top of the sheet as per the diagram below.
- Page 14 CyclonicKit 1.5 x 1.5 x 2.0m Now repeat same process for the other side wall with parts S89, S91 (sheet) and ZZ10, ZZ11, ZZ12, ZZ02 ans ZZ03 (jamb) as per the diagram below. ZZ03 ZZ02 ZZ12 ZZ11 ZZ10 RIDGES FACING UP...
- Page 15 Once the jambs are in position for both side walls, you will need to drill holes through the sheet using a 3mm drill bit to fix the jambs as per diagrams below. Please note: Drill holes from the inside of the sheet through the pre-drilled holes in the jambs to ensure holes line up.
- Page 16 CyclonicKit 1.5 x 1.5 x 2.0m Now fit part 25 (top channel) and 20A (bottom channel) to the sheeting by tapping or sliding it in. Make sure that the small lip of the channel is always facing out, this ensures rain water cannot build up inside your shed. Note: All screws marked with a cross should not be fixed at this stage.
- Page 17 Once 3 x part 31 (channel) are in position, fix with the provided self-tapping screws. Please note the groove should face downwards. You will need to drill holes through the sheeting to fix these channels using a drill and a 3mm bit. Please note: Drill holes from the inside of the sheet through...
- Page 18 CyclonicKit 1.5 x 1.5 x 2.0m Assemble the roof panel Step 4: Place 2 x part 8 (Sheet) on your worktable and then position 1 x part ZZ13 (jamb) down the ridge where the two sheets join and fix together with the provided self-tapping screws as per diagram below. ZZ13 X 5PCS RIDGES FACING UP...
- Page 19 Once the two sheets are joined together with the middle jamb, slide the remaining 4 x part ZZ13 (jamb) into place and drill through the sheet to fix with the provided self-tapping screws as per diagram below. Back Please note: Use a 3mm bit to drill holes from the inside of the sheet through the pre-drilled holes in the jambs to ensure...
- Page 20 CyclonicKit 1.5 x 1.5 x 2.0m Once the sheets are fixed together and all jambs attached, tap or slide in 2 x Part 20A (channel) to the sheeting and fix with the self- tapping screws provided as per diagram below. Note: All screws marked with a cross should not be fixed at this stage. RIDGES FACING UP Now fit 2 x Part 51 (side lips) to the sheeting and fix them using self-tapping screws.
- Page 21 Step 5: Assemble the front wall panels Place part S86 (sheet) on the worktable. Slide in 2 x Part ZZ04 and 1 x Part ZZ05 (jamb) into the top of the sheet and fix with the self- tapping screws provided. You will need to drill holes through the sheet using a 3mm drill bit to fix the jambs as per diagrams below. ZZ04 ZZ04 ZZ05...
- Page 22 CyclonicKit 1.5 x 1.5 x 2.0m Note: Holes drilled in the edge of this sheet are not a defect. They are there to allow the door hinge rivets clearance through this sheet. RIDGES FACING UP Fit part 20D (top channel), 20E (bottom channel) and J3 (jamb) ensuring the pre-drilled holes on S86 and J3 are aligned. Fit parts J5 (jamb), 42 (jamb) and 23 (bottom channel) and fix with the self-tapping screws provided.
- Page 23 Once the door frame is fixed to front wall panel, turn around to the inside of the wall and fix 3 x part 33R (channel) to the sheet using the self-tapping screws provided ensuring the groove on front-wall channel is facing down when fixed. The middle channel will have pre-punched holes although you will need to drill holes for the top and bottom channels using a drill and a 3mm bit.
- Page 24 CyclonicKit 1.5 x 1.5 x 2.0m Assemble the front door Step 6: Place part D18R (door sheet) on the worktable then slide parts ZZ06 (jamb) and ZZ07 (jamb) into the sheet ridges from the top. Once the jambs are in place, turn sheet over and drill holes through the pre-drilled holes in the jambs to ensure the holes line up. Then fix jambs to the sheet with the provided 3.0 x 10mm rivets as per diagrams below.
- Page 25 Now fix 2 x part M26, part M24 and part M25 (channels) to the door with the provided 3.0 x 10mm rivets. Make sure that the small lips on channels M26 are always facing out. This ensures rainwater cannot build up inside your shed. D18R Fix with 3.0 x 10mm rivets RIDGES FACING UP...
- Page 26 CyclonicKit 1.5 x 1.5 x 2.0m Once channels are fitted to the doors, align 2 x part U11 (brace) and part W (joining brace) with holes on the back of the door and position temporarily with some tape or simply hold in place. D18R Back RIDGES FACING DOWN...
- Page 27 Turn door over with bracing aligned with holes (make sure the ridges of the door are facing up) and fix the bracing with the provided 3.0 x 10mm rivets through the front of the panel. Then turn door over and insert plastic stoppers at the ends of braces as shown below.
- Page 28 CyclonicKit 1.5 x 1.5 x 2.0m Fit part D18R (assembled door) to the front wall panel as per the diagram below. Use rivet gun to fix the door using the pre-drilled holes. Fix the pad bolt (but NOT its keeper at this stage) using the pre-drilled holes with the self-tapping screws (or rivets) provided. D18R...
- Page 29 Fit the panels together Step 7: Attach the two side walls to the back wall followed by the front wall. Fix all of these components together using the provided self- tapping screws. Fix the pad bolt keeper with the provided 16mm self-tapping screws (diagram A) or using rivets (diagram B) at this stage as well.
- Page 30 CyclonicKit 1.5 x 1.5 x 2.0m Once 4 walls are fixed together, fix roof using the provided self tapping screws. Please ensure screws engage the channels in the walls to fix firmly. Now fix part 72 (wall brace bracket) to all corners of the wall channels followed by part LZ01 (channel connector) as per diagram below.
- Page 31 Now fit the bolt down kit as per the diagram below. Strengthen the mid wall braces by applying part 72 (mid wall brace bracket) on each corner if necessary. Wall Sheet Bolt & Nut Steel Angle Slab Sleeve Anchor Bolt Door...
- Page 32 CyclonicKit 1.5 x 1.5 x 2.0m For safety apply channel safety cover (L type) to part 31 (channel) and channel safety cover (R type) to 33R (channel) as per the diagram below.
- Page 33 Lastly fix 2 x part D5 (bracket) to the top two corners of the door. You will need to hold the bracket in position and drill holes through the pre-drilled holes in the bracket to ensure holes line up. Once you have drilled holes, fix brackets with provided 3.0 x 10mm rivets as per diagram below.
-
Page 34: Warranty Statement
CyclonicKit 1.5 x 1.5 x 2.0m Warranty statement: This warranty against defects is given by: Pinnacle Hardware Business Address: 28 Hudson Court, Keysborough VIC 3173 1800 349 776 Email: support@pinnacle.net.au New Zealand customers please contact: HARCO (Harkness & Young Ltd) Ph: 09 276 4071 Email: sales@harknessyoung.co.nz Details of Manufacturer’s Warranty... - Page 35 IMPORTANT 1. Manufacturer’s Disclosure This warranty against defects shall not apply in the following situations: A) Where the product is not assembled in accordance with the instructions provided in the product kit. B) Where the product is used to store corrosive materials such as fertilizer, chlorine etc; C) Where the damage to the product is caused by storms.
Need help?
Do you have a question about the 1.5m Skillion Series and is the answer not in the manual?
Questions and answers