
Related Manuals for anko CFXB50-B


Summary of Contents for anko CFXB50-B
- Page 1 10 Cup Rice cooker Instruction Manual Model: CFXB50-B PLEASE READ AND SAVE THESE INSTRUCTIONS FOR FUTURE REFERENCE...
-
Page 2: Important Safeguards
IMPORTANT SAFEGUARDS READ ALL INSTRUCTIONS CAREFULLY BEFORE FIRST USE. 1. To reduce electric shock, risk of fire or injury, please read the operating instructions carefully before using the appliance for the first time and keep them for future reference. 2. Never immerse the appliance in water or other liquids. 3. - Page 3 24. Do not use this appliance for any other purpose but its intended use. Do not use in a moving vehicle or boats. Do not use outdoor. Misuse may cause injury. 25. Do not operate the appliance without water, as it may damage the heating element. WARNING: The heating element surface is subjected to residual heat after use.
-
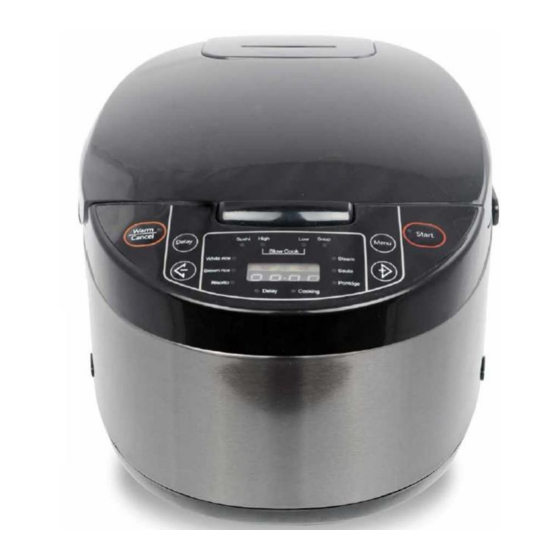
Page 4: Before First Use
PARTS BEFORE FIRST USE Remove all packaging from the rice cooker. Wash the inner pot, spatula, measuring cup, steam tray in hot soapy water. Rinse well in clear water and dry carefully. Wipe the cooker body with a damp cloth. Dry thoroughly. ... - Page 5 FUNCTIONS Keep Warm/Cancel button Start button Cooking time/Delay time button Time - / Menu selection button Cooking mode indicators LED Display Menu selection button Time +/ Menu selection button CONTROL PANEL The control panel consists of an LED display and function keys. Use “Menu” to select function mode.
-
Page 6: Getting Started
Menu Press “Menu” button to select a desired cooking function. When the desired cooking mode is selected, the corresponding indicator light will be turned ON. You will see a number flashing on the display which stands for the default cooking time. Refer to the table below for the default cooking time in each cooking mode: Cooking time Cooking mode... -
Page 7: Cooking Functions
COOKING FUNCTIONS Rice Cooking (Brown rice/ White rice/ Sushi) Before cooking, measure the rice with the measuring cup and rinse it, except for risotto rice. 1. Put the rinsed rice well distributed around the inner pot. Fill it with water to the corresponding water level. - Page 8 5. When the program ends, the "Warm/Cancel" indicator light will turn ON, the cooker enters “Keep warm” mode automatically. Soup 1. Press “Menu” button in standby mode until the “Soup” indicator light turns ON. 2. Display shows default cooking time “00:30”. 3.
-
Page 9: Care And Maintenance
Porridge 1. Press “Menu” button in standby mode until the “Porridge” indicator light turns ON. 2. Display shows default cooking time “00:15”. 3. Adjust the cooking time if necessary by pressing button. Cooking time can be adjusted from 5min to 2hr in 5min intervals. 4. - Page 10 “E3” is shown on the Top Sensor error Unplug the pressure cooker and allow it to display. rest for 20 minutes before using it again. “E4” is shown on the Over-heat or Short circuit Have it checked by qualified electrical display.
- Page 11 12 Month Warranty Thank you for your purchase from Kmart. Kmart Australia Ltd warrants your new product to be free from defects in materials and workmanship for the period stated above, from the date of purchase, provided that the product is used in accordance with accompanying recommendations or instructions where provided.
Need help?
Do you have a question about the CFXB50-B and is the answer not in the manual?
Questions and answers