Advertisement
Quick Links
A
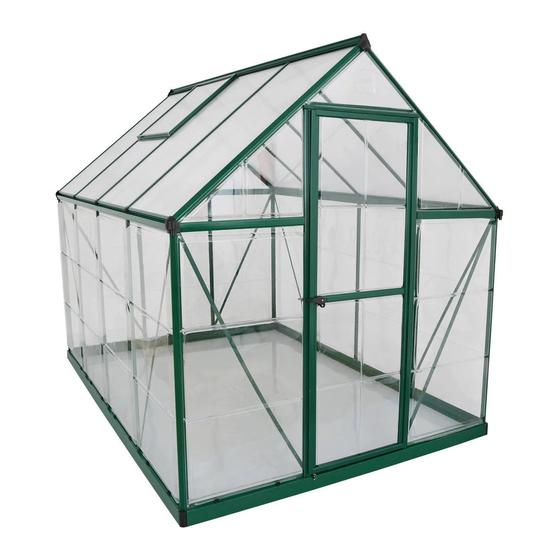
ssembly Instructions
Multi Line 6'x8'
255x193x203cm / 100
"x76"x80"
1 / 2
Company information:
Palram Americas Inc.
9735 Commerce Parkway
Kutztown, PA, USA
Greenhouse Service Center:
Toll Free: (877) 627-8476
E-Mail: greenhouseUSA.support@palram.com
www.palramapplications.com
Advertisement

Related Manuals for Palram Multi Line 6'x8'


Summary of Contents for Palram Multi Line 6'x8'
- Page 1 Instructions Multi Line 6'x8' 255x193x203cm / 100 "x76"x80" 1 / 2 Company information: Palram Americas Inc. 9735 Commerce Parkway Kutztown, PA, USA Greenhouse Service Center: Toll Free: (877) 627-8476 E-Mail: greenhouseUSA.support@palram.com www.palramapplications.com...
- Page 2 a Before Assembly a During Assembly IMPORTANT This is a multi-part assembly best achieved Carry out the assembly steps in the order set by two people. Allow at least half a day for out in the instructions. Please read these instructions carefully before you start to assemble this greenhouse. assembly process.
- Page 3 Contents Inc./cm Inc./cm Inc./cm Item Qty. Item Qty. Item Qty. M243 A283 / 233 A151 / 59 23 / 58.5 A260 M244 A271 / 63 23 / 58.5 / 233 A261 A282 A141 / 40 / 55 / 245 A136 A211 A182 / 245...
- Page 4 Contents Item Inc./cm Qty. Item Inc./cm Qty. Item Inc./cm Qty. A222 / 124 A203 A111 / 156 / 113.5 M285 / 185 A112 A204 / 113.5 / 156 A256 / 129 A113 / 114 A162 / 98 A114 / 114 A173 59 / 150 A115...
- Page 5 Contents Inc./mm Inc./mm Inc./mm Inc./mm Item Qty. Item Qty. Item Qty. Item Qty. T341 R360 R303 P333 T340 PR351 44 / 112 (2 spare ) P399 M6x1.77/M6x45 PR356 / 44.5 PR353 / 30 A306 M6x0.39/M6x10 0.26/6.5 P361 P328 (1 spare ) 8x1/5 M8x7 A323...
- Page 6 253cm/99 ” 253cm/99 ” 193cm / 76” 193cm / 76”...
- Page 7 M243 M244 M243 M244 M243 M244 M243 M243 M243 M244 M244...
- Page 8 T001 A162 A162 A162 Door Tür Porte Puerta...
- Page 9 A111 A112 A111 A112 A112 A111 A111 Door Tür Porte Puerta...
- Page 10 A136 P324 P324 A136 P324...
- Page 11 A136 A256 A136 A136 A256 A136 A256 A256 A136 A256 A256...
- Page 12 A256 M285 M285 M285 A256 A256 A256...
- Page 13 A256 A256...
- Page 14 A103 A104 A104 A103 A104 A103...
- Page 15 A115 A116 A115 A115 A116 A104 A115 A115...
- Page 16 A283 A283 A283 A283 A283 A283 A283...
- Page 17 A283 A283 A283 A283...
- Page 18 A256 A203 A203 A203 A256 A256 Door Tür Porte Puerta...
- Page 19 A283 A283 A283 A256...
- Page 20 A613 A613 A613 A113 A203 A613...
- Page 21 A204 A256 A283 A114 A114 A204 A283 A256...
- Page 22 A211 A113 A211 A211 Door Tür Porte Puerta...
- Page 23 A141 A141 A141...
- Page 24 A102 A102 A102 A102 A102 A102 A102 A102 A102 A102...
- Page 25 Window Location Fenster Standort Fenêtre Emplacement Ventana Ubicación...
- Page 26 A102 A102 A102 A102 A102 A102...
- Page 27 A260 A260 A260...
- Page 28 A102 A102 A102 A102 A102...
- Page 29 P328 P540 ” x113.5 cm P328 P540 P540 P540 P328 P540 P540...
- Page 30 P540 ” x113.5 cm PA351 P328 P328 PA351 P540 click P328 PA351...
- Page 31 EN: Do not fix the next panel before the previews one is fixed with its sealing strip. P540 ” x113.5 cm FR: Ne pas fixer le panneau suivant avant de PA351 prévisualiser le est fixe avec ses bandes d'étanchéité sur les deux côtés.
- Page 32 P580 P542 45” x 114.5 cm PA351 PA352 PA351 P333 PA352 P580 PA352 P580 P580 P542...
- Page 33 R360 PR351 PR351 PR351 P333 R360 R360 PR351 PR351 R360 PR351 PR351 PR351 PR351 PR351 PR351 PR351 PR351 PR351 click...
- Page 34 P546 P545 P544 P543 PA353 PR351 PR351 PR351 PR356 P544 PA353 P543 PA353 P545 PR351 P333 P546 PR351 P545 PR356 PR356 P544...
- Page 35 A222 A222 A222...
- Page 36 A261 A261 A261 A222 A261...
- Page 37 A173 A192 4008 A174 A182 A192 A174 A192 A173 A173 A173 4008 4008 A174 A182 A173 A182 4008...
- Page 38 P540 P541 P540 P541 P540 P541 P541...
- Page 39 A173 4008 P304 P304 P304...
- Page 40 R303 PR351 PR353 click PR351 PR353 PR351 PR353 PR353 R303 R303...
- Page 42 A151 A282 A271 P512 A151 A151 A282 A282 A282 A271 A282 A271...
- Page 43 A306 A306 A271 A306...
- Page 44 A323 A323...
- Page 46 P399 P399 P399 P399...
- Page 47 EN: Assemble parts T340 & T341 from the inside of the Greenhouse T340 T341 FR: Assembler les pièces T340 et T341 de l'intérieur de la serre G: Zusammenstellen von Teilen T340 und T341 aus dem Inneren des Greenhouse SP: Ensamble las partes T340 y T341 en T340 el interior del invernadero IT: Assemblaggio di parti T340 e T341...
- Page 48 p361 x113 p361 p361 p361...
- Page 50 M307 M307...
Need help?
Do you have a question about the Multi Line 6'x8' and is the answer not in the manual?
Questions and answers
how to reinstall the window?
To reinstall the window for the Palram Multi Line 6'x8', follow these steps:
1. Choose the window location before starting assembly. It can be installed in one of the designated spots.
2. If the window does not close properly:
- Loosen the screws.
- Adjust the frame or profile.
- Retighten the screws.
3. Tighten all screws after completing the installation.
This answer is automatically generated