Table of Contents
Advertisement
Quick Links
Advertisement
Table of Contents

Subscribe to Our Youtube Channel
Summary of Contents for Forte VFX1
- Page 2 User's Manual...
- Page 3 VFX1 HEADGEAR Virtual Reality System...
- Page 4 FORTE Technologies, Inc.
- Page 5 Information in this document is subject to change without notice and does not represent a commitment on the part of Forte Technologies, Inc. The manufacturer makes no warranty or representation of any kind, either implied or expressed, of performance, merchantability, or fitness for a particular purpose.
- Page 6 Contents page iv ..............About this Manual page vi ............SAFETY FIRST!!! page viii ............QUICK INSTALL Chapter 1 ..............Introduction Chapter 2 ............Before You Start Chapter 3 ........... Hardware Installation Chapter 4 ........Software Installation & Setup Chapter 5 .......... Troubleshooting & Support Appendix A ........System Software and Utilities Appendix B ..........
- Page 7 VFX1 HEADGEAR system. Chapter 1 provides an introduction to the VFX1 HEADGEAR, the major components, and also provides instructions for handling and care of the VFX1 HEADGEAR. Chapter 2 includes a checklist to ensuring that your computer system has...
-
Page 8: Document Conventions
VFX1 HEADGEAR User's Manual Document Conventions Bold Used to highlight sections and important text throughout the manual. Also used for words and characters that you type including system commands and switches. <keyname> Used to denote special keyboard characters you type such as the "ENTER"... - Page 9 Used to call special attention to a section. Indicated important safety or warning information. It is VERY important that you read and understand these sections.
-
Page 10: Safety First
SAFETY FIRST ! !! - Page 11 IMPORTANT SAFETY CONSIDERATIONS - PLEASE READ THE FOLLOWING VERY CAREFULLY BEFORE USING THE VFX1 HEADGEAR.
- Page 12 Therefore, IT IS IMPERATIVE that you adjust the optics virtual BEFORE each use of the VFX1 HEADGEAR System. The optical reality adjustment procedure is part of the SETVFX1 Setup Program described in the software section of this manual.
- Page 13 VFX1 HEADGEAR User's Manual Give Yourself a Break - Virtual reality applications, whether viewed on a video screen or headset, can potentially have adverse effects on the user including possible motion sickness, perceptual aftereffects and disorientation, and decreased postural stability. In rare cases, the onset of these symptoms can be delayed. The...
- Page 14 Medical Considerations - A very small portion of the population may experience epileptic seizures when viewing certain kinds of flashing lights or patterns that are commonly present in our daily environment. These persons also experience seizures while watching some kinds of television pictures or playing certain video games including the use of virtual headsets.
- Page 15 Quick Install...
- Page 16 PC user up and running fast. We strongly recommend, however, that even the seasoned veterans take the time to completely familiarize themselves with this manual prior to installing and using the VFX1 HEADGEAR system. STEP 1 Carefully read the SAFETY FIRST section on page vi and the Electrostatic Precautions section on page 3-1 BEFORE you start.
- Page 17 viii...
- Page 18 VFX1 HEADGEAR User's Manual...
- Page 19 □ Attach supplied 8' interconnect cable between the VIP Card and the VFX1 HEADGEAR. □ Plug the CyberPuck connector into the ACCESS.bus port located at the rear of the VFX1 HEADGEAR or the port located on the VIP Card. □ Optional: Attach the supplied mini-phono cables between the VIP Card and your sound card.
- Page 20 VFX1 HEADGEAR User's Manual...
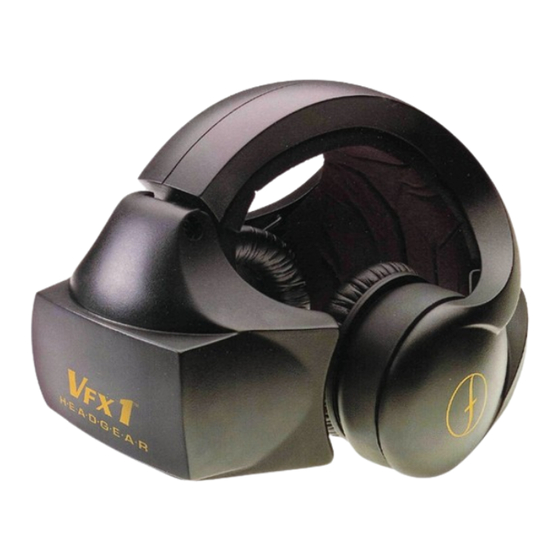
- Page 21 System Features The major components and key features of the VFX1 HEADGEAR system are illustrated in figure 1-1 and are further described below: VFX1 HEADGEAR™ Smart Visor™ - The Smart Visor™ allows the VR user to interactively use the PC or workstation without removing the headset.
- Page 22 VFX1 HEADGEAR User's Manual High Fidelity Stereo Headphones - Designed with high quality stereo speakers, the VFX1 HEADGEAR utilizes any standard stereo sound card for an awesome VR experience. Microphone - The VFX1 HEADGEAR has a COMSET™ built into the Smart Visor™.
- Page 23 Chapter 1 - Introduction Figure 1-1. Major components and key features if the VFX1 HEADGEAR™ System.
- Page 24 VFX1 HEADGEAR User's Manual...
- Page 25 • Adjust the Visor's interpupillary distance (IPD) and optical focus by running the VFX1 HEADGEAR setup program SETVFX1, selecting the SETUP OPTICS option, and proceeding as directed in the How To Adjust the Optics section on page 4-3. It is very important that these adjustments be made in...
- Page 26 ward, lifting slightl y. See figure 1-3. • dset • aise visor grasp beam top. • lide head back...
- Page 27 Chapter 1 - Introduction Figure 1-2: Putting on The VFX1 HEADGEAR...
- Page 28 Figure 1-3: Removing The VFX1 HEADGEAR...
- Page 29 VFX1 HEADGEAR User's Manual Using the CyberPuck...
- Page 30 The CyberPuck removes the constraints of the traditional mouse or joystick, providing 2- axis sensing and three program- mable input buttons (Figure 1-4). The CyberPuck is normally held in a vertical position as shown in the illustration. Ergonomic design, with thumb indentations on both sides toward the top, Figure 1-4 provides for comfortable right or...
- Page 31 Turning the CyberPuck ON and OFF...
- Page 32 For some applications that do not support the Figure 1-5. VFX1 HEADGEAR system natively, the CyberPuck simulates mouse and/or keyboard input using a special driver. For these applications, the CyberPuck is toggled ON and OFF by holding the unit horizontally, as...
- Page 34 Before reconnecting the headset, make sure that it is absolutely dry. NOTE! There are no internal user adjustments or serviceable parts in your VFX1 HEADGEAR system. Do not open the units or attempt any repairs yourself.
- Page 35 VFX1 HEADGEAR User's Manual...
- Page 36 □ A VGA Video Adapter equipped with a 26-pin VESA Feature Connector (sometimes referred to as "External Video"). The Forte VIP card requires a VGA card with a 100% fully VESA compliant Feature Connector output to drive the VFX1 HEADGEAR visor displays. If...
- Page 37 Check the VFX1 HEADGEAR System Package The items supplied with the VFX1 HEADGEAR System are illustrated and listed below. As you unpack the system, confirm that all items are present. Do not continue the installation if any major item(s) are missing or appear damaged.
- Page 38 □ [A] VFX1 HEADGEAR □ [B] Headgear Nape Strap □ [C] VFX1 HEADGEAR Interface Protocol (VIP) Card □ [D] 26-pin, 12", VESA Feature Connector Ribbon Cable □ [E] Two (2) mini-phono Cables (Sound and Microphone □ [F] 8' Headset/VIP Interconnect Cable □...
-
Page 40: Hardware Installation
CHAPTER 3 Hardware Installation Installing the VIP Card... - Page 41 The following section provides a step-by-step procedure for installing the VFX1 Interface Protocol (VIP) Card in your system. CAUTION! The discharge of static electricity can damage sensitive electronic components both on the VIP card and in your computer. To avoid such damage,...
- Page 43 VFX1 HEADGEAR User's Manual STEP 2. Select a Slot With the cover removed, you will be able to see the motherboard, existing adapter cards, and available expansion slots. □ Locate your computer's 26 pin VESA Feature Connector - Some computers...
- Page 44 Chapter 3 - Hardware Installation □ Remove the expansion slot's cover by removing its retaining screw and lifting the cover straight out. Put the screw in a safe place because you will need it to secure the VIP Card after it has been installed. STEP 3.
- Page 45 VFX1 HEADGEAR User's Manual...
- Page 46 Connector as shown in the illustration. Verify that the cable is properly aligned with the connector. It is not uncommon to inadvertently shift the connector by a pin or more when attaching it. Check Carefully! VFX1 HEADGEAR Interface Protocol (VIP) Card...
- Page 48 Chapter 3 - Hardware Installation STEP 4 - Insert the VIP Card □ Pick up the VIP Card and align it with the adapter slot you previously selected. The end with the mounting cover and external connectors should line up with the slot covering opening on the PC.
- Page 49 VFX1 HEADGEAR User's Manual STEP 5 - Close the Computer □ Check that your VIP Card is correctly configured, fully inserted in its slot, and not touching other cards on either side. □ Check that the VESA Feature Connector Cable is properly attached at both the computer and VIP Card connectors with proper "Pin 1"...
-
Page 50: Making The Final Connections
Using the illustration below as a guide, make the following connections: □ Attach the 8' Interconnect Cable between the VIP Card and VFX1 Headset. □ Plug the CyberPuck connector into the ACCESS.bus port located at the rear of the VFX1 headset or the port located on the VIP Card. - Page 51 By repositioning the Velcro fasteners, the nape strap is adjusted to provide a comfortable fit. When you wear the VFX1 HEADGEAR, the nape strap should fit comfortably on the nape of your neck. To tighten, pull on both sides of the loose straps and Velcro...
-
Page 52: Software Installation And Setup
CHAPTER 4 Software Installation & Setup With the hardware setup completed, we are now ready to install the system software and complete the VFX1 installation by running the SETVFX1 setup program. Installing the System Software A global software installation program is provided with the FORTE VFX1 HEADGEAR System. - Page 53 If you changed the default drive and directory name supplied during installation, enter those values in place of the defaults "C:" and "VFX1". The VFX1 HEADGEAR setup program main menu will appear. A mouse may be used to select and move through the various menu options. Alternately, the following keys may be use: <esc>...
- Page 54 Chapter 4 - Software Installation & Setup VFX1 HEADGEAR Optics Setup Proper adjustment of the VFX1 HEADGEAR Optics is vital to prevent eye strain while using the VFX1 HEADGEAR. See the SAFETY FIRST section at the front of this manual for further information.
- Page 55 VFX1 HEADGEAR User's Manual VFX1 HEADGEAR Tests The TEST VFX1 menu selection in the SETVFX1 setup program offers you the opportunity to confirm proper operation of the headset video elements by selecting various video views and palette displays. A headset tracking test is also provided to confirm proper operation of the headset tracking system.
- Page 56 Installing CD-ROM Bonus Software The Bonus Software CD-ROM provided with your system contains applications and utilities which can be used with your VFX1 HEADGEAR System. An installation program is provided on the CD-ROM. To install some or all of the programs from the CD-ROM: •...
- Page 57 VFX1 HEADGEAR User's Manual...
-
Page 58: Troubleshooting And Support
CHAPTER 5 Troubleshooting and Support If you encounter problems during the installation or use of your VFX1 HEADGEAR System, this chapter provides some basic troubleshooting guidance and where to get additional help if needed. The Chapter is divided into three parts: •... - Page 59 I/O Address setting to the new value. After you exit the setup program, reboot your computer for the change to take effect. Symptom 2: The VFX1 HEADGEAR Displays are blank when performing the TEST VFX1 Headset Test. Check: Is the Headset/VIP Interconnect Cable installed properly? Make sure that the cable is securely fastened at both the Headset and the VIP card connectors.
- Page 60 Does the computer monitor show a dual, split screen image when performing the stereo mode test? If the computer monitor does not show a split screen image, then either the VFX1 HEADGEAR system test software is corrupt or the video adapter does not fully support the VGA 640x480x256 mode (VESA l0lh).
- Page 61 VFX1 HEADGEAR User's Manual Symptom 5: The CyberPuck fails to function correctly during the TEST CYBERPUCK "Tracking & Button Test" Check: Is the CyberPuck ACCESS.bus plug securely fastened to the ACCESS.bus jack located at the back of the helmet or the port located on the VIP Card? Confirm that the cable plug is firmly seated and securely fastened to the helmet jack.
- Page 62 IRQ from the list displayed. After you exit the setup program, reboot your computer for the changes to take effect. Symptom 8: The VFX1 HEADGEAR does not work with my application. Check: The VFX1 HEADGEAR is functioning properly: Does the application support the VFX1 HEADGEAR?
- Page 63 VFX1 HEADGEAR User's Manual provide VFX1 HEADGEAR keyboard and mouse simulation. Although VRMOUSE will support most non-native mode applications directly, optimal support is provided for applications included in the VRMOUSE.INI file. Refer to the VRMOUSE section in Appendix A for further information.
- Page 64 On some older VGA Cards, the VESA Feature Connection was implemented as an edge connector. If you have this configuration contact FORTE Technical Support and we will send you a cable that will work with your card. Please note, however, that these older cards may lack the speed and performance needed to adequately support VR applications.
-
Page 65: Technical Assistance
Technical Assistance FORTE is committed to providing you with the expert advice and technical assistance needed to get your VFX1 HEADGEAR System up and running on your computer system. This support is available to all registered owners of the VFX1 HEADGEAR system, so it is important that you promptly fill out and mail the registration card provided. - Page 66 Technical support is available by telephone 9AM-4PM Eastern Standard Time, Monday through Friday at (716) 427-8604. Technical Support - Forums and Electronic Mail The FORTE Technical Support staff is active on several forums and may be contacted by modem at the following addresses: CompuServe®:...
-
Page 67: Warranty Information
Warranty Information FORTE Technologies, Inc. (hereafter referred to as FORTE) warrants to the original purchaser of the VFX1 HEADGEAR that it will be free of defects in materials and workmanship for a period of one year from the original date of purchase. - Page 68 2615 West Henrietta Road Rochester, NY 14623 FORTE is not responsible for any damage that may occur during shipping, Shipping charges to FORTE are your responsibility. FORTE will NOT accept COD shipments. If it is determined that the product is outside of its warranty period, a method of payment for repair cost must be arranged prior to commencing repair work.
- Page 69 VFX1 HEADGEAR User's Manual 5-12...
- Page 70 Also, the VFX1 directory name is added to the path statement in your computer's autoexec.bat file so that the VFX1 programs can be accessed at any time without having to manually select the directory.
- Page 71 VFX1 HEADGEAR User's Manual VRMOUSE Driver program used to support the VFX1 Headgear system in non-native mode. The driver simulates mouse and keystroke actions for applications that do not directly support the VFX1. Headset movements, CyberPuck motions, and buttons actions, are translated into simulated mouse and keyboard input for the non-native mode application.
- Page 72 VRMOUSE driver, then displays instructions for using Heretic with VRMOUSE support. The second line starts the program. Activate VFX1 tracking by holding the CyberPuck horizontally and depressing the bottom button. If you did not want the application instructions to be displayed...
- Page 73 VFX1 HEADGEAR User's Manual VRMOUSE.INI Initialization file containing the functional mapping of mouse and keyboard inputs to those of the VFX1 Headgear and CyberPuck for FORTE supported, non-native mode, applications. Used in conjunction with VRMOUSE. VRMINI.TXT Text file which provides programming guidance for supporting non-native mode applications with VRMOUSE.
- Page 74 A listing of the application software provided on the CD-ROM Bonus Disk is furnished with the bonus software package. This tabulation provides the name of the application, the developer, whether the application is VFX1 native mode, and the command to enter at the DOS prompt to start the application. ALL GAMES SHOULD BE STARTED FROM THE SPECIFIC DIRECTORY WHERE THEY WERE LOADED TO ON YOUR HARD DISK.
-
Page 75: Regulatory Statements
Any cable that is connected to the VIP Card connectors must be a shielded cable that is properly grounded. Your FORTE hardware device has been tested and found to comply with the limits for a Class B digital device, pursuant of Part 15 of the FCC Rules. These limits are designed to provide reasonable protection against harmful interference in a residential installation. - Page 76 Appendix B - Regulatory Statements Canadian Radio Interference Regulations This digital apparatus does not exceed the Class B limits for radio noise emissions from digital apparatus as set out in the Radio Interference Regulations of the Canadian Department of Communications.
-
Page 77: Product Specifications
• Single 26-pin D-connector (High resolution) containing video, audio, and VOS™ head tracking sensor cable • Connects to VFX1™ Interface Protocol (VIP™) card • ACCESS.bus™ host connector (phone jack connector) • VIP interfaces with standard VGA card VESA compliant feature connector •... - Page 78 Appendix C - Product Specifications Video • Dual active-matrix color LCD's • Works with existing Standard VGA applications Audio • High fidelity stereo headphones • Microphone in visor for multiplayer communication • Interfaces with any standard PC stereo sound card's amplified Line Out connector •...
- Page 79 Credits & Acknowledgements A Special Thanks... to the visionary software development teams and many other companies who provided invaluable assistance in making the VFX1 HEADGEAR a reality and tremendous success. The VFX1 HEADGEAR Team...
Need help?
Do you have a question about the VFX1 and is the answer not in the manual?
Questions and answers