Table of Contents
Advertisement
Available languages
Available languages
Advertisement
Chapters
Table of Contents

Subscribe to Our Youtube Channel
Related Manuals for Orion Diagnostica QuikRead go Instrument

Summary of Contents for Orion Diagnostica QuikRead go Instrument
- Page 1 QuikRead go ® Instrument 145841-6 • English • Español...
- Page 2 Explanation of symbols Explicación de los símbolos In vitro diagnostic medical device Producto sanitario para diagnóstico in vitro Catalogue number Número de catalogo Manufacturer Fabricante Date of manufacture Fecha de fabricación Contents Contenido Instrument Equipo Power supply Fuente de alimentación Power cable / Mains cable Cable de poder Consult instructions for use...
- Page 3 Cat. No. 145218 Rx only Instructions for use • English Instrucciones de uso • Español...
-
Page 4: Table Of Contents
Personal settings ........19 Unpacking ........... 5 8 PRECAUTIONS AND RESTRICTIONS Measurement flow ....... 20 Parts of the QuikRead go instrument .... 6 ON OPERATION ......28 Maintenance settings ......22 Lifting/transporting the instrument ....8 Admin settings ........23 Precautions and restrictions .... -
Page 5: Intended Use
Orion Diagnostica QuikRead go ® is an in vitro diag- Safety information nostic test system. The QuikRead go instrument has QuikRead go is a photometer capable of reporting been designed to measure quantitative test results quantitative measurements. The instrument has For your own safety, comply with all warning and from patient samples using QuikRead go reagent kits. -
Page 6: Parts Of The Quikread Go Instrument
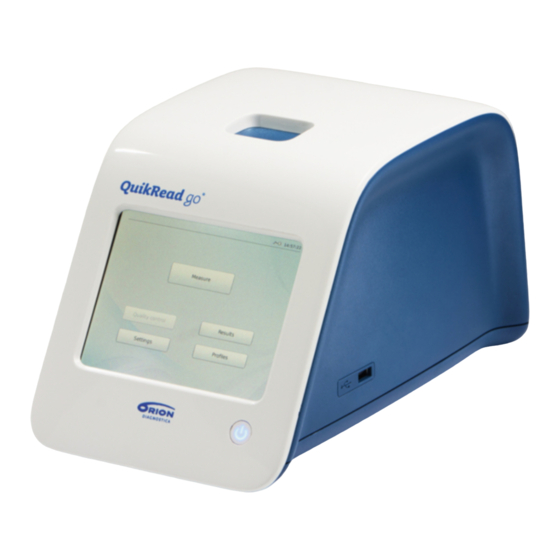
Parts of the QuikRead go instrument The QuikRead go components are shown below, in Image 1 (instrument from above), Image 2 (instrument from the rear), and Image 3 (instrument from below). Image 1 1. Measurement well for cuvette 2. Touchscreen display 3. - Page 7 Image 2 Image 3 1. USB port 2 (Type A) 1. Battery unit cover 2. USB port 3 (Type A) 2. Instrument label, with serial number 3. USB port 4 (Type B) 3. Warranty seal 4. RJ45 port 5. Connector for power supply INSTALLATION PROCEDURES AND REQUIREMENTS...
-
Page 8: Lifting/Transporting The Instrument
Lifting/transporting the instrument Location and environment ● Altitude up to 6,500 feet (2,000 m) ● When lifting or transporting the QuikRead go Ambient temperature between 59 °F (15 °C) During use instrument, always handle it carefully. At the back of and 95 °F (35 °C) the instrument is a handle, enabling lifting with one The instrument should be placed on a flat, clean,... -
Page 9: Power Cable And Battery Pack
Power cable and battery pack Connectors and cables Plugging in the power supply cable The QuikRead go instrument can be used with either On the back of the instrument are five connection Plug in the power-supply cable, using the marked the power-supply cable or an optional battery pack. -
Page 10: Inserting A Battery Pack
External devices Barcode reader An external barcode reader can be connected to the QuikRead go instrument. A list of com- patible barcode reader devices can be found via www.quikread.com. Connect the compatible barcode reader to a USB port and follow the instructions on the display. -
Page 11: Use Of The Touchscreen
Use of the touchscreen The QuikRead go instrument has a color touch- screen. The user operates it by touching the virtual buttons with the fingers. The screen can be used either with bare fingers or with gloves. The touch- screen does not require much pressure, and pressing too hard or operating it with sharp items could dam- age the screen. -
Page 12: Set-Up Wizard
Set-up wizard LIS ON 10:30 When starting up the QuikRead go instrument for the first time, you will be asked to follow a set-up Set-up WELCOME wizard. During the set-up process, you will be asked to select the language and to set the date and time. -
Page 13: Language
No. The chosen language can be changed later, at any time. Back More languages Image 11 The first step in the set-up process is to choose the interface language for the QuikRead go instrument. INSTALLATION PROCEDURES AND REQUIREMENTS... -
Page 14: Date And Time
Date and time LIS ON 10:30 The second step presented by the set-up wizard is to adjust the date and time. To do this, follow the Set-up DATE & TIME instructions below: Choose Edit on the Time row Time: Adjust the time with the arrow buttons Choose between a 12-hour and 24-hour clock 10:30 am Edit... -
Page 15: Audio Volume
You have now completed the set-up process. The QuikRead go instrument can be in any of the tings (see the section on Settings > Power save). The You may start using the instrument or make three modes: on, off or sleep mode. -
Page 16: User Interface In General
User interface in general The QuikRead go instrument is used via a graphical user interface. This section of the manual explains the main principles of the user interface. PROFILE LIS ON 10:30 Main menu All the features of the user interface can be accessed via the main menu (see Image 13). -
Page 17: Layout
Layout The screen area of the user interface is divided into five sections by function (see Image 14): PROFILE LIS ON 12:20 Status area This indicates the status of the QuikRead Measure RESULT go instrument via symbols. Notification area Here, information is given, with the color mg/L indicating the current stage of the pro- cess. -
Page 18: Structure Of The User Interface
Structure of the user interface Measure Quality Control The user interface features a menu system with five main sections under the main menu (see Image 15): Measurement Quality control Main menu Results Profiles Settings Settings QuikRead go system settings can be configured Profiles Results Settings... -
Page 19: Personal Settings
Personal settings PROFILE LIS ON 10:30 From Personal settings, the operator can set lan- guage, screen, volume, and power-saving options. Settings PERSONAL SETTINGS These can be chosen for temporary use (that is, un- til powering down of the instrument) or for further use, in which case the settings need to be saved to Language a profile. -
Page 20: Measurement Flow
Test parameters Power-save operation The unit of results can be chosen here. The change The time after which the QuikRead go instrument With the measurement flow settings, the operator requires the administrator’s password, which is QR- closes the lid – without entering sleep mode – can can adjust laboratory- or work-routine-oriented set- be adjusted from Power save >... - Page 21 Saving measurement flow settings to PROFILE LIS ON 10:30 a profile for further use On the main menu screen choose Profiles. Then MEASUREMENT FLOW Settings choose Save as profile. Select a new profile and supply a name for it, or select a profile you’d Operator ID: Patient ID: Test...
-
Page 22: Maintenance Settings
Maintenance settings Error log Software update QuikRead go software defines the instrument op- The instrument-specific settings can be configured The instrument’s error log is saved in its memory. Er- ror records can be scrolled from the log screen with erations. Software can be updated to the newest from the Maintenance menu. -
Page 23: Admin Settings
Admin settings Profiles Local time The administrative settings allow instrument-specific Adjust the time in accordance with the local time. User-adjusted settings can be saved as profiles for The local time is saved to the memory as an offset settings for the LIS connection and GMT value to later use. -
Page 24: Performance Characteristics And Specifications
Touchscreen display Memory CHARACTERISTICS AND The user interface consists of an easy-to-use touch- The QuikRead go instrument has an internal memo- SPECIFICATIONS screen display. It is used by means of touch-sensitive ry for result history. See the section “Results”. buttons presented on the screen. It also provides... -
Page 25: Operating Instructions
6 OPERATING INSTRUCTIONS PROFILE LIS ON 10:30 Usage of the QuikRead go instrument can be char- acterized as involving three main operations: • Performing an assay • Viewing results • Changing the instrument’s settings Measure Performing an assay The instrument can be placed in various measure- ment modes, as needed. -
Page 26: Quality Control
Drop a cuvette into the measurement well in the right position. The barcode of the cuvette must be facing towards you (see Image 19). Note: do not insert your finger or anything else into the measurement well. The lid closes, and the instrument starts the measurement. -
Page 27: Other Measuring Modes
Transferring results to USB storage where these features can be enabled or disabled. of a QuikRead go instrument that is normally con- The results can be transferred to USB storage. Con- Operator and patient IDs can be supplied via a bar- nected to an LIS but has temporarily been in LIS nect a USB drive to a USB port. -
Page 28: Calibration Procedures
Recycling instrument, and make sure that the plug is po- sitioned such that it is readily removable. The QuikRead go instrument is a low-voltage elec- • Use only the official QuikRead go battery pack tronic device, and it should be recycled as electri- supplied by Orion Diagnostica. -
Page 29: Troubleshooting
TROUBLESHOOTING The QuikRead go instrument displays error messag- Contact your local supplier in the event that support es and guides the user if it detects errors. Follow the is needed or repair requirements arise. instructions displayed, and consult the troubleshoot- ing table in this manual and also the QuikRead go kit instructions for use. - Page 30 Error message / symptom Possible cause Corrective action Make sure that the printer is connected and The printer is off. its power is on. Check the settings. The printer cable is not properly connected. If the problem is not solved, restart the instrument Printer does not print.
- Page 31 Error message / symptom Possible cause Corrective action Remove the cuvette when the instrument has raised Remnants of cuvette sealing foil remain on the cuvette it. Make sure that all foil remnants are removed collar. before the next measurement. “Cuvette position not correct. Remove cuvette.” error message is displayed.
-
Page 32: Service And Maintenance Information
The instrument has a battery that supplies power to the internal clock. If the clock battery runs out, The QuikRead go instrument has been designed to a warning is displayed. The clock battery can be re- be as user-friendly as possible, with no need for reg- placed with a battery of the same type (CR 2032 3V). - Page 34 4 PRINCIPIOS DE OPERACIÓN ..45 6 INSTRUCCIONES DE USO ..... 55 CONTENIDOS Potencia (encenddo, apagado, o reposo) ..45 Realizar un análisis ....... 55 Encendico ..........45 Realización de un análisis en modo 1 USO RECOMENDADO ....35 Apagado ..........45 de lectura básico ........
-
Page 35: Uso Recomendado
PROCEDIMIENTOS Y REQUISITOS El QuikRead go ® de Orion Diagnostica es un siste- QuikRead go es un fotómetro capaz de producir lec- DE INSTALACIÓN ma para test de diagnóstico in vitro. El instrumento turas cuantitativas. El equipo ha sido diseñado y ca- QuikRead go se diseñó... -
Page 36: Componentes Del Quikread Go
Componentes del QuikRead go Los componentes de QuikRead go se muestran en la Imagen 1 (equipo desde arriba), la Imagen 2 (equipo desde atrás), y la Imagen 3 (equipo desde abajo). Imagen 1 1. Pocillo para lectura de la cubeta 2. - Page 37 Imagen 2 Imagen 3 1. Puerto USB 2 (Tipo A) 1. Tapa de la batería 2. Puerto USB 3 (Tipo A) 2. Etiqueta del equipo con el número de serie 3. Puerto USB 4 (Tipo B) 3. Sello de la garantía 4.
-
Page 38: Levantar/Transportar El Equipo
Levantar/transportar el equipo Ubicación y entorno • Altitud hasta 6.500 pies (2.000 m) Al levantar o transportar el equipo QuikRead go, • Temperatura ambiente entre 59 °F (15 °C) y Durante su uso manéjelo siempre con cuidado. En la parte de atrás 95 °F (35 °C) del equipo hay un soporte para permitir levantarlo El equipo debe colocarse sobre una superficie ho-... -
Page 39: Cable De Poder Y Bateria
Cable de poder y batería Conectores y cables Enchufar el cable de poder El QuikRead go puede utilizarse ya sea con el cable En la parte posterior del equipo hay cinco conecto- Enchufe el cable de poder al conector marcado en la de poder o la batería. -
Page 40: Inserción De La Bateria
Inserción de la batería Siga los pasos a continuación para insertar una bate- ría en el instrumento QuikRead go. Asegúrese de que el equipo esté apagado Desenchufe el cable de poder Coloque el equipo de lado sobre una mesa Abra el compartimiento de la batería al quitar la tapa Conecte el conector de la batería a la batería Presione la de batería en su lugar y asegúrese de... -
Page 41: Uso De La Pantalla Táctil
Uso de la pantalla táctil El equipo QuikRead go tiene una pantalla táctil a co- lor. El usuario la opera al tocar los botones virtuales con los dedos. La pantalla puede utilizarse tanto con los dedos desnudos como con guantes La pantalla táctil no requiere mucha presión;... -
Page 42: Asistente De Configuracion
Asistente de configuración LIS ON 10:30 Se le pedirá ejecutar un Asistente de configuración cuando ponga en marcha el equipo QuikRead go Set-up WELCOME por primera vez. Durante el proceso de configura- ción se le pedirá que seleccione el idioma y ajuste la fecha y hora. -
Page 43: Idioma
Idioma LIS ON 10:30 Elija el idioma que desea utilizar en el equipo. A continuación se le pedirá que confirme su elección Set-up LANGUAGE de idioma. Se verá la petición de confirmación en el idioma elegido -y en inglés si no es el idioma elegido. Si el idioma elegido es correcto, elija Yes;... -
Page 44: Fecha Y Hora
Fecha y hora LIS ON 10:30 El segundo paso en el Asistente de configuración es ajustar la fecha y la hora. Para ello, siga las siguien- Configuración FECHA & HORA tes instrucciones: Seleccione Editar en la fila Hora Hora: Ajuste la hora con las flechas de dirección Elija entre un reloj de 12 horas y 24 horas 10:30 am Editar... -
Page 45: Volumen De Audio
PRINCIPIOS DE OPERACIÓN Volumen de audio Después de pulsar el botón de Encendido, se ilumi- El cuarto paso del Asistente de configuración es El equipo QuikRead go mide la absorbancia del con- nará la retroiluminación de la pantalla, se iniciará el equipo y aparecerá... -
Page 46: Interfaz De Usuario En General
Interfaz de usuario en general El equipo QuikRead go se utiliza a través de una interfaz gráfica de usuario. Esta sección explica los principios fundamentales de la interfaz de usuario. PERFIL LIS ON 10:30 Menú principal Todas las características de la interfaz de usuario pueden accederse a través del menú... -
Page 47: Plantilla
Plantilla El área de la pantalla de la interfaz de usuario está dividida en cinco áreas funcionales (véase la Imagen 14): PERFIL LIS ON 12:20 Área de estado Lectura RESULTADO Indica el estado del equipo QuikRead go a través de símbolos. mg/L Área de notificación Aquí... -
Page 48: Estructura De La Interfaz De Usuario
Estructura de la interfaz de usuario Lectura Control de Calidad La interfaz de usuario consta de cinco áreas princi- pales bajo el menú principal (véase la Imagen 15): Lectura Control de calidad Resultados Menú principal Perfiles Configuraciones Configuraciones Los parámetros del QuikRead go pueden configurar- se a través de la pantalla táctil. -
Page 49: Configuración Personal
Configuración personal PERFIL LIS ON 10:30 En Configuración personal, el operador puede con- figurar las opciones de idioma, pantalla, volumen y Configuraciones CONFIGURACIÓN PERSONAL ahorro energético. Estos ajustes pueden seleccionar- se para uso temporal (hasta el apagado del equipo) o para su uso posterior, en cuyo caso estos ajustes Idioma deben guardarse en un perfil. -
Page 50: Configuración De Lectura
Configuración de lectura Parámetros del test Ahorro de energía Aquí se puede elegir la unidad de los resultados. Puede ajustarse el tiempo tras el que el equipo En la Configuración de lectura, el analista puede Para realizar un cambio, se debe ingresar la contra- QuikRead go entra en modo de reposo eligiendo ajustar o elegir la configuración habitual del labo- Ahorro de energía >... - Page 51 Guardar la configuración de lectura en perfiles PERFILES LIS ON 10:30 para su uso posterior En la pantalla principal seleccione Perfiles. Luego CONFIGURACIÓN DE LECTURA Configuraciones elija Guardar como perfil. Seleccione un nuevo per- fil y déle un nombre, o seleccione un perfil que le ID del ID del Parámetros...
-
Page 52: Configuración De Mantenimiento
Configuración de mantenimiento Registro de errores Actualización de software El software QuikRead go controla las operacio- La configuración específica del equipo puede confi- El registro de errores del equipo se almacena en la memoria. Se puede desplazar por los registros de nes del instrumento. -
Page 53: Configuración De Administración
Perfiles Información del producto hora guardada. La hora se ajusta en la configura- Se muestran los detalles específicos del equipo en la ción de administración. Esta operación requiere una Las configuraciones modificadas por el usuario pue- contraseña. La nueva hora ingresada no puede ser pantalla Acerca de: den guardarse como perfiles para su uso posterior. -
Page 54: Especificationes Del Equipo
ESPECIFICACIONES Dimensiones y requerimientos Fuente de poder DEL EQUIPO de potencia El equipo es alimentado por una fuente de poder su- • Peso: 1.7 Kg. sin fuente de poder ministrada con el equipo Además, el equipo puede Declaración de conformidad •... -
Page 55: Instrucciones De Uso
INSTRUCCIONES DE USO PERFIL LIS ON 10:30 El uso del equipo QuikRead go puede dividirse en 3 operaciones principales: • Realizar un análisis • Ver resultados • Cambiar la configuración del equipo Lectura Realizar un análisis El equipo puede colocarse en diferentes modos de lectura, según sea necesario. -
Page 56: Control De Calidad
Se cierra la tapa y el instrumento comienza la lectura. Una vez finalizado el test, el resultado se mues- tra en la pantalla y la cubeta se eleva para ser retirada. Retire la cubeta. El resultado desaparece de la pantalla. Pueden mostrarse nuevamente eli- giendo Ver resultado anterior. -
Page 57: Resultados
Ver resultados Enviar resultados a un LIS/HIS fuera de línea por medio del teclado virtual del equipo o con un teclado externo El usuario introduce la ID del analis- Para ver los resultados elija Resultados en el menú Pueden ver todos los resultados que no se han principal. -
Page 58: Procedimientos De Calibración
• Utilice sólo la batería QuikRead go suministrada chos de aparatos eléctricos. Los materiales de empa- por Orion Diagnostica. que son materiales reciclables. PRECAUCIONES Y • No introduzca los dedos ni cualquier dispositivo LIMITACIONES DE OPERACIÓN... - Page 59 Mensaje de error / síntoma Posible causa Acción correctiva La potencia no está conectada. Conecte la fuente de poder y vuélvalo a intentar. El QuikRead go no se inicia. El equipo tiene una falla electrónica. Contacte a Servicio al Cliente. La calibración de la pantalla táctil es incorrecta Calibre la pantalla táctil de acuerdo con el procedimiento (Vg.
- Page 60 Mensaje de error / síntoma Posible causa Acción correctiva Reemplace la batería vieja por una nueva, La capacidad de almacenamiento de la batería disminu- Es necesario cargar la batería (opcional) con frecuencia. de acuerdo con el procedimiento descrito en la sección ye durante su vida útil.
-
Page 61: Informacion De Servicioy Mantenimiento
Mensaje de error / síntoma Posible causa Acción correctiva Blanco demasiado alto. Pruebe la cubeta de nuevo. El proceso de blanco no se ha completado o la muestra puede contener substancias que crean interferencia. En este último caso, no se puede completar el test. Blanco inestable. - Page 62 QuikRead go ® is a registered trademark of Orion Diagnostica Oy. Orion Diagnostica Oy Koivu-Mankkaan tie 6 B P.O.Box 83, FI-02101 Espoo, Finland Tel. +358 10 4261 Fax +358 10 426 2794 www.oriondiagnostica.com www.quikread.com 11/2016...
Need help?
Do you have a question about the QuikRead go Instrument and is the answer not in the manual?
Questions and answers