
Related Manuals for Laufen CLEANETINTEGRATED

Summary of Contents for Laufen CLEANETINTEGRATED
- Page 1 8.2188.9.000.000.1 CLEANETINTEGRATED Remote Control CLEANETINTEGRATED 暖 風 Note: Guarantee/Liability only when assembled by an approved specialist in accordance with the instructions and local regula tions within the pressure range 1 - 7 bar.
-
Page 2: Table Of Contents
Contents Important Safety Instructions ___________________________________________________________________________ 3 Grounding Instructions ________________________________________________________________________________ 4 Important Safeguards ______________________________________________________________________________ 5 – 6 Specification / Default Settings _________________________________________________________________________ 7 Parts List / Parts Description ___________________________________________________________________________ 8 Installation / Remote Installation ____________________________________________________________________ 9 – 10 Before Use / Standard Operational Instructions __________________________________________________________ 11 Operation Guide ________________________________________________________________________________ 12 –... -
Page 3: Important Safety Instructions
Danger -To reduce the risk of electric shock: 1. Do not place or store the CLEANETINTEGRATED where it can fall down or be pulled into a tub, sink or tank. 2. Do not place in or drop the product into water or other liquid. -
Page 4: Grounding Instructions
Grounding Instructions The plug must be inserted into an outlet that is properly installed and grounded. ln the event of an electrical short circuit, grounding reduces the risk of electric shock. The electrical outlet, which must be a 100-240V~, 50/60Hz, and at least a 15-Amp grounded outlet, should be located on the wall within reach of the unit’s power cord. -
Page 5: Important Safeguards
Important Safeguards For safety reasons, please read this entire manual before use and keep this manual where you can refer to it easily. Attention to electric safety instruction before use: Do not put inflammable objects such as Do not splash water or any other liquid on this Please read page 4 electric safety instruction cigarettes on the product. - Page 6 Important Safeguards For safety reasons, please read this entire manual before use and keep this manual where you can refer to it easily. Please do not use plug while your Only use domestic water connected to cold Please do not disassemble without hands are wet which might lead to water.
- Page 7 Level 3 FRONT CLEANING PRESSURE Level 3 NOZZLE POSITION REAR AND FRONT Level 3 PULSATING OSCILLATING DEODORIZER NIGHT LIGHT AUTO OPEN ON (LID, Distance-3) AUTO FLUSH POWER SAVING BUZZER Note: In case of power failure CLEANETINTEGRATED will remember last time settings.
-
Page 8: Parts List / Parts Description
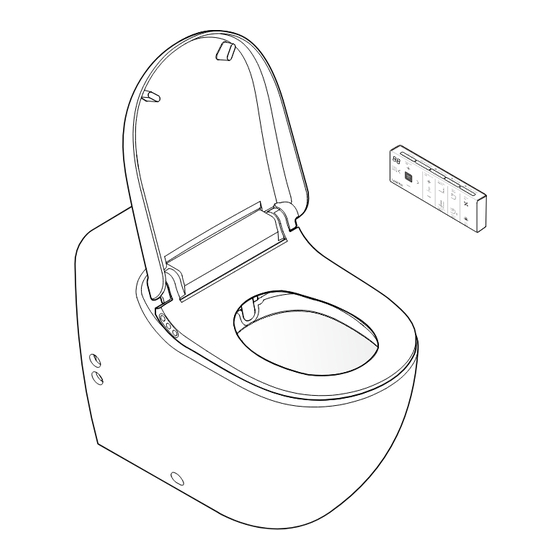
Parts List Parts Description Night light Power-outlet * Dryer Power-plug Deodorizer Seat Spare control button Nozzle Water supply hose User presence sensor Porcelain Water shut off valve *Items not supplied with the product Remote unit T O P F R O N T B O T T O M... - Page 9 Installation 10 s min. 3.5 liters ✔ Ø Ø...
-
Page 10: Installation / Remote Installation
Installation klick Power Supply 220-240V~,50/60Hz G½" OPEN Remote Installation ≈ 1 Ø 6 mm (cm) -
Page 11: Before Use / Standard Operational Instructions
(Please kindly refer to page 18) of manual for toilet seat/lid operational instructions.) The seat is occupied The sensor will be activated once the toilet seat is occupied, all the functions of CLEANETINTEGRATED may be used under this situation. How to activate and stop the function of cleaning and dryer 暖風... -
Page 12: Operation Guide
Operation Guide 1 Cleaning Function Please occupy the toilet seat in order to activate the sensor installed in the seat. Cleaning Select REAR or FRONT cleaning to activate the cleaning function. Water Pressure Adjustment Press to increase or to decrease water pressure while the cleaning function activated. - Page 13 Operation Guide 3 Temperature Adjustment Function A d j u s t W a t e r T e m p e r a t u r e Cleaning Select REAR or FRONT cleaning to activate the cleaning function. Water Temperature Adjustment Press to increase or to decrease...
- Page 14 Operation Guide 4 Time setting for Cleaning and Dryer Function Cleaning/Dryer function duration may be adjusted in order to automatically stop. R e a r c l e a n i n g t i m e s e t t i n g REAR cleaning duration Press REAR button button for 3 consecutive seconds to adjust REAR cleaning duration.
- Page 15 Operation Guide 5 User Settings 6 user profiles can be stored. Select User Setting Parameter Select your prefered setting parameter for: - Water pressure - Water temperature - Nozzle position - Massage(Pulsating/Oscillating) - Dryer temperature - Cleaning and dryer duration F R O N T Save User Settings To save the already chosen setting...
- Page 16 Main power consumption will turn off automatically when power saving is set. The main power will resume once the toilet seat is occupied again by user. There are 2 types of power saving mode which can be selected: Smart ( ) : CLEANETINTEGRATED stores data about using time and automatically set power saving. 0:00 Setting...
- Page 17 ) only ) User Occuppies the Seat User is Standing for using the Toilet >10 sec >7 sec >10 sec >7 sec NOTE: In case of power failure, CLEANETINTEGRATED can be flushed by using spare button (see page 19).
- Page 18 Operation Guide 11 Toilet seat/lid open and close operational instructions R e m o t e C o n t r o l O p e n / C l o s e Lid/Seat Open Press LID/SEAT OPEN button to open lid and seat.
-
Page 19: Service
Operation Guide 12 UV Light An ultraviolet disinfection process it‘s implemented to the nozzle head after cleaning function use and seat not occupied. UV Light Press button for consecutive 3 seconds for switching ON/OFF UV light auto activation. F R O N T UV light desinfection process start automatically after seat not and turns off after 1 minute. - Page 20 Service 15 Remote Control Cleaning and Battery Change Please take out the batteries before cleaning. It is forbidden to wash this product with The number shown in display will flicker to indi- Please wipe it softly with dampened cloth. water or detergent directly. cate low battery.
- Page 21 Service Close Close 17 Nozzle Cleaning Nozzle Extension Press PULSATING button for 3 seconds, nozzle reaches out automatically which will be remained for 60 seconds. Nozzle Cleaning Press NOZZLE CLEAN button and UV light will activate at the same time that nozzle would automatically oscillated back and forth during 60 seconds.
- Page 22 Troubleshooting ISSUE POSSIBLE SOLUTION 1. Connect the product 1. Disconnected 2. Check if there is a 220-240V~ signal with Not working 2. No electrical power supply another product (such as hairdryer) 3. Product is power off 3. Push the power button 1.
- Page 24 Headquarters: Laufen Asia Laufen China Laufen Bathrooms AG Room 2303, 23/F Room 503-505, City Gateway Wahlenstrasse 46 148 Electric Road No. 396 North Caoxi Road CH-4242 Laufen, Switzerland North Point, Hong Kong Shanghai 200030, China www.laufen.com www.laufen.com www.laufen.com...
Need help?
Do you have a question about the CLEANETINTEGRATED and is the answer not in the manual?
Questions and answers