Table of Contents
Advertisement
INDEX
INTRODUCTION...................................................................P2
LEGAL REQUIREMENTS AND WARNINGS. .............................P3
RECOMMENDED TOOLS. .....................................................P3
TERMS AND DEFINITIONS. ...................................................P4
MOTOR LAYOUT. .................................................................P5
SITE EVALUATION. ..............................................................P6
GATE EVALUATION. ............................................................P7
STARTUP FORCE................................................................P8
REMOVING THE LID. ............................................................P9
TRANSFORMER WIRING
...................................................P10
ANCHORING THE MOTOR. ...................................................P11
SECURING THE MOTOR. ......................................................P12
MOUNTING THE RACK. ........................................................P13
FILLING THE GEARBOX OIL. .................................................P14
MOUNTING THE MAGNET. ...................................................P14
MAIN PC BOARD LAYOUT. ....................................................P15
LCD SCREEN. .....................................................................P16
SETTING THE MOTOR DIRECTION. .......................................P17
PROGRAMMING THE MOTOR. ..............................................P18
SETTING THE OVERCURRENT. ...........................................P19
PROGRAMMING THE REMOTES. ..........................................P19
SETTING AUTOCLOSE TIME. ..............................................P20
SETTING PARTY MODE. ......................................................P20
TECHNICAL SPECIFICATIONS. .............................................P21
1
Advertisement
Table of Contents

Subscribe to Our Youtube Channel
Summary of Contents for D.A.C.E SPRINT
-
Page 1: Table Of Contents
INDEX INTRODUCTION………………………………………………………….P2 LEGAL REQUIREMENTS AND WARNINGS. ………………………..P3 RECOMMENDED TOOLS. ……………………………………………..P3 TERMS AND DEFINITIONS. ……………………………………………P4 MOTOR LAYOUT. ………………………………………………………..P5 SITE EVALUATION. ……………………………………………………..P6 GATE EVALUATION. ……………………………………………………P7 STARTUP FORCE……………………………………………………….P8 REMOVING THE LID. …………………………………………………...P9 TRANSFORMER WIRING ……………………………………………P10 ANCHORING THE MOTOR. ……………………………………………P11 SECURING THE MOTOR. ……………………………………………...P12 MOUNTING THE RACK. ………………………………………………..P13 FILLING THE GEARBOX OIL. …………………………………….……P14 MOUNTING THE MAGNET. ……………………………………………P14 MAIN PC BOARD LAYOUT. ………………………………………..…..P15 LCD SCREEN. ……………………………………...……………………P16 SETTING THE MOTOR DIRECTION. ………………………………...P17 PROGRAMMING THE MOTOR. ……………………………………….P18 SETTING THE OVERCURRENT. …………………………………….P19 PROGRAMMING THE REMOTES. …………………………………...P19 SETTING AUTOCLOSE TIME. ……………………………………….P20 SETTING PARTY MODE. ……………………………………………...P20 TECHNICAL SPECIFICATIONS. ……………………………………...P21 1 ... -
Page 2: Introduction
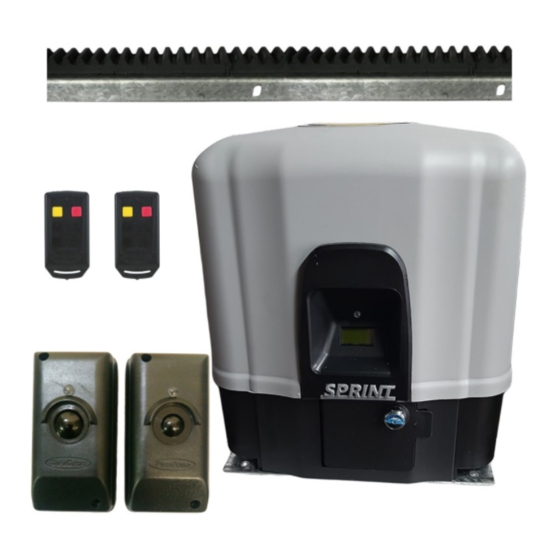
INTRODUCTION AND RECOMMENDATIONS Congratulations on your purchase of a D.A.C.E gate motor. D.A.C.E has proven to be a leader in the automation field and strives to manufacture high quality products using the latest technology available. D.A.C.E. is constantly working on upgrading their products to bring you, the customer, a product of the highest quality. Other products manufactured by D.A.C.E. include: · Infrared safety beams · Remotes and receivers · Slide gate operators SPRINT; CONDO It is recommended that an experienced gate installer is used to install your gate motor. If you intend to install this motor yourself, please read this manual carefully before any installation begins. It is strongly recommended that safety beams are used on all installations, as this reduces the risk of the gate closing on a pedestrian or vehicle. NOTE : D.A.C.E. supplies an onboard receiver with every motor. D.A.C.E. cannot guarantee the range of the receiver due to interference or obstacles in the path of the receiver. This automatic gate operator is NOT a security device. It is designed to make access to a premises undemanding. WARRANTY BMG Imports offer a Standard Warranty on this equipment. The following terms and conditions apply to ALL warranty claims. BMG Imports warrants the ORIGINAL purchaser, at the point of sale, that the product is in good working order and is free from any defect. ANY warranty claim must be accompanied by the original invoice. The original purchaser is responsible within 24hours of receiving the goods to carry out a physical inspection and notify BMG Imports in writing if the goods do not comply with the description set out. -
Page 3: Legal Requirements And Warnings
If you intend to run 220V/AC directly from the Mains supply (house supply) to the transformer, the · wiring should be done by a qualified/registered electrician. This is a legal requirement and failure to do so may lead to noncompliance of property or law suits against the property owner in the event of an accident. It is a legal requirement to run all cabling in conduit. The power supply must be run in a separate · conduit to ANY other cables. Mains supply may only be run in a guarded cable. Under no circumstances may 220V/AC be run · using Communication cable, Ripcord or Cabtyre. BMG Imports will not be held liable for any accident / incident resulting in damage, injury or death · ensuing from the installation of the automatic gate motor. Although the SPRINT and CONDO operators have builtin collision sensing, substantial damage · may still occur. For this reason safety beams should be used on all installations. Do not allow children to play near or with any gate, gate motor or remote control. · · It is the responsibility of the installer to ensure that the gate is in good working condition before automating the gate. BMG Imports will not be held responsible for any gates bumping the ends stops when a gate is · automated on a slide. RECOMMENDED TOOLS Assorted screw drivers – phillips and flat · ·... -
Page 4: Terms And Definitions
TERMS AND DEFINITIONS · Autoclose: allows the gate to close automatically after a selected time period. · Multiuser mode: this is a setting used in town house situations where there are multiple triggers. This setting will avoid the motor getting multiple triggers at the same time. · Pedestrian access: allows only partial opening of the gate · Antilift device: stops the gate being lifted off the rail. · Battery: the battery is used to drive the motor. · Safety Beams: These reduce the risk of the gate closing on a vehicle. Beams should always be used when autoclose is selected. · Transformer: the transformer reduces the mains power to 16 VAC. NOTE! The cable to be used from the transformer to the main PC board must be a minimum of 1.5mm cable. DO NOT use communications cable. · Charger module: the onboard charger receives 16 VAC from the transformer and then delivers a trickle charge to maintain ± 13.8 VDC charge to the battery. · Main PC board: this is the printed circuit board that contains all the electronic components that oper ate the motor. NOTE! Always remove the power from the PC board before connecting any output wires. · Remote/Transmitter: this is usually a hand held product which transmits a radio signal to the receiver. · Receiver: the receiver triggers the motor after receiving a radio signal from the transmitter. · Test button: this is a button on the main PC board that can be used to activate the motor. This is usually used during the programming of the motor. · Rack: this is a length of toothed gear mounted on the gate. ·... -
Page 5: Motor Layout
MOTOR LAYOUT MAIN PC BOARD 12 VOLT BATTERY 12VOLT DC ELECTRIC MOTOR L.C.D. SCREEN CABLE RISERS ACCESS DOOR WITH LOCK FOUNDATION PLATE CONDUIT ENTRY HOLES 4 HOLES TO PEG OR BOLT THE PLATE 5 ... -
Page 6: Site Evaluation
SITE EVALUATION The site should be evaluated before the installation begins. The following items should be checked: · Flood level: the motor should be above flood level to avoid any damage to the motor. · The rail must be level and should be above ground level, this will assist with keeping debris out of the path of the wheels. Any debris lying on the rail may cause the motor to over current. Mount the motor above the flood level or a flood proof wall must be built in order to prevent water from entering the motor It is important to ensure that the rail is above the ground level, as this reduces the chance of stones and other debris blocking the track and jamming the wheels of the gate. The rail should be above ground level Ensure that the rail is kept clear of all debris, Keep all trees, bushes and other growth clear of the gate. Failure to do this may lead to the gate jamming. 6 ... -
Page 7: Gate Evaluation
GATE EVALUATION It is extremely important to evaluate the gate that is to be automated before any automation is done. The following points must be checked. All of the points mentioned below are common causes of problems if not checked. Ensure that the end stops are secure. It is recommended that steel plates of a minimum 70mm high are used as stops. . Ensure that the wheels are turning freely It is recommended that 16mm round bar is used to assist with the smooth operation of the gate Ensure that the gate is level! The gate must not move on its own when left in any position on the rail. D.A.C.E will not be held responsible for any gates bumping the ends stops when a gate is automated on a slide! Rollers must roll freely. The roller mounting can be used as an antilift device. The catch bracket can also be used as an antilift device All precautions must be taken to ensure that the gate cannot run free of the rollers. A device can be fabricated and fitted to prevent this. The gate must not bind in any way on the bracket when opening or closing. Binding can cause a fuse to blow. 7 ... -
Page 8: Startup Force
START UP FORCE It is important to check the startup force of the gate before the motor is installed. Place the gate in the fully closed position. Using a fishing scale, pull the gate open and check the kilogram force required to start the gate rolling. This is the startup force. At no stage while moving the gate must the reading exceed the force shown in the table below. Start up force table Sprint max. start up force of 18kgs max. running force of 12kgs Condo max. start up force of 28kgs max. running force of 18kgs Note: a good standard household gate of +- 100kgs should have a start up force of 1.5kg - 2.5kg... -
Page 9: Removing The Lid
REMOVING THE LID AND PLACING THE MOTOR IN MANUAL OVERRIDE REMOVING THE LID Step 1 Step 2 Open the access door Pull the pin out, the pin will move about 5 mm PLACING MOTOR INTO MANUAL OVERRIDE Open the door as in step 1 above. Turn the thumbwheel CLOCKWISE until the gate moves freely. The front cover can be removed for ease of operation, as shown bellow. PLACING THE MOTOR IN NORMAL OPERATION MODE Turn the thumbwheel ANTICLOCKWISE. Move the gate by hand until it locks into place. 9 ... - Page 10 ELECTRICAL WIRING (SPRINT & CONDO ) The following section explains how the wiring should be done for the CONDO and SPRINT motors only. · The transformer must be plugged into a normal plug socket in the house. 16 Volts AC is then run directly to the PC board 16V AC connection. The distance between the transformer and the motor should not exceed 50 meters. · The cable should be run in a 300 mm deep trench in a water proof conduit and must be terminated inside the motor.
-
Page 11: Anchoring The Motor
ANCHORING THE MOTOR It is very important that the motor is mounted on a firm foundation that can not move or become loose over time. The foundation should be constructed from concrete. The size of the plinth should be about 300 by 300 mm square and about 200mm deep. The foundation plate supplied with the motor must be securely mounted to the concrete using coach screws and plugs. The foundation plate can also be welded to the gate rail if need be. The concrete should be allowed sufficient time to set before the mo tor is mounted onto the plate. GATE CLOSING TO THE RIGHT GATE CLOSING TO THE LEFT Place concrete plinth here Place concrete plinth here 2 1 Place the conduit in the correct position before filling the Dig a hole about 300mm hole with concrete. Flexible conduit may also be used. 4 Foundation plate 3 Use 8mm coach screws to mount the foundation plate to the concrete Allow concrete to set and then place the Trim the conduit and the cable to the correct length foundation plate onto the concrete plinth before placing the motor onto the foundation plate. Side view Top view Gate 11 ... -
Page 12: Securing The Motor
SECURING THE MOTOR TO THE FOUNDATION PLATE When anchoring the motor it is important to ensure that the following points are checked. · The electrical cable is in position. · The concrete is fully set. · The motor foundation mountings are secure and can not move or become loose. · The motor should be set level and parallel to the gate. · The motor must be set above the flood level or if this is not possible, a flood proof wall should be constructed around the motor. TOP VIEW Antilift device and Rollers PC BOARD After placing the motor onto the three jackup bolts, place the three clamping nuts and washers over the bolts to clamp the motor in place. Gate in fully closed position SIDE VIEW PC board Jackup nuts for adjusting the motor height. Concrete plinth 8mm Coach screws in plugs ENSURE THAT THE MOTOR IS MOUNTED LEVEL 12 ... -
Page 13: Mounting The Rack
MOUNTING THE RACK The rack is a length of steel that has nylon teeth attached to it. The rack is attached to the gate by means of TEK screws. The rack meshes with the pinion gear on the motor which then drives the gate. It is very important that the rack is mounted securely and that the rack meshes with the pinion gear for the full length of the gate . Any section of rack that is too tight or too loose will cause problems with the operation of the gate. Step 1: ensure that the motor is at least 7 mm above the ground level and that the gate is in the closed position. Fig A Step 2: place a piece of the rack on the pinion of the motor, ensuring that the teeth of the rack and the pinion mesh correctly. Step 3: now fasten the rack to the gate using the TEK screws. The TEK screw should be placed in the centre of the slot in the rack so as to allow for adjustment later. FIG B Step 4: push the gate towards the open position continuing to secure the rack to the full length of the gate. Ensure that the rack is securely meshed with the pinion at all times during this operation. Repeat step 4 until the full length of rack is attached to the gate. Step 5: using the jackup bolts under the motor, drop the motor 2mm, this allows a slight gap be tween the teeth of the rack and the pinion so as to prevent any binding or tight spots on the rack. FIG C Step 6: push the gate all the way open and closed to check that the rack is meshing with the pinion for the complete length of the gate. Check that the rack is not touching the motor while running and also check that the rack covers at least three quarters of the pinion at all times when viewed from above. A Place TEK screw here B Start with 7 mm space Place the TEK screws as shown bellow for the complete length of rack. IT IS RECOMMENDED THAT THE RACK IS MOUNTED AS SHOWN AND NOT C INVERTED , AS THIS MAY CAUSE OB STRUCTION SENSING PROBLEMS Drop motor by 2 mm when rack is secured to gate. 13 ... -
Page 14: Filling The Gearbox Oil
FILLING THE GEARBOX OIL VERY IMPORTANT: GEARBOX MUST BE FILLED WITH THE SUPPLIED OIL BEFORE THE MOTOR IS OPERATED! The gearbox oil level needs to be checked periodi Fill the gearbox as shown bellow. The entire cally. To check the oil level, remove the oil level bottle needs to be emptied into the gearbox. screw . Oil should be added until the oil just starts to run out of the hole. REPLACE THE SCREW! Oil level screw Use S.A.E.75W/90 oil to refill the gearbox MOUNTING THE MAGNET 700 mm Magnet As shown above, with the gate in the closed position, the magnet must be mounted 700 mm from the centre of the motor. If it is not possible to mount the magnet at 700mm, this distance may be extended very slightly. The mag net must not be inverted. If the magnet is moved for any reason after the motor has been programmed, then the motor will have to be reprogrammed. The gap between the motor and the magnet, when the magnet passes the motor, must not exceed 3mm. To check this, manually move the gate until the magnet is directly over the pinion gear then measure be tween the magnet and the motor lid. If the gap is more than 3mm, place washers behind the magnet until the correct gap is achieved Maximum gap between the magnet and the motor 3 mm Place washers here if gap is not correct 14 ... -
Page 15: Main Pc Board Layout
MAIN P.C.BOARD LAYOUT This PC board is a very sensitive piece of equipment and must be handled with extreme care. The electronic components that are found on the board are sensitive to static electricity and should not be handled or tampered with unless by an authorized D.A.C.E. agent. It is safe to connect electrical wiring to the wiring connectors on the board, but this must be done according to the instructions in this manual. It is very important to remember to disconnect ALL power before connecting or discon necting any wiring. LCD screen connector Light/Lock connector On board receiver Rev Counter connector Marker connector Current Sensing pots Battery wires Auxiliary connectors Earth wire Green & Yellow 16 Volt AC connector from transformer LED extension con nector 20 amp motor fuse x 2 Infra Red jumper Open/Close/Status LED Program jumper Learn / Erase remote jumpers Test button Dipswitches Motor wire connectors 15 ... -
Page 16: Lcd Screen
LCD SCREEN The LCD is an easy to use screen that gives the owner / installer information regarding programming and motor status. Whenever the motor is programmed or a fault occurs, refer to the screen for diagnostic assis tance. In certain cases the screen will give a message that reads “Call Technician’ this means that the motor needs to be checked by an installer. The messages on the screen are generally self explanatory. However the following table gives a description of the messages and their meaning. LCD SCREEN Some of the messages below have been shortened to show the main message. Certain messages will also show the action needed. MESSAGE MEANING / ACTION LOW BATTERY THIS MESSAGE WILL SHOW AFTER INITIAL START UP, IF THE LOW BATTERY MESSAGE REMAINS AFTER THE MOTOR IS TRIGGERED : CHECK BATTERY VOLTAGE / CHECK CHARGER VOLTAGE MAINS FAIL CHECK THE MAINS POWER / CHECK TRANSFORMER / CHECK CHARGER. GATE CLOSED THE GATE IS IN THE CLOSED POSITION. GATE OPEN THE GATE IS IN THE OPEN POSITION. OBSTRUCTION THE GATE HAS SENSED AN OBSTRUCTION. CHECK THE WHEELS / ROLLERS/ RACK/ BRACKETS/ FUSES/ FORCE SETTING POTS. NO REV PULSES FAULTY REV COUNTER, PC BOARD MOUNTING MAY BE LOOSE, MAGNET HOLDER BROKEN. AUTOCLOSE ACTIVE THE GATE IS SET TO AUTO CLOSE. PARTY MODE THE GATE IS IN AUTOCLOSE OVERRIDE . PROGRAM MODE THE GATE IS IN PROGRAM MODE. BEAMS BLOCKED THE INFRARED SAFETY BEAMS ARE BLOCKED / FAULTY/ THE BEAMS LINK HAS BEEN REMOVED. PROGRAMMING CLOSE POSTION ... -
Page 17: Setting The Motor Direction
SETTING THE MOTOR DIRECTION The following diagrams show the correct wiring of the electric motor to the main PC board. The motor wires are found extending from the motor, there are two wires, one wire is blue the other wire is black. GATE CLOSING TO THE LEFT GATE CLOSING TO THE RIGHT BLUE WIRE BLACK WIRE BLACK WIRE BLUE WIRE Closing direction Closing direction It is important to set the motor direction, as this will influence the programming of the motor and the security of the motor. The motor is set to automatically close whenever the power is applied and the test button is pressed for the first time. If the gate runs open when the test button is pressed during programming it means that the motor wires are incorrect. The motor wires are the two wires that extend from the electric motor and are connected to the main PC board. The other reason that the setting of the motor direction is important, is that the motor will automati cally drive to the closed position after a prolonged power failure (if the gate is in the open position). Setting the correct motor direction will, in this situation, prevent the gate from suddenly opening and remaining in the open position. 17 ... -
Page 18: Programming The Motor
PROGRAMMING THE MOTOR The motor must be programmed in order that the gate operate correctly. Once programming is com plete, the program is held in the memory on the microchip and there is no need to reprogram the motor after the initial program. It is important to note that the following points should be checked before the gate is programmed. · Gear box is filled with the gearbox oil. · Motor is level. · Rack is secure to the gate and engaged with the pinion gear. · The gate has adequate end stops. (DO NOT automate a gate without end stops) · The gate must run freely and not jam at ANY point in its travel. · The magnet is mounted correctly. TO PROGRAM THE MOTOR: Ensure that all power is removed from the board. The LCD screen is designed to assist with the programming of the motor. Step 1: manually open the gate 1m 1.5m. Step 2: engage the motor using the thumb wheel. Step 3: have dip switch 1 & 2 in the 'ON' position Step 4: apply the battery power. The three LED’s will flash rapidly. The LCD will say “ PROGRAM MODE PRESS BUTTON” Step 5: press the TEST button on the PC board. The gate will automatically do the following: a) Close slowly until the end stop is struck b) Open slowly until the end stop is struck. Step 7: after closing it will automatically reopen. Now the LCD screen will say 'PUT SW 1 OFF' The motor is now fully programmed and ready for normal use. ... -
Page 19: Setting The Overcurrent
SETTING THE OVERCURRENT It is recommended that the current sensing is left as set in the factory. Increasing the current sensing may cause serious injury or damage in the case of the gate striking a person or object. Overcurrent is the amount of force that the motor delivers before stopping when an object is struck. The amount of force is controlled by the two potentiometers (pots) found on the main PC board. To increase the amount of force turn the pots clockwise. To decrease the amount of force turn the pots counter clockwise. NOTE! the current sensing is set in the factory and should only be changed if absolutely necessary. Using a small flat screwdriver turn the pots to increase or decrease the current sensing of the motor PROGRAMMING THE REMOTES To program remotes to the on-board receiver complete the following steps. (Note: once remotes are programmed, the jumper must not be left on both pins, can be connected to 1 pin for safe storage) It is recommended that the remotes are numbered in order of programming. -
Page 20: Setting Party Mode
SETTING PARTY MODE (AUTOCLOSE OVERIDE) Party mode is the autoclose override mode. This means that the gate will remain open and ignore the autoclose time. To set party mode: Press and hold the remote button down. The gate will open immediately. Continue holding down for 15 seconds until the LCD displays PARTY MODE. To reset the gate to normal operation: Press the remote button twice within two seconds. The gate will start to close. The gate is now in normal mode again and will use the Autoclose function. AUTO-CLOSE Auto-close is an option that allows the gate to close automatically after a chosen time delay, this delay can be from 10 to 70 seconds. Auto-close is selected by using the dipswitches on the main PC Board. Dipswitch numbers 6,7 and 8 are the auto-close time select switches. - Page 21 TECHNICAL SPECS SPRINT CONDO Single Dwelling Application: Only Town House Maximum number of open ings: for a gate <200kg 40 120 for a gate <300kg 20 50 for a gate <500kg 10 10 Maximum Gate Mass: 500kg 500kg 11m Maximum Gate Size: 11m Collision Sensing: Electronic Electronic Duty Cycle: 20% *** 20% *** Motor Voltage: 12 Volt 12 Volt Motor Power: 120 watts 120 watts 25m/min Opening Time: 18m/min Supply Voltage at Gate: ...
Need help?
Do you have a question about the SPRINT and is the answer not in the manual?
Questions and answers
How to set the remote on gate motor
To set (program) the remote for the D.A.C.E SPRINT gate motor:
1. Locate the on-board receiver on the main control board.
2. Follow the steps to program the remote (exact steps are not fully provided in the context).
3. After programming, remove the jumper from both pins. It can remain connected to only one pin, but not both.
Note: Ensure the jumper is not left on both pins after programming.
This answer is automatically generated
When i press rhe remot the gate opens slowly and then when i close it it closes fast but when reaches theend stop clossing it doesntslowdown it bangs at the clossing stop