Advertisement
Entryway Rack Assembly Instructions
Hi, thank you so much for
purchasing the Entryway Rack.
Before you get started with the
assembly, we have a couple of tips:
1. Find a soft surface for the assembly process
to avoid any scratching (e.g. on top of a rug,
a carpet, or even the broken down shipping box)
2. It's easiest to assemble with two people, so feel
free to grab a friend or family member, but only
one person is needed
Advertisement
Table of Contents

Subscribe to Our Youtube Channel
Summary of Contents for OPEN SPACES Entryway Rack
- Page 1 Entryway Rack Assembly Instructions Hi, thank you so much for 1. Find a soft surface for the assembly process to avoid any scratching (e.g. on top of a rug, purchasing the Entryway Rack. a carpet, or even the broken down shipping box) 2.
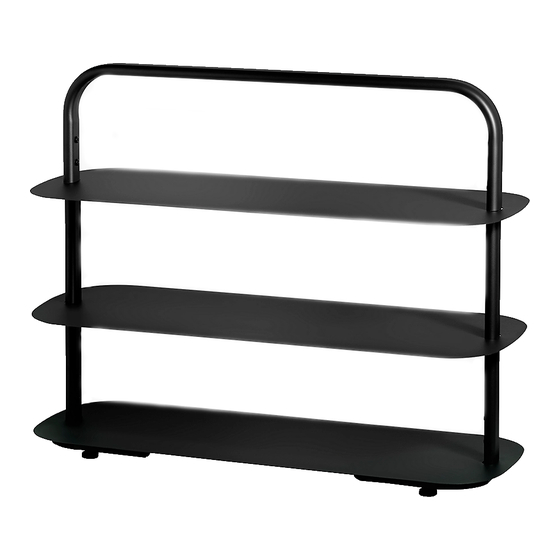
- Page 2 Assembled Product Max Load Per Shelf: 22 lbs (10 kg) Package Contents M5 x 30mm Bolt M5 x 15mm Bolt Rubber Feet Entryway Rack Allen Key Shelf Assembly Cardboard Insert Open Spaces | Entryway Assembly Instructions Page 2...
- Page 3 Step 1: Fit the 4 rubber feet into the bottom shelf Step 2: Insert the 2 upright tubes into the base Step 3: Use allen key to secure each tube with 2 bolts (M5 x 15) Open Spaces | Entryway Assembly Instructions Page 3...
- Page 4 Step 6: Slide the shelf over the uprights to align with the lower set of holes Step 7: Use allen key to secure with 2 bolts (M5 x 30) on each side of the shelf Open Spaces | Entryway Assembly Instructions Page 4...
- Page 5 Step 9: Use the cardboard insert to position the shelf at the correct height Step 10: Use allen key to secure with 2 bolts (M5 x 30) on each side of the shelf Open Spaces | Entryway Assembly Instructions Page 5...
- Page 6 If you need any help, please don’t hesitate to email us at help@getopenspaces.com any time of the day and we will get back to you during our office hours from 9am – 6pm ET. Open Spaces | Entryway Assembly Instructions Page 6...
Need help?
Do you have a question about the Entryway Rack and is the answer not in the manual?
Questions and answers