Advertisement
Quick Links
Advertisement

Summary of Contents for PENTA Premium Stringer 7600
- Page 1 7600/8600 S TRINGING ACHINE ’ ANUAL...
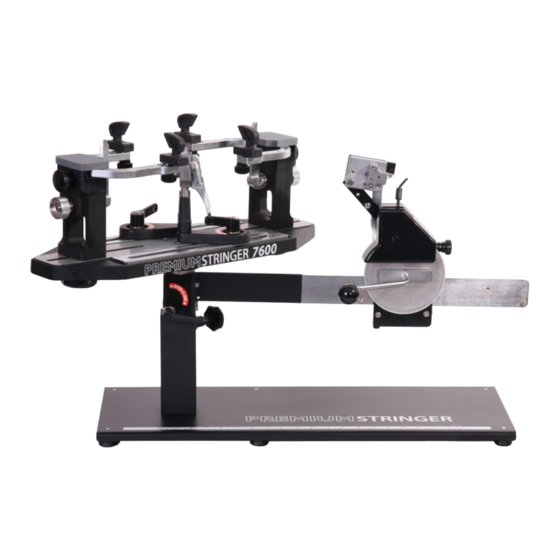
- Page 2 ANATOMY...
- Page 3 1. Machine Body along Tension-Head Assembly 2. Table Top Base 3. Tennis Swivel Clamp 4. Swivel Clamp Base 5. Side Support 6. Side Support Arm Adjustment Knob 7. Center Support Adjustment Knob 8. Mounting Stock 9. Turntable 10. Mounting Stock Locking Knob 11.
- Page 4 ASSEMBLY Step 1 : Adjust the machine body to the desired height and lock in place with the height adjustment knob. Step 2 : Unlock the turntable by loosening the brake. Step 3 : Insert two string clamps into the string clamp bases and four side supports in the holes of the side support arms.
- Page 5 Step 4 : Unlock the tension head by pushing the tension head by pushing the tension locking lever back into catch.. Rotate the crank/handle counter-clockwise to slide the tension head to get closed to the racquet mount.
- Page 6 MOUNTING THE RACQUET FRAME Begin by turning the black (side support adjustment) and chromed (center support adjustment) knobs on the two mounting stocks counterclockwise to open the side support arms and reduce the spread of the vertical supports. Spread the mounting stocks so that the vertical centers supports fit within the racquet head without touching it.
- Page 7 STRINGING INSTRUCTION Please consult the stringing instructions from each racquet manufacturer for correct stringing patterns and tensions. 1). STARTING POSITION Move t h e t e nsion he ad t o starting pos ition f o r s tringing. Slide t h e t e nsion he ad s o t h at with t h e ha ndle up, t he s tring gripper c omes within 1”...
- Page 8 3). PULLING THE STRINGS To pull the string, continue rotating the tension head handle backward until the t e nsion l e ver c licks out . This c locks t h e t e nsion he ad t o t e nsion arm. 4).
- Page 9 5). ADJUST STRING CLAMP TO THE CORRECT HOLDING PRESSURE *If gripper of the string clamp is over tension, turn the thumb wheel adjustment of the string clamp counterclockwise to the correct tension by needle nose pliers or fingers adjusting directly. *If gripper of the string clamp doesn’t hold string well, turn the thumb wheel adjustment of the string clamp clockwise to the correct tension by needle nose pliers or fingers adjusting directly.
- Page 10 6). ADJUST THE BASE OF THE SWIVEL CLAMP TO THE CORRECT HOLDING PRESSURE...
- Page 11 CALIBRATION 1. Set the tension scale on 60 lbs and the collar on 0. Place a string attached to a tension calibrator in string gripper. Tension calibrator will indicate the pounds of tension on tension head under actual stringing conditions. Pull string until the locking lever releases.
- Page 12 2. Loosen the safety screw A. If the locking lever release before 60 lbs., turn the adjustment screw B counterclockwise until the scale reading matches the calibrator’s; if the locking lever release after 60 lbs., turn the adjustment screw B clockwise. WARNING: Be sure to tighten the safety screw A after the adjustment has been made.
-
Page 13: Maintenance
MAINTENANCE 1. The stringing machine is adjusted and calibrated properly before shipping. It is designed to work snugly and be relatively maintenance-free. 2. Always keep the stringing machine in a clean and safe place. Keep it away from dust, grease, moisture and any source of heat. 3.
Need help?
Do you have a question about the Premium Stringer 7600 and is the answer not in the manual?
Questions and answers