
Subscribe to Our Youtube Channel
Summary of Contents for SwipeSimple Swift B250
- Page 1 Swift B250 Card Reader NFC Contactless | EMV Chip Cards | MagneticStripe Star Micronics mPOP Cash Drawer | Bluetooth Receipt Printer SwipeSimple Register Setup Guide - mPOP - Version 2018.1...
-
Page 2: Table Of Contents
Pairing the mPOP with Your Device Downloading the SwipeSimple App Logging into SwipeSimple Printing a Test Receipt and Testing the Cash Drawer Connecting the Swift B250 Optional: Printing Receipts Automatically All Set! Quick Troubleshooting Steps SwipeSimple Register Setup Guide - mPOP - Version 2018.1... - Page 3 Setup should take between 5-10 minutes Before setting up your SwipeSimple Register, please ensure that you have the following items: CARD READER • Swift B250 card reader • Swift B250 charging stand • Micro USB cable (connect one end to the...
- Page 4 STEP 1a CONNECTING THE MPOP First, we’ll set the equipment up and connect them to a power source (power strip, wall outlet, etc.) Connect the power cable to the underside of the mPOP, and an available outlet or power strip. Turn it on using the switch, a blue light will illuminate.
- Page 5 STEP 1b LOADING THE RECEIPT PAPER ROLL To load the receipt paper roll, pull out printer, open printer cover, and set roll of paper as illustrated. Please ensure that you’re using a 2.28 in x 85 ft thermal receipt paper roll. Push to Release Printer Push the front face of the printer to unlock and pull out the printer...
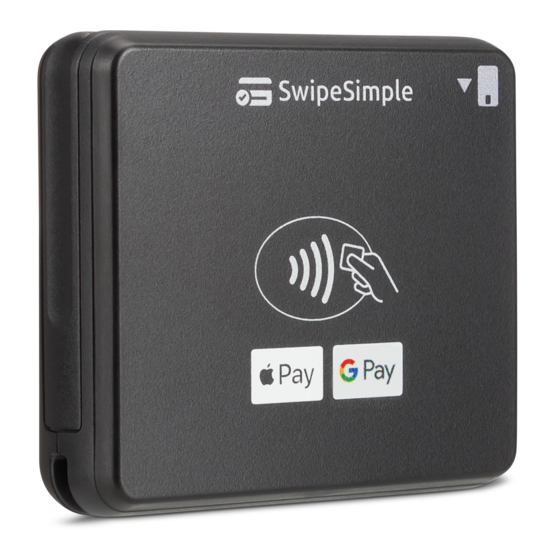
- Page 6 STEP 1c CONNECTING THE SWIFT B250 CHARGING STAND Place the Swift B250 reader into the charging stand with the NFC symbol ( ) facing towards you. Securely fasten your reader by pushing the reader into the charging stand until it clicks.
-
Page 7: Pairing The Mpop With Your Device
COMPLETING THE SETUP Setup is complete when the “lightning bolt” on the mPOP is illuminated, your device is switched on, and the LED indicator above the power button on the Swift B250 is blinking blue. STEP 2 PAIRING THE MPOP WITH YOUR DEVICE... - Page 8 iOS: On your device, go to Settings > Bluetooth. Turn Bluetooth on. Locate your mPOP’s serial number in the Bluetooth devices section. The serial number can be located on the underside of the mPOP, or on the box in which Android: your mPOP came in.
- Page 9 Android: If you are using an Android device, in the “Available Devices” section, select the printer using STAR mPOP-CXXXX serial number. iOS: Once selected and successfully paired, the mPOP’s serial number will move from “Other Devices” to “My Devices” and be shown as “Connected”...
-
Page 10: Downloading The Swipesimple App
“SwipeSimple”. STEP 4 LOGGING INTO SWIPESIMPLE Once the SwipeSimple app is installed, open it and login to your SwipeSimple account using the login information from the Welcome Email you received. This email will have the subject line Welcome to SwipeSimple. - Page 11 iOS: Select the printer using your STAR mPOP- CXXXX serial number. It may take a few seconds for your device to detect the printer when connecting for the first time. Android: To refresh the list of devices, simply pull and release the Device Management panel.
-
Page 12: Connecting The Swift B250
CONNECTING THE SWIFT B250 After connecting the mPOP, we’ll now connect the Swift B250 with your device. Please note that the Swift B250 does not need to be paired with your device, connection is done entirely through the SwipeSimple app. - Page 13 6c. Select the card reader with your Swift B250’s serial number. The serial number can be located at the back of the Swift B250, or on the side of the box in which your Swift B250 came in. Format: Swift XXXX, with the last four digits...
-
Page 14: Optional: Printing Receipts Automatically
OPTIONAL: PRINTING RECEIPTS AUTOMATICALLY To print receipts automatically at the end of every transaction, go to Settings > Receipts on the SwipeSimple app. 7a. Set the number of receipts to print automatically by selecting between “0 copy”, “1 copy”, and “2 copies”. - Page 15 Follow the steps in Step 2 to repair the mPOP with your device. ISSUES CONNECTING THE MPOP 1. Ensure that your device’s OS and the SwipeSimple app are up to date. SwipeSimple Register requires iOS version 9.0 and above, Android version 5.0, and SwipeSimple 4.6.0 and above.
- Page 16 2. Reload the paper roll and close the cover. Please ensure that the paper roll is loaded in the correct direction, see Step 1b for more instructions. 3. Remove anything that may prevent the cash drawer from opening. In the SwipeSimple app > Settings > Device Management, select your mPOP and Test Cash Drawer.
- Page 17 ISSUES OPENING THE CASH DRAWER The mPOP has a maximum withstanding load of 17 lbs. A heavy load placed on the mPOP may prevent the cash drawer from opening. To open the cash drawer manually, use the multi-function button or lock release lever: 1.
- Page 18 A full charge may take up to 2 hours. 3. To power up your Swift B250 card reader, press and hold the power button for 5 seconds. The LED indicator will blink blue when successfully switched on.
- Page 19 Swiped Payments: Ensure that the magnetic stripe of the card is facing the front of the Swift B250 card reader when swiping. Swipe the card in a slow fluid manner when prompted by SwipeSimple.
- Page 20 For more information, please visit home.swipesimple.com/support-center or contact Retriever Merchant Solutions...
Need help?
Do you have a question about the Swift B250 and is the answer not in the manual?
Questions and answers