Table of Contents
Advertisement
Quick Links
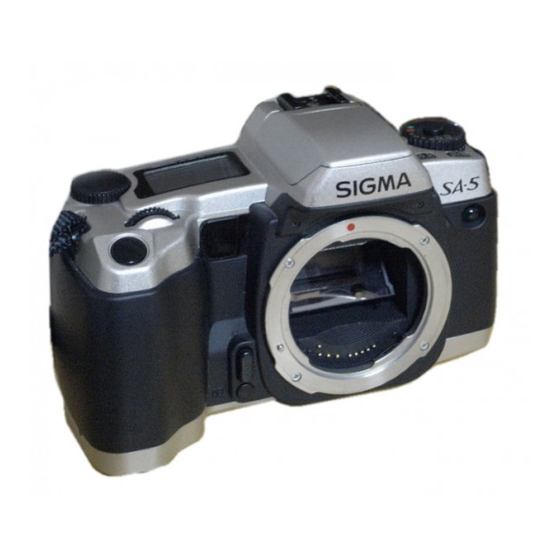
Sigma SA-5
AKA - SA-300 or 300N
This camera manual library is for reference and historical purposes, all rights reserved.
This page is copyright by
, M. Butkus, NJ.
This page may not be sold or distributed without the expressed permission of the producer
I have no connection with Chinon Co., Japan
On-line camera manual library
This is the full text and images from the manual.
If you find this manual useful, how about a donation of $3 to:
M. Butkus, 29 Lake Ave., High Bridge, NJ 08829-1701
and send your e-mail address so I can thank you.
Most other places would charge you $7.50 for a electronic copy
or $18.00 for a hard to read Xerox copy.
This will help me to continue to host this site, buy new manuals, and pay their shipping costs.
It'll make you feel better, won't it?
If you use Pay Pal, use the link below. Use the above address for a check, M.O. or cash.
Back to main camera manual page
Advertisement
Table of Contents

Related Manuals for Sigma SA-5


Summary of Contents for Sigma SA-5
- Page 1 Sigma SA-5 AKA - SA-300 or 300N This camera manual library is for reference and historical purposes, all rights reserved. This page is copyright by , M. Butkus, NJ. This page may not be sold or distributed without the expressed permission of the producer I have no connection with Chinon Co., Japan...
- Page 2 --Partial metering --Average metering * Mirror-up and Preview mechanism To make the most of all these features, and to get the maximum performance and enjoyment from your Sigma SA-5 Camera, please read this instruction booklet before using the camera. INDEX CAUTION ..
- Page 3 HOLDING THE CAMERA SHUTTER BUTTON INSERT THE FILM SETTING THE FILM SPEED MANUALLY PRINTING DATE AND TIME ... BASIC OPERATION ... TAKING A PICTURE BY * MODE .. REWIND THE FILM ....UNSUITABLE SUBJECT FOR AUTOFOCUS ..FOCUS LOCK ..FOCUS MANUALLY ..
- Page 4 BULB SETTING SELECTING THE METERING AE LOCK... AUTO BRACKETING ... EXPOSURE COMPENSATION BUILT-IN FLASH MIRROR UP OPTIONAL ACCESSORIES REMOTE CONTROLLER RS-11 AND RS-21 EXTERNAL FLASH EF-43 PHOTOGRAPHY TIPS ..SNAPSHOT PHOTOGRAPHY SCENERY PORTRAIT MOVING SUBJECT CLOSE-UP PHOTOGRAPHY. NIGHT SCENES WARNING INDICATIONS DEPTH OF FIELD INFRARED PHOTOGRAPHY REPLACING THE DATA BACK BATTERY...
-
Page 5: Description Of Parts
* Do not use this camera with any external flash unit other than the Sigma EF-430, which has special contact pins on the hot shoe. This flash is offered as an optional accessory. Other external flash units may damage the camera's circuitry or may not work properly. - Page 6 When you press the Exposure Compensation/Drive Mode Button and Flash Mode Metering Mode Button simultaneously, the LCD Panel will illuminate for about seconds. LCD AND VIEWFINDER INFORMATION...
-
Page 7: Basic Operation
If you press both buttons simultaneously again, the illumination will disappear. If you press any button or turn the dial while Illuminating the LCD, the illumination will continue for an additional 6 seconds. During the charging of the built in flash, the LCD will not Illuminate. At very low temperatures you that due to the nature of the LCD it may take slightly longer to respond - this is not a function problem, but a characteristic of LCDs. -
Page 8: Attaching The Carry Strap
4. Set the mode dial to the " " position. Turn the mode dial while pressing the lock button. 4www.butkus. org 5. Insert the film Insert the film and align the tip of the film with the Film Position Mark. Then close the back cover. 6. -
Page 9: How To Use The Finder Cap
HOW TO USE THE FINDER CAP When using the self-timer or remote control, please cover the finder eyepiece with the Finder Cap. Remove the eye cap from the finder. Insert the finder cap onto the finder. INSERTING THE BATTERY This camera uses a 6 V 2CR5 Lithium Battery. Without a battery, the camera will not function at all. 1. -
Page 10: Checking The Battery
3. Close the battery cover until it clicks and locks closed. CHECKING THE BATTERY Turn the mode dial to the "*" position or one of the P. S. A or M positions while pressing the lock button. The battery mark will appear on the LCD panel. The battery strength is good. -
Page 11: Mounting And Removing The Lens
MOUNTING AND REMOVING THE LENS. This camera uses the SA type bayonet mount. For ordinary lenses use the inside bayonet mount (type SA-IB) and for Super Telephoto lenses use the outside bayonet mount (type SA-OB). The mounting methods are same for both type of mounts. -
Page 12: Shutter Button
SHUTTER BUTTON The shutter button of the SA-5 camera has two positions. When you press the shutter button "Halfway Down", the camera's Autofocus and Exposure System activates. Then you press the button "All-the-way Down", and the shutter will release to take a picture. -
Page 13: Setting The Film Speed Manually
4. Push the cartridge in firmly, and align the tip of the film with the Film Position Mark. 5 Check to be sure that the film sprocket holes are properly engaged with the teeth of the film transport sprocket wheel. 6. -
Page 14: Printing The Date And Time
2. Set the mode dial to 3. Turn the A-dial to set the desired film speed. When you set the film speed manually, the DX will disappear on the LCD panel even if you use the DX coded film. 4. Turn the mode dial to the desired exposure mode. You can check the current film speed setting when you set the mode dial to the "... - Page 15 If the Data Back LCD becomes light and difficult to read, please replace the battery in the data back. The SA-5 camera has many features. This part describes the basic camera operation using Full Automatic Mode " " and the functions you can use in this mode.
- Page 16 Align the subject In the AF frame 4www. but kus.org . When you press the shutter button "Half-way", the camera will focus automatically, and the shutter speed and aperture speed are displayed in the viewfinder and on the LCD panel. .
- Page 17 REWIND THE FILM If you use DX coded film with 12, 20, 1 24 or 36 exposures, the number in the film counter will blink when the remaining frames becomes less than 3. After the last frame has been exposed, L the camera will automatically rewind the film.
- Page 18 If the rewind motor stops while rewinding the film due to low battery power, do not open the back cover. Replace the battery and press the rewind button. You should open the back cover only after "End" appears on the LCD panel. This camera reads the film's number of exposures from the DX code and will I rewind the film automatically after the last frame is exposed.
-
Page 19: Focus Lock
FOCUS LOCK Occasionally when the main subject does not fall within the focus frame in the viewfinder, or the subject is unsuitable for the autofocus system, you can lock the focus distance temporarily. If the subject isn't in the focus frame when you compose the picture, the camera will focus on the background. - Page 20 FOCUS MANUALLY If the subject is unsuitable for use with the autofocus system and hard to use with the focus lock, you can focus manually. Set the lens switch to the MF position. (switch is located on lens by lens mount) 4www.butku s.org While looking through the finder, turn the focusing ring on the lens until you get a clear sharp image.
-
Page 21: Using The Built-In Flash
USING THE BUILT-IN FLASH When you press the shutter button "Half-way", and the flash indicator in the viewfinder blinks, the camera has determined that the shutter speed will be very slow or the subject is strongly back light. In this case, we recommend that you use flash. -
Page 22: Red-Eye Reduction
RED EYE REDUCTION When you take a flash picture, sometimes the person's eyes reflect the flash light and appear" red-eye" in the picture. Use the red-eye reduction mode when you photograph a person who is looking directly at the camera. The flash will blink several times about one second before the picture is taken. - Page 23 The lens hood may intrude into the light path of the built-in flash unit, resulting in a shadow at the bottom of the picture. Either remove the lens hood, or use an external flash unit. If the lens has a built-in lens hood, it should not be used with the built-in flash, as it may cause a shadow in part of the picture.
- Page 24 OPERATION OF THE DRIVE MOTOR When you use the " " mode, you can chose one of three drive mode. To make your selection press the Drive Mode Button and turn the A-dial while pressing the button until the desired mode is displayed on the LCD panel.
- Page 25 2. SELF-TIMER (C2) When you want to include yourself in the picture, put the camera on the tripod or other camera support and sue the self timer. When you press the shutter button, the self-timer ready light will come on, and you will have 10 seconds to get in front of the camera. The LCD panel will also count down the remaining time.
- Page 26 3. REMOTE CONTROLLER MODE (C3) Select this mode when using the optional remote controller RS-11 or RS-21. This mode has three channels but if you use with RS-11 you should set to "C1". See The remote controller mode will be cancelled if you set the mode dial to the "L" position. FIXED AND SELECTABLE FUNCTIONS IN THE * MODE...
-
Page 27: Advanced Functions
If you accidentally set any function other than above "selectable functions" while in the "*" mode, " Auto'' will blink on the LCD panel. ADVANCED FUNCTIONS This section describes those advanced features which are used in the camera modes other than the " "... -
Page 28: Selecting The Exposure Mode
3. AF The camera focuses on the subject continuously. You can release the shutter any time even if the subject is not in focus. If the subject is in motion the camera will focus continuously and adjust the focus to maintain focus. - Page 29 If the subject is too bright or too dark, both I shutter speed and aperture value indicators will blink and will show limit values. If the subject is too bright, use an ND filter to reduce the brightness. If the subject is too dark, use the flash.
- Page 30 2. S - SHUTTER SPEED PRIORITY AE When you set the desired shutter speed, the camera will select the appropriate aperture value. You can achieve stop action effects by selecting a fast shutter speed or express the feeling of speed for a moving subject by selecting a slow shutter speed.
- Page 31 3. A - APERTURE PRIORITY AE When you set the desired aperture value, the camera will select the appropriate shutter speed. You can make the depth-of field deeper or shallower by selecting the aperture value. Set the mode dial to A position. When you press the shutter button "Halfway", the shutter speed and aperture value are displayed in the viewfinder and on the LCD panel.
- Page 32 4. M - MANUAL OPERATION Set both the shutter speed and aperture value according to the indication of the exposure meter. You can change the exposure as you intend. Set the mode dial to M position. When you press the shutter button "Halfway", the shutter speed and aperture value are displayed in the viewfinder and on the LCD panel.
-
Page 33: Selecting The Metering Mode
5. BULB SETTING When long time exposures are required (for shooting night scenes or very dark subjects) the use of the "Bulb" setting is recommended. Set the mode dial to M position. 4www.butkus.org When you press the shutter button "Halfway", the shutter speed and aperture value are displayed in the viewfinder and on the LCD panel. - Page 34 The camera will measure the brightness only inside of the circle as shown in the viewfinder (approx. 9 mm in diameter). This mode is suitable when you wish to set the exposure of a portion of the scene and ignore the influence of rest of the scene.
-
Page 35: Auto Bracket
4. Hold the AE lock button while you compose the picture. Then press th shutter button. If you turn either the S-dial or A-dial while the exposure is locked, the combination of the shutter speed and aperture value will change to combinations which give the same exposure (except when the mode is se on M position). - Page 36 4. Once set the Auto Bracketing is maintained until you set the bracketing amount 0.0 or set the mode dial to the L position. The exposure compensation will be applied as follows in the camera's 4 modes. P mode: Both shutter speed and aperture value will be changed. S mode: Only aperture value will be changed.
-
Page 37: Exposure Compensation
or the brightness changes during the 3 exposures, some of the exposures may be mis-exposed or out of focus. When the end of the film is reached before three consecutive pictures are taken, please retake the all three pictures after reloading with the new film. EXPOSURE COMPENSATION If you want to intentionally overexpose or underexpose the subject, use this function. -
Page 38: Built-In Flash
3. WIRELESS FLASH MODE When you use the optional external flash SIGMA EF-430, wireless flash photography is possible. Please refer to the instruction book of EF-430 for more details. The Wireless Flash Mode will be cancelled if you set the mode dial to the... - Page 39 1. Press the Flash Pop-up Button. The I built-in flash will pop-up and " " will be indicated on the LCD panel. 2. After the flash is fully charged, the flash indicator in the viewfinder will change from blinking to steady. 4ww w.but kus.org 3.
- Page 40 subject is too bright, use an ND filter to reduce the brightness. If the subject is too dark, the camera will proceed to take a flash exposure with the aperture wide open. If you adjust the shutter speed until the aperture value indicator stop blinking, you can get an appropriate exposure for both the subject and background.
-
Page 41: Preview Button
PREVIEW BUTTON The aperture is always fully opened except at the time of taking the photograph, so that you can look through the viewfinder under conditions of maximum brightness. However, when the preview button is pressed, the aperture closes to the size used for taking the photograph so that you can check the depth of field of the subject in the finder. -
Page 42: Optional Accessories
-2.0 OPTIONAL ACCESSORIES To expandable the SA-5's photographing ability, we have developed some innovative accessories which are described in this section. This accessory permits releasing the camera's shutter from up to 6 feet (5 m) away from in front of the camera to 9.8 feet (3 m) away if you are 30 degrees to either side. - Page 43 3. Check that the subject is framed correctly After you set the focus, we v recommend setting the lens switch to MF position. 4. Point the transmitting diode at the camera and press the transmit button. 5. The camera's self-timer light will blink, then the shutter will release. 6.
-
Page 44: Photography Tips
* Normal slave and 3 channel Designated Slave Flash mode. For more details, please refer to the catalogue or instruction book of EF-430 super PHOTOGRAPHY TIPS The SA-5 has a variety of features. This section provides several tips on which features to use in various photo situations. SNAPSHOT PHOTOGRAPHY What is snapshot photography? There are many situations where you'd like to take pictures spontaneously without changing setting or modes. - Page 45 To photograph a subject in motion, focusing according to the subject speed is the most important factor. The SA-5's AF-C mode will focus continuously and adjust the subject to the best focus. Using the 8 segment metering and shutter speed priority AE mode for exposure is preferable. A high shutter speed of second and...
- Page 46 CLOSE-UP PHOTOGRAPH Focusing is very important and very difficult in Close-up photography. When you take a picture of a flower, autofocusing cannot help you to make the decision to focus on the petals or the tip of stamens. You should focus on the specific point manually.
-
Page 47: Warning Indications
APPENDIX WARNING INDICATIONS If the Battery mark blinks, the battery is very low and the camera is not operable. Please replace the battery. If the "Err" and the film mark blinks, film has not been loaded properly. Please reload the film. -
Page 48: Infrared Photography
The position of the infrared mark on the Sigma lenses cased on a wave length for infrared light. Depending on the infrared film, peak sensitivity other then 770 nm may require a slightly different setting. We suggest making... - Page 49 REPLACING THE DATA BACK BATTERY This data back uses a 3V CR2025 Lithium battery 1. Open the battery compartment cover by inserting the tip of a small screwdriver or similar tool. 2. Replace the battery. Be sure the (+) end is up 3.
-
Page 50: Precautions During Use
For example, set to the September 18, 1997/20:05 (8:05 PM) 1. Select the Year-Month-Date display by pressing the MODE button. 2. Press the SELECT button. The number for the "YEAR" will blink. Then press ADJUST button to set 97. 4www.butkus .org 3. -
Page 51: Auto Focus
9. Never touch the shutter or mirror. SPECIFICATIONS OF A SIGMA SA-5 TYPE 1 ) Type of camera: 35 mm focal-plane shutter SLR camera with TTL Auto Focus, Auto exposure, Built-in Electronic Flash, and Data back. -
Page 52: Exposure Control
6) Viewfinder indication: Displayed at the bottom of the finder by LCD and LED a) Shutter speed b) Aperture value c) Manual exposure level d) Exposure compensation mark e) Auto bracket mark f) Flash ready indication g) Focus information h) AE lock indicator 7) Mirror: Quick-return half-mirror EXPOSURE CONTROL 1) Light metering:... -
Page 53: Film Transport
4www.butkus.org 2) Battery check: Indicator on the LCD panel OTHERS 1) External flash: Hot-Shoe with Sigma dedicated contacts 2) Back cover: Fixed type with data back module 3) Remote control: By optional remote controller RS-21 and RS-11 4) Mirror up:...
Need help?
Do you have a question about the SA-5 and is the answer not in the manual?
Questions and answers