Advertisement
Table of Contents
GivMohr Sling User Guide (Printed Version)
Initial Fitting and Adjustment
Locking the 4 Tab Buckle for Optimal Fit (Recommended)
o
Handpiece Adjustment Instructions (Optional)
o
Proper Fit Checklist
Donning Instructions
Washing Instructions
Common Modifications
Adding Wrist Splint for proper Wrist Position
o
Decreasing Handle Volume to accommodate Distal Motor Return
o
Mix sling sizes to accommodate different body types and arm lengths (Bilateral)
o
Additional Information
Initial Fitting and Adjustment
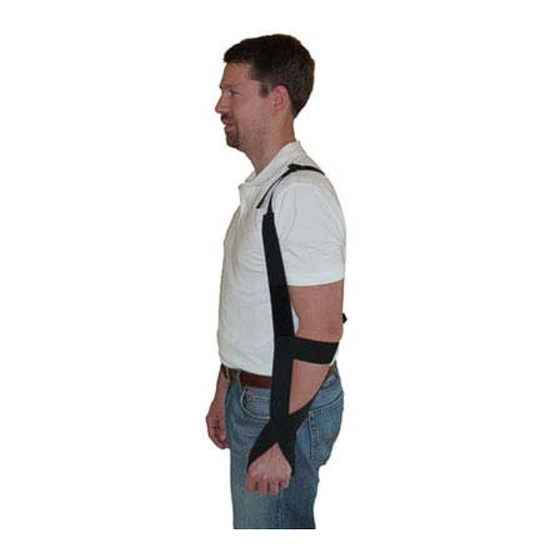
Initial fitting by PT or OT is recommended to ensure proper fit.
1. Orient sling on a flat surface with Blue
Stripe (inside) up
2. Place uninvolved arm through the
shoulder loop
3. Lay sling across back and drape
anterior strap over involved shoulder
4. Position 4-Tab low on back between
shoulder blades
5. Position hand into Handpiece
6. Locate Elbow Strap horizontally 1"
below elbow
7. Adjust both straps at buckles to
reduce subluxation
8. Slide Axillary (Arm Pit) Pad to a
comfortable position
9. Reposition 4-Tab for optimum comfort
and function
10. Lock 4-Tab
11. Adjust Handpiece if needed
12. Adjust posterior strap to bring shoulder into neutral rotation
GivMohr Sling User's Guide – page 1
August, 2015
Advertisement
Table of Contents

Subscribe to Our Youtube Channel
Summary of Contents for GivMohr Sling Sling
- Page 1 Common Modifications Adding Wrist Splint for proper Wrist Position Decreasing Handle Volume to accommodate Distal Motor Return Mix sling sizes to accommodate different body types and arm lengths (Bilateral) Additional Information Initial Fitting and Adjustment Initial fitting by PT or OT is recommended to ensure proper fit.
- Page 2 3. Lock the 4-Tab in place by snapping the webbing under the locking hooks on ALL 4 SIDES 4. Re-check the overall fit of the GivMohr Sling and repeat if needed Occasionally, lower 4-Tab position can be achieved by shifting webbing from front to back (see below).
- Page 3 Flexion/Extension Wrist Adjustment This adjustment is rarely needed and should be made by a therapist. 1. Release both sides of Velcro 2. Rotate elastic position relative to Handpiece to increase flexion or extension 3. Reattach elastic to Velcro GivMohr Sling User’s Guide – page 3 August, 2015 ...
- Page 4 Elbow Strap positioned 1" below elbow and horizontal Wrist Cross centered over wrist (see instructions above) Handpiece position accommodates contour of hand Blue Stripe against body PRECAUTIONS: Thumb web space for skin breakdown Dorsal hand swelling GivMohr Sling User’s Guide – page 4 August, 2015 ...
- Page 5 8. Check Axillary (Arm Pit) Pad position and adjust for comfort if necessary With training and practice, many clients are able to don and doff the sling independently. Washing and Care Instructions 1. Hand Wash in cold water 2.
- Page 6 2. Wrap handle with mole skin to reduce handle size and pad rough edges Mix Sling Sizes to accommodate different Body Types Mixing shoulder harness and arm strap sizes is available to accommodate unique sizes of individuals. For bilateral sling clients, this can be used to accommodate different arm lengths. GivMohr Sling User’s Guide – page 6 ...
- Page 7 Additional Information More information is available online at www.GivMohrSling.com Anatomy of the GivMohr Sling (diagrams and explanations of the sling parts) www.GivMohrSling.com/anatomy.htm GivMohr Sling Demonstration Videos www.GivMohrSling.com/instructions.htm #Demonstration_Video Frequently Asked Questions www.GivMohrSling.com/faqs.htm GivMohr Sling Related Research www.GivMohrSling.com/research.htm Customer Testimonials www.GivMohrSling.com/testimonials.htm Online Contact Form www.GivMohrSling.com/contactgm.htm GivMohr Sling User’s Guide – page 7 August, 2015 ...


Need help?
Do you have a question about the Sling and is the answer not in the manual?
Questions and answers