Advertisement
Table of Contents
- 1 Table of Contents
- 2 Important Safeguards
- 3 Parts and Accessories
- 4 Parts and Accessories FAQ
- 5 Intelligent Control Panel
- 6 Menu Function Selection
- 7 Set up and Using Air Fryer Oven
- 8 Using the Rotisserie Forks to
- 9 Trussing a Whole Chicken
- 10 Cleaning and Maintenance
- 11 Error Codes & Trouble Shooting
- Download this manual
Advertisement
Table of Contents

Subscribe to Our Youtube Channel
Summary of Contents for YEDI AIR FRYER OVEN
- Page 1 YEDI AIR FRYER OVEN www.yedihousewareappliances.com For more recipes go to: If you have any issues or questions regarding your purchase please email us at: info@yedihouseware.com...
-
Page 3: Table Of Contents
Parts and Accessories ..............7 Parts and Accessories FAQ ............9 Intelligent Control Panel..............10 Menu Function Selection............... 11 Set Up and Using Air Fryer Oven ..........13 Using The Rotisserie Forks to ............17 Roast a Whole Chicken Trussing a Whole Chicken............. 18 Cleaning and Maintenance ............ -
Page 4: Important Safeguards
IM P ORT A NT S A FE GU AR D S 1. Read all instructions. 2. Do not touch hot surfaces, use handles and cooking mitts. 3. To protect against electrical shock, do not immerse cord, plugs, or the main unit housing in water or other liquid. 4. - Page 5 16. Oversized foods or metal utensils must NOT be inserted in the air fryer oven as they may create a fire or risk of electric shock. 17. A fire may occur if the air fryer oven is covered or touching flammable material, including curtains, draperies, walls,...
- Page 6 Pull the plug out immediately and clean the food and oil off of the basket, rack, and tray. 19. After using the Air Fryer Oven, please press the power button, then pull the plug from the socket. Do not pull the power cord out too hard.
- Page 7 Press the ‘Temp/Timer’ button again and using the + and – button set to 05 minutes. Press the ON/OFF button and the Yedi Air Fryer Oven will now cook for 5 minutes at 350° burning off any remaining residue left from the manufacturer.
-
Page 8: Parts And Accessories
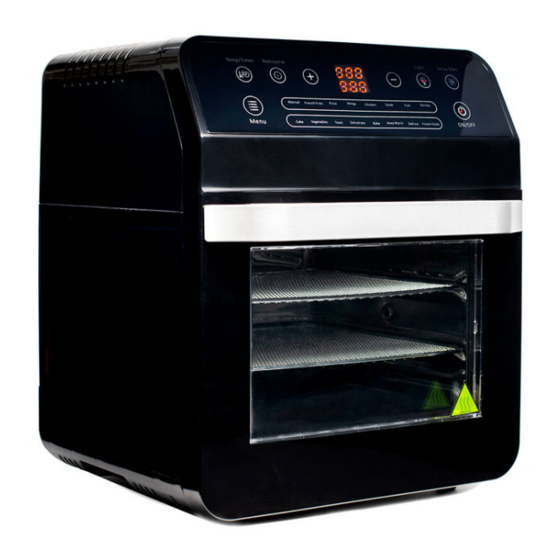
P A RTS A ND A C C ES S ORI ES MAKE SURE THE UNIT RESTS ON A FLAT LEVEL SURFACE 7 INCHES AWAY FROM ANY OTHER WALL OR APPLIANCE AND WELL AWAY FROM ANY CURTAINS, FABRICS, OR CLOTHS . 7"... - Page 9 P A RTS A ND A C C ES S ORI ES Rotisserie Tong Rotisserie Fork Oven Wire Rack Drip Pan Skewer Rotisserie Rotisserie Cage Rotisserie Steak Cage Mesh Basket Mesh Tray X2...
-
Page 10: Parts And Accessories Faq
2. Skewer Rotisserie 3. Rotisserie Cage When using the Rotisserie Rod with the accessories what end goes into the left and right side of the Air Fryer Oven? This is Side A. This is Side B. Side A goes into the Rotisserie Slot. -
Page 11: Intelligent Control Panel
IN TE L LI GENT C ONTR OL P A NE L Product Operate Instruction After plugging in the Yedi Air Fryer Oven it will power on, the buzzer will ring, and the digital screen will flash with all the indicator lights, then it will show a blank screen. -
Page 12: Menu Function Selection
The delay start range can be set from 1 minute - 9 hours 59 minutes using the “+” “-” buttons. 3. Press the "ON/OFF" button to confirm the delay start function and the Yedi Air Fryer Oven will countdown to zero from your set "delay start" time before cooking. - Page 13 When Finished Cooking 1. When the Yedi Air Fryer Oven is finished cooking, it will make a beeping noise and then stop working, but its fan will continue working for 1 minute until the internal center temperature drops.
-
Page 14: Set Up And Using Air Fryer Oven
To prevent personal injury, always use oven mitts to remove contents and always wait until the Unit has cooled sufficient- ly before touching or cleaning any area of the Internal Heating Compartment of the Air Fryer Oven. - Page 15 S ET U P A ND USI NG AI R FR YE R OV EN Rotisserie Skewer: Use for cooking Kebabs. Attaching Rotisserie Rod and Skewer Racks Place the two Skewer Racks at each end of the Rotisserie Rod. Make sure thumb bolts are on the outer side of the Rotisserie Rod.
- Page 16 S ET U P A ND USI NG AI R FR YE R OV EN Rotisserie Steak Cage: Use for cooking tender meats like Fish and Steak 1. Open Steak Cage by compressing handles of the Rotisserie Steak Cage and lifting the latch side out first. 2.
- Page 17 SET UP AND USI NG A IR FRY E R OVE N Removing Rotisserie Forks, Rotisserie Skewers, Steak Cage & Rotisserie Cage from Air Fryer Oven: Open the oven door. While wearing oven mitts on both hands and using the Rotisserie Tongs,...
-
Page 18: Using The Rotisserie Forks To
USIN G TH E ROT IS S ER IE F OR KS TO ROA S T A W H OL E C HIC KE N After the chicken is trussed, carefully maneuver the Rotisserie Rod through the chicken from the neck to the legs. Slide the Rotisserie Forks on both sides of the Rotisserie Rod piercing the chicken;... -
Page 19: Trussing A Whole Chicken
T R U SSI N G A W H O L E C H I C K E N Finding the right size chicken – be careful not use a chicken exceeding the 5lbs max. After preparing, i .e ., seasoning the chicken, truss the chicken using butcher’s twine. a. -
Page 20: Cleaning And Maintenance
CL EAN I NG AN D MA INT E NA NCE NOTE: Be sure to unplug this appliance before cleaning. 1. Please always keep the drip tray in the lowest layer for gather ing oil from fried food. 2. Clean the basket, wire rack, drip tray, etc.. with water or liquid detergent after using.
Need help?
Do you have a question about the AIR FRYER OVEN and is the answer not in the manual?
Questions and answers
Is there an internal fuse in this? If so, where is it located?