
Related Manuals for Seacam SEAFLASH 160DIGITAL

Summary of Contents for Seacam SEAFLASH 160DIGITAL
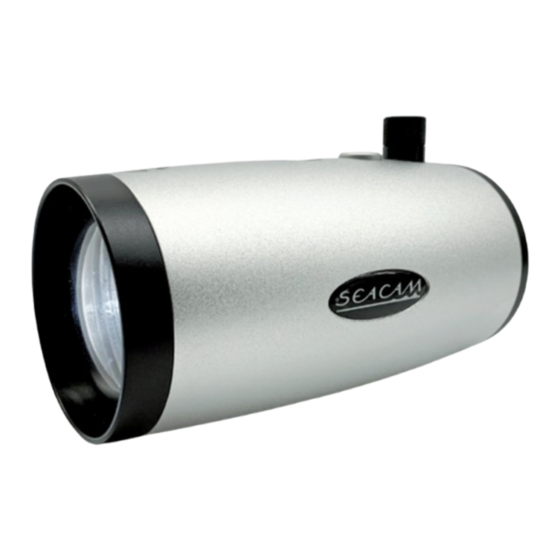
- Page 1 silver USER MANUAL SEAFLASH 160 DIGITAL SEAFLASH 160 OFFSHORE CANON TTL / NIKON TTL / SLAVE TTL...
- Page 2 SEAFLASH 160o . The document can be downloaded at digital ffshore www.seacam.com/en/service/downloads/manuals or from the QR Code enclosed. Trademark Information CANON is a registered trademark of CANON INC. NIKON is a registered trademark of NIKON CORPORATION. SEACAM is a registered trademark of SEACAM.
-
Page 3: Table Of Contents
Contents Safety Instructions General Description Controls and Parts Compatible Cameras Quick Guide Battery Management and Maintenance 1. General Information 2. Battery Recharge 3. Battery Maintenance and Refreshing Pilot Light Shooting Mode – Cable 1. E-TTL, I-TTL, film-TTL 2. Manual Mode 3. - Page 4 Contents Setup Menu 1. Pilot Light 2. Display 3. Prelamp 4. Camera types & Multiple flash 5. Other Settings & Data Firmware Upgrade 1. Procedure 2. Upgrade Error Codes General Error Codes Maintenance Accessories 1. Standard Accessories 2. System Accessories 3.
-
Page 5: Safety Instructions
• Do not fire the flash unit directly into the eyes of someone that is at close range, as it could seriously damage the retinas of their eyes. • Use only SEACAM accessories and original TTL- / fiber optical cable which are delivered with the flash. - Page 6 Safety Instructions • Before using the flash with a camera brand not listed in this manual contact SEACAM. • Never connect a power supply or battery charger to the synchro connection of the unit or to the USB Adapter. • Do not remove the battery pack from the battery container if the unit is still switched •...
-
Page 7: General Description
General Description The SEAFLASH 160 and SEAFLASH 160 are different in the maximum digital offshore rate of depth only. The standard depth rate is -80 m / -240 ft. The offshore depth rate is -200 m / -600 ft. All electronic features and the accessories are the same. In the further manual both strobes are called SEAFLASH 160 digital SEAFLASH 160... - Page 8 General Description The SEAFLASH 160 features Canon e-TTL, Nikon i-TTL, multi-TTL, Film TTL digital and manual power adjustment, TTL mode exposure adjustment +3 to -3 aperture in 1/3 steps. Manual mode works in 14 different power settings from 1/1 to 1/64 - minimum power settings in 0,5 aperture steps from 1/1 to 1/64.
-
Page 9: Controls And Parts
Controls and Parts Control Panel 1 Power Switch / Mode selector 2 Rotary Switch – multi purpose 3 Push Button / Pilot Light / Input control 4 OLED Display 5 Multicolor Ready Light Indicator LED 6 Safety Lock Button 7 Battery Compartment / Cap Front 8 Front Slave Sensor 9 Flash Bulb / Refl ector... - Page 10 Controls and Parts Connections 11 S6 Synchro Socket 12 Fiber Optical Socket 13 M8 Connection Thread M8 Connection Thread 14 Macro Protection Ring, Macro Protection Ring, removable Battery Pack 15 Power Adapter Socket 16 Recharger LED Indicator 17 Minus (-) Battery Pin 18 Plus (+) Battery Pin 19 Battery Pull Ring...
-
Page 11: Compatible Cameras
Compatibile Cameras The SEAFLASH 160 is suitable for CANON and NIKON digital and film digital cameras, in e-TTL, i-TTL, film -TTL and in manual mode. All special functions as, +/- flash compensation, automatic AF- light, pre-exposure lamps, automatic standby, 2nd curtain exposure etc. are supported. Other camera brands can be used in manual mode. -
Page 12: Quick Guide
An M8 ball adapter is required to attach a fl ash arm to the fl ash unit. Use the original SEACAM M8 ball adapter (not included) – it is mounted onto the M8 connection thread (13). ATTENTION! - Page 13 Quick Guide In TTL mode, correct the exposure if needed +/- with the rotary switch (2) 1/3 aperture per step. In MAN manual mode, adjust the power setting with the rotary switch (2) – increasing the power rotating clockwise and decreasing the power rotating counterclockwise. Half aperture per step.
-
Page 14: Battery Management And Maintenance
When floating occurred, remove the battery pack immediately, rinse with fresh water and dry the battery compartment completely. By using a spare battery, you can continue shooting. Send the unit to a SEACAM service facility for a complete check as soon as possible. -
Page 15: General Information
Battery Management and Maintenance ATTENTION! ATTENTION! Never remove the battery pack from the battery compartment when the fl ash unit Never remove the battery pack from the battery compartment when the fl ash unit is still switched on! To prevent slow deep discharge, never leave the battery in the is still switched on! To prevent slow deep discharge, never leave the battery in the fl ash when it is not in use! fl ash when it is not in use! -
Page 16: Battery Maintenance And Refreshing
Battery Management and Maintenance power adapter and wait for the battery to cool down. If the control LED (16) continues to blink at a high frequency, the battery might be defective and must be serviced or replaced. 3. Battery maintenance and refreshing As for all NiMH batteries, we advise to fully discharge the battery, when possible, before recharging. -
Page 17: Pilot Light
Pilot Light A high efficiency power LED (10) produces bright coaxial pilot light with a light beam of 10° and allows an easy and perfect setting of the flash. The light intensity can be set in 25 different steps to fit personal requirements and preferences. The pilot light is switched ON/OFF by the push button (3) and the settings can be adjusted on 2 different light levels. - Page 18 Pilot Light PL High PL Low value … 25 (default 20) PL Low PL High value … 01 (default 10) Light intensity for step 1(Low) and step 2(High) can be set in 25 different steps. PL Stb ON/OFF (default OFF) The pilot light can be switched off automatically when the connected camera enters into standby mode and will turn on again as camera is reactivated.
-
Page 19: Shooting Mode - Cable
Shooting Mode – Cable Electrical Synchro Connection It is highly recommended to use a wire synchro connection with Nikon and Canon digital cameras to ensure the precise, full performance and accessibility of all features from the camera-flash setup. For this purpose, use our highest quality S6 synchro cable and connect the S6 synchro socket (4) with your camera system. -
Page 20: Hss High Speed Syncronisation
Shooting Mode – Cable When the flash delivers at full power, but less than the camera requires, the user is advised of a possible underexposure with an audible alarm and 1/1 blinking on the display. Feature Knowing the delivered power allows you to identify whether it is still possible to further open or close the aperture. -
Page 21: Stroboscopic Mode
Shooting Mode – Cable 4. 2 Curtain Flash Operation curtain fl ash operation is available in TTL and in MAN mode. You are able to set this mode only if the camera is active and connected to the strobe. When the 2 curtain operation is activated, the display shows a >>... - Page 22 Shooting Mode – Cable Feature The parameters of the stroboscopic mode can be adjusted to better fit individual needs. In stroboscopic mode, the display shows the manual power level set up, the number of set lamps and the set time. Select the setup menu with the main switch (1) SET.
-
Page 23: Dual / Multiple Flash Operation
DO NOT CONNECT DIFFERENT STROBE BRANDS OR MODELS! DO NOT CONNECT DIFFERENT STROBE BRANDS OR MODELS! Always contact SEACAM for additional information on handling strobe combinations. Always contact SEACAM for additional information on handling strobe combinations. To set the SEAFLASH 160... - Page 24 MAN manual mode. Master set to manual and Slave in TTL is not possible. IMPORTANT – FOR NIKON USERS The new SEAFLASH 160 is also compatible with the SEACAM - NIKON digital digital dual strobe connector S-N DDSC installed prior in SEACAM housings to be used with SEAFLASH 150D, 100D and 60D.
-
Page 25: Shooting Mode - Optical & Slave
Shooting Mode – Optical Cable & Front Slave Sensor To trigger the SEAFLASH 160 optically, the Fiber Optic Socket (8) or the Front digital Slave Sensor (12) can be activated by selecting the synchro input on the strobe. To select the different synchro inputs, press the push button (3) for 2 seconds. The different inputs are indicated on the top side of the display and can be selected from: Electrical Cable Optical Cable... - Page 26 Shooting Mode – Optical Cable & Front Slave Sensor The power required from the fl ash is calculated by the camera to obtain the correct exposure. An additional manual correction is available, using the rotary switch (2), which makes an exposure correction from +/-3,0 in 0,3 aperture steps possible. The display indicates the correction: The number 0.0 for no correction.
- Page 27 Shooting Mode – Optical Cable & Front Slave Sensor A customizable Prelamp copy time in μs (micro seconds) was added in the set-up menu SET in order to work with different available camera systems. Prelamp Time 15 … 250μs (default 120μs) The default value of 120 μs should work on most systems.
-
Page 28: Optical Manual Mode
Shooting Mode – Optical Cable & Front Slave Sensor 2. Optical Manual Mode Set the power switch (1) to MAN and select the shooting mode for optical cable by pressing the push button (3) for more than 2 sec and select OC showing up in the display. -
Page 29: Optical Stroboscopic Mode
Shooting Mode – Optical Cable & Front Slave Sensor If there is no manual mode available for the pop-up flash, set Prelamp Copy to ON and if required, adjust Prelamp Time to a value close to the one on the camera in use. With the correct setting, the strobe will be able to copy the camera prelamp properly and then give the desired output of manual power at the exposure lamp. -
Page 30: Safety Mode
S.O.S. Safety Mode For security reasons and in order to draw attention, your fl ash is equipped with a true S.O.S. Morse function. With the power switch (1) in the SOS position an S.O.S. Morse light signal is generated. This feature can also be used to test the fl ash. The display will show: S O S …... -
Page 31: Setup Menu
Setup Menu There are various options to customize the SEAFLASH 160 in the Setup Menu digital SET. Restore to default factory settings, perform a firmware upgrade, switch from Nikon to Canon system compatibility or from Master to Slave etc. The following options are available: 1. -
Page 32: Prelamp
Setup Menu 3. Prelamp Prelamp Copy ON / OFF (default ON) Prelamp Time 15 … 250 μs (default 120 μs) Here you can set the prelamp settings for improved use. Please refer to back to page 27 for more information. 4. -
Page 33: Other Settings & Data
Setup Menu 5. Other Settings & Data Serial Number 0000 Shows the serial number of the unit and cannot be changed. Firmware upgrade NO / YES (default NO) If set to YES, the Firmware Upgrade procedure is initiated. Please refer to the following page 34 about the Firmware Upgrade procedure. Restore Factory Default... -
Page 34: Firmware Upgrade
The current fi rmware release number (v.01) is shown on the bottom right of the display when you switch off the device. Find out on our website www.seacam.com whether a new fi rmware is available, and if you need to upgrade your device. - Page 35 Firmware Upgrade 1. In the setup menu SET, select the Firmware Upgrade and switch it to YES, then activate it by pressing the push button (3). Firmware upgrade 2. The strobe will now ask for a USB connection. Connect the USB cable to your computer with the S6/USB adapter provided with the unit.
-
Page 36: Upgrade Error Codes
In any case of an error, the upgrade stops and an error code is shown on the display. Switch the strobe to OFF, perform the required operation and restart the upgrade from the beginning. If the problem persists, please contact SEACAM Service. - Page 37 Firmware Upgrade File error The hash control on the file failed. Download file again wrong and try to recopy it. Do not to modify the file. file hash File error The downloaded file is not compatible with the strobe incompatible to be upgraded –...
-
Page 38: General Error Codes
If you cannot solve the issue according to the error codes below and / or the error code is permanent, please contact an authorized SEACAM Service Center. The display can show following error codes: FLASH ERROR The main voltage is over the maximum rate. -
Page 39: Maintenance
Maintenance Rinse your fl ash using fresh water after every dive in the sea and dry it carefully. Clean with a mild cleaner and lubricate the threads regularly. S6 SYNCHRO SOCKET The S6 connection system is a very safe and sturdy plug-in system. The S6 synchro socket (11) and its golden contact system is very precise and secure and is combined with a 4-part O-ring sealing which is easy to maintain. -
Page 40: Accessories
Accessories Only original SEACAM accessories guarantee that your SEAFLASH 160 digital flash works reliably and safely. In the following chapters you will find the standard accessories, the entire system accessories and our unmatched flash arm system. This way, you can add many more additional functions and possibilities to your strobe, making your time under water a lot easier. -
Page 41: System Accessories
Accessories 2. System Accessories Following optional accessories are available: • SPARE ACCU PACK A spare is always good to have. • DIFFUSOR Mount the diffusor instead of the macro protection ring to get a softer light from your strobe. • MACRO FILTER Screw-in filter for the diffusor –... - Page 42 Accessories Diffusor Macro filter Snoot Switch extension Neoprene cover Neoprene dome cover...
-
Page 43: Flash Arm System
Accessories 3. Flash Arm System We have designed your flash arm system for a wide variety of applications. With the enormous retention force of the system, you already have the best product on the market in your hands. The unique, patented brake disc technology guarantees you a perfect hold, even on land. - Page 44 Accessories Fixation Use the M8 stainless steel insert thread at the top of the fl ash to fi x the SEAFLASH on the fl ash arm. The M8 ball adapter is the best way to connect it to our digital reliable fl ash arm system (not included in delivery).
- Page 45 Accessories Mounting The flash arm base is used to fix the flash arm system to your housing. Tighten this part carefully with the fixation screw at the housing’s T-piece. The best and quickest system to mount your arm is with released joints. Afterwards adjust the flash system to your working position and set it by tightening the fixation levers.
- Page 46 Accessories Maintenance Rinse your fl ash arm system carefully with fresh water after every dive and turn the joints. Clean the aluminum balls regularly and the brake surface with acetone, alcohol or cellulose thinner. Grease the screws and fi xation levers. You can dismount the levers with a screwdriver and also clean them inside.
- Page 47 Accessories Flash Arm 50/150/300 Telescope Arm Fiber Optical Cable Cleaning of Joints S6 Synchro Cable External Slave Sensor...
- Page 48 Accessories Flash Arm Combinations Standard Combination 1 Standard Combination 2 Makro Combination 1 Makro Combination 2 Close-Up Combination Wide Angle Combination...
-
Page 49: Technical Details
Flash L x Ø: 190 x 95 (90) mm, 1320 g (with battery), underwater -50g Battery Pack L x B: 95 x 45 mm, 260g • Depth rate SEAFLASH 160DIGITAL -80m / -240 ft SEAFLASH 160OFFSHORE -200m / -600 ft... -
Page 50: Environmental Information
We therefore ask that you take these products to your municipal collection point for recycling and resource recovery where the devices can be returned at no cost. Alternatively, you can send them to SEACAM for proper disposal. For more detailed information on your nearest collection point, please contact your communal government. -
Page 51: Warranty
TTL Synchro cables, batteries, flash bulb and consumables parts are not covered by warranty. If the warranty seal is broken the warranty immediately expires. SEACAM shall not be liable for direct or indirect damage to persons and devices or (built in) cameras and reserves the right to make technical changes or replacements.
Need help?
Do you have a question about the SEAFLASH 160DIGITAL and is the answer not in the manual?
Questions and answers