Advertisement
Table of Contents
- 1 Table of Contents
- 2 Safety Notes and Cautions
- 3 Adjusting Your Trikexplor
- 4 How to Ride
- 5 Maintenance
- 6 Inspection
- 7 Warranty Policy
- 8 Legal Requirements
- 9 Rear Shock A5-RE User Manual
- 10 AOY-36RC Air Shock User Manual
- 11 Display User Manual
- 12 Li-Ion Battery User Manual (Hailong Type)
- 13 Li-Ion Battery User Manual (Rear Rack Type III)
- 14 Li-Ion Battery Charger User Manual
- 15 Lighting System User Manual
- Download this manual
Advertisement
Table of Contents

Summary of Contents for TrikExplor F426E
- Page 1 TRIKE & QUAD USER MANUAL...
-
Page 2: Table Of Contents
Li-ion Battery User Manual (Rear Rack Type III)………. 38/41 Li-ion Battery Charger User Manual…………………… 42/43 Lighting System User Manual…………………………… 44/46 This manual contains important safety, operation and maintenance information. Read it before you take the first ride on your new TrikExplor, and keep it for reference. -
Page 3: Safety Notes And Cautions
Check List for Every Ride Before you ride your TrikExplor make sure it is in a safe operating condition. If any part of your TrikExplor does not function correctly, do not ride it until it is fixed. - Page 4 Cycling in Bad Weather Take extra care when the weather is wet, foggy, windy, or icy. Ride with extra care and brake early, as your TrikExplor will take longer to stop. Sudden braking could lead to skidding and loss of control.
-
Page 5: Adjusting Your Trikexplor
Adjusting Your TrikExplor Tire Pressure Tire pressure is important for comfort and safety. Ensure your tires are correctly inflated before every ride. The recommended pressure range is given on the side wall of the tire. Adjusting the seat tension The mesh seat tension can be adjusted using the straps behind the seat back and base. -
Page 6: How To Ride
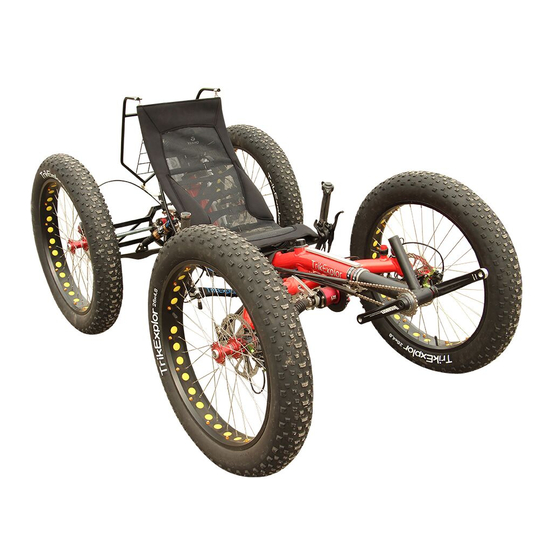
How to Ride Entering and Exiting the TrikExplor Before sitting down on the TrikExplor, make sure that it cannot roll away from you by using the parking brake. Straddle the boom and begin lowering yourself into the seat while supporting yourself using the tires or the sides of the seat frame. -
Page 7: Maintenance
F426E, 424E and T320E have unique brake levers. The right handlebar is mounted two levers. The outsider lever is to control the brake on front right wheel. The insider lever is to control the brakes on two rear wheels. You need to using two levers by one hand. - Page 8 Transport in the Car The best way to transport your TrikExplor is inside the car. Take care that it does not lie on the derailleur. If you want to transport it outside the car we recommend a roof-rack or a rear carrier.
-
Page 9: Inspection
• Inspect drivetrain for damage. Every 12 months: In addition to the regular maintenance, we recommend that your TrikExplor is given a full service every year. Unless you are experienced in trike mechanics, we recommend that you ask your dealer to do this for you: •... -
Page 10: Warranty Policy
In the event of any action that falls under warranty the original warranty period will not be prolonged and no new warranty will be given. If TrikExplor refuses to count a repair as warranty case we will only carry out a repair with costs after having talked to the customer or his representative, the respective dealer. -
Page 11: Legal Requirements
Legal Requirements Legal requirements vary from country to country and you should always comply with them. The important areas you need to consider are lighting, and helmet use. Consult your local bike dealer for information about what is required in your area. Please also remember that even if not required by law, some equipment (such as helmets and lights) can increase your personal safety and should be carefully considered. -
Page 12: Rear Shock A5-Re User Manual
Rear Shock A5-RE User Manual Setup To set the pressure in the main cylinder (valve marked “MP”), use a compatible shock pump. Remove the valve cap and attach the shock pump according to the pump manufacturers’ specifications. Kind Shock recommends using the KS AIR-8 pump model for best results. - Page 13 Attention This is a high performance product. It will give you reliable service if it is installed properly and regularly maintained by an authorized ExaForm service center. Please read through these instructions fully and follow them carefully before you install your new rear shock.
-
Page 14: Aoy-36Rc Air Shock User Manual
AOY-36RC Air Shock User Manual Product Description Diagram Consumer Safety / : Warning : Attention... - Page 15 Rebound adjustment knob + direction rotation, increase damper (slow) - direction rotation, decrease damper (fast) Compression adjuster + direction rotation, lock-out - direction rotation, open up Main air chamber Supply air pressure according to pressure meter Negative air chamber Supply air pressure according to pressure meter Specification A.
- Page 16 DNM Air Shocks Congratulations! You have purchased the best suspension shock absorber in the Mountain Bike Technology. DNM shocks are made of lightweight, high strength materials and they are designed to balance high performance, easy to use and easy to maintain.
- Page 17 4. Once you know the correct shock length and you are confident that the bushing gaps are also correct, the fitting of the new shock is a relatively simple exercise. Remove your old shock absorber and clean the inside surfaces of the frame and swing arm, remove any dirt and make sure that the surfaces are clean.
- Page 18 6. Lock-Out A unique DNM device allows the rider to choose different riding styles. Lock the movement of the shock, reduce the suspension travel of your bike, and make it easy to climb hills, fast acceleration, suitable for Downhill applications depending on the track conditions.
- Page 19 Turning the red circular rebound knob you can control the speed of your shock slower or faster. Lock-out adjustment is the blue knob which locks the movement of the shock and reduces the rear suspension travel of your bike by manually pulling the lock-out knob.
-
Page 20: Display User Manual
DPC14 Display User Manual... - Page 21 Features Suitable for low temperature Max -20 . High-contrast 3.2inch IPS colorful matrix screen. Ergonomic external button design, easy to operate. Speed display : AVG SPEED, MAX SPEED, SPEED(Real-time). Kilometer / Mile : Can be set according to customers’ habits. ...
- Page 22 3.1 Power On/Off Press and hold Power button for 1 second can turn on/off the display. The Display can automatically shut down when there is no operate & ride for X minutes X could be 0~9 . *If the display has been set password power on, you need to input the right password before start. 3.2 Assist level operating Short press UP/DOWN button can change the assist level.
- Page 23 *Range need smart BMS support. **If there is no operation for 5 seconds, display will return Speed (Real-Time) display automatically. 3.4 Headlight/backlight On/Off Press and hold UP button for 1 second can turn on/off the headlight, and the scree will switch to the corresponding mode.
- Page 24 when release the button. 38.9V 38.9V RT SPEED Km/h ASSIST 256.8 TRIP 12:30:45 * This feature needs to be supported by controller. 3.6 Data cleanup Press and hold UP & DOWN buttons together for 1 second can reset several temporary data, temporary data include AVG Speed / MAX Speed / Trip / Time.
- Page 25 4.2 Brightness : Press Up / Down button to change the brightness of the backlight, ׀is darkness ׀׀׀׀׀is brightness, .׀ default value is System Metric System Metric Brightness | | | | Brightness | || || Auto off 5min Auto off 5min...
- Page 26 0 2 : 4 0 38.9V ASSIST Km/h 3 9 w TRIP 5 6 . 8 Km 4.5 Battery Ind : Press UP/DOWN button to change the battery indicator, Voltage / Percentage / OFF. *Accurate percentage needs communication with battery. System Metric System...
- Page 27 38.9V Voltage Percentage 4.6 Pow Ind : Press UP/DOWN button to change the Power indicator, Analog / Digital/Current. * This data represent power output of the battery (not motor). System Metric System Metric Brightness Brightness Auto off Auto off Scenes Digital Scenes Digital...
- Page 28 System Metric Brightness Year 2015 Auto off 5min Month Scenes Digital Battery Ind Voltage Hour Pow Ind Analog Minute Clock > Start password > Second BACK Wheel 27 inch EXIT 4.8 Start password : Press POWER button get into the password setting menu. If you had set Start input ON, you must input right password before power on, password is accorded to your setting.
- Page 29 Wheel Battery Advance setting Information Factory setting *Press DOWN button to move the red arrow to , press POWER button can show all items of the Basic Setting. 4.9 Wheel : Press UP/DOWN can change the wheel setting, optional wheel diameter is 16/18/20/22/24/26/27/27.5/28/29/30/31 inch, 51cm~255cm represent wheel circumference (this needs controller support).
- Page 30 Speed limit Assist levels Error code 4.12 Speed limit : Press UP/DOWN will change speed limit, range 10km/h~45km/h. Default value is 25km/h. *Speed limit and current limit are restricted by controller and motor. 4.13 Assist levels : This parameter can customize assist levels, options are 3/5/9/UBE, UBE represent factory default settings.
- Page 31 4.16 Information : Show information of the E-bike. Speed 15.4 Km/h 32.4 Km/h Mileage Trip 9999.9 Km 99999.9 Km Range 59.9 Km BACK Product Infor Battery Infor 4.17 Product info : Get into this item can show hardware version software version… 4.18 Battery info : Get into this item can show all information of battery, including Voltage, Current, Current,...
- Page 32 5 Error Code define 850C can show warning message, icon shows on the screen, and show error code at the bottom of the screen, error code from 04~30, definition see the table below. Error Code Error description Error diaplay 0x01 Normal No error 0x03...
- Page 33 6 Connector descriptions Red wire : Anode(24v/36v/48V) Blue wire : Power cord to the controller Black wire : Green wire : RxD (controller -> display) Yellow wire : TxD (display -> controller) 7 Assist level instructions Assist level can be customized, the highest level is 9, common used assist level see the table below: 3 level 5 level...
-
Page 34: Li-Ion Battery User Manual (Hailong Type)
Li-ion Battery User Manual (Hailong Type) This manual contains important safety, performance and service information. Read it before you take the first ride on your new bicycle, and keep it for reference. Introduction Battery Level Indicator ------ Press button the indicator will turn on. 1 red, 3 green --- 100% 1 red, 2 green --- 75% 1 red, 1 green --- 50%... - Page 35 Lock ------ Battery Locked On the Holder No Lock The battery must be locked when riding or it may fall out. To remove the battery, switch the key to OPEN position, then pull the battery (using the the underside finger groove) to slide it out from the holder. The key does not have to be in to operate the bike.
- Page 36 The fumes may irritate the respiratory system. • Only charge the battery using original TrikExplor chargers. When using chargers that are not supplied by TrikExpor, the risk of fire cannot be excluded.
- Page 37 • Keep the battery away from children. The safety of both our customers and our products is important to us. Our eBike batteries are lithium-ion batteries which have been developed and manufactured in accordance with the latest technology. We comply with or exceed the requirements of all relevant safety standards.
-
Page 38: Li-Ion Battery User Manual (Rear Rack Type Iii)
Li-ion Battery User Manual (Rear Rack Type III) This manual contains important safety, performance and service information. Read it before you take the first ride on your new bicycle, and keep it for reference. The manual can also be found online at www.motrike.com. Introduction Battery Level Indicator ------ Short press button the indicator will turn on. - Page 39 Lock ------ To remove the battery, switch the key to NO Lock position, then pull the battery (using the battery handle) to slide it out from the holder. Key must be pushed in to turn all the way ON. Operate﹣Always switch the battery off, when inserting or removing it from the holder. Charge﹣Battery should be charged in a dry location and at room temperature.
- Page 40 The fumes may irritate the respiratory system. • Only charge the battery using original TrikExplor chargers. When using chargers that are not supplied by TrikExpor, the risk of fire cannot be excluded.
- Page 41 • Keep the battery away from children. The safety of both our customers and our products is important to us. Our eBike batteries are lithium-ion batteries which have been developed and manufactured in accordance with the latest technology. We comply with or exceed the requirements of all relevant safety standards.
-
Page 42: Li-Ion Battery Charger User Manual
Li-ion Battery Charger User Manual This manual contains important safety, performance and service information. Read it before you take the first ride on your new bicycle, and keep it for reference. Introduction Charge Cycle and LED Indicators for Li-ion Battery STATUS Green Battery not connected yet... - Page 43 WARNING Read and understand all safety warnings. Failure to follow the below warnings could result in death or serious injury. Save all safety warnings and instructions for future reference. • Protect your charger from children. To prevent injury use the charger that comes with your e-bike.
-
Page 44: Lighting System User Manual
Lighting System User Manual 326E, 320E, F326E, S320E, 420E, F420E & H420E lighting system... - Page 45 424E lighting system...
- Page 46 320E Solar & T320E lighting system The tail light turns off automatically in the daytime, and turns on automatically at night or dark. The tail light turns off automatically under static condition more than 30 seconds and turns on automatically when the trike is shaking. Short press for less than 2 seconds, when the light flashed 3 times, the light goes into Auto Mode;...
Need help?
Do you have a question about the F426E and is the answer not in the manual?
Questions and answers