Table of Contents
Advertisement
Quick Links
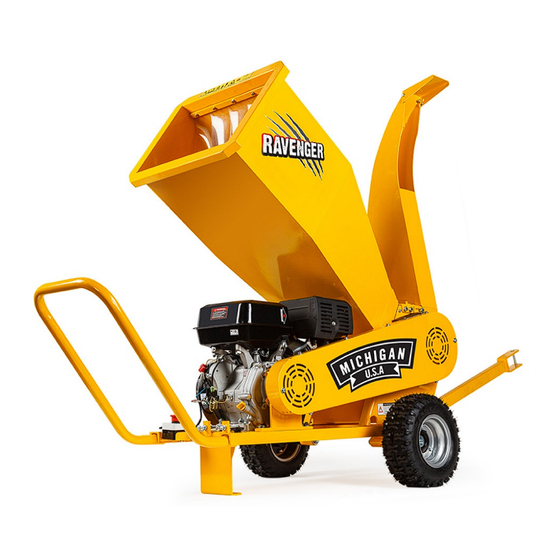
Ravenger 1950 Wood Chipper
User Manual
[Revision
.0
2019]
4
July
READ THIS MANUAL CAREFULLY BEFORE USE – FAILURE TO DO SO MAY RESULT IN INJURY, PROPERTY
DAMAGE AND MAY VOID WARRANTY. • KEEP THIS MANUAL FOR FUTURE REFERENCE. • Products covered by
this manual may vary in appearance, assembly, inclusions, specifications, description and packaging.
The product is NOT supplied with engine oil, although traces of oil from the
manufacturing process may be present. It is essential to add adequate engine oil of the
correct type to the engine before use – see
Checking and Changing Engine
Oil.
Failure to add engine oil will void the product
warranty.
Advertisement
Table of Contents

Summary of Contents for MICHIGAN Ravenger 1950
- Page 1 Ravenger 1950 Wood Chipper User Manual [Revision 2019] July READ THIS MANUAL CAREFULLY BEFORE USE – FAILURE TO DO SO MAY RESULT IN INJURY, PROPERTY DAMAGE AND MAY VOID WARRANTY. • KEEP THIS MANUAL FOR FUTURE REFERENCE. • Products covered by this manual may vary in appearance, assembly, inclusions, specifications, description and packaging.
-
Page 2: Safety
Ravenger 1950 Wood Chipper and Shredder Safety Safety messages are designed to alert you to possible dangers or hazards that could cause death, injury or equipment or property damage if not understood or followed. Safety messages have the following symbols:... - Page 3 Ravenger 1950 Wood Chipper and Shredder stop moving before moving, lifting etc. General Fuel Safety General Electrical Safety General Service Information Petrol/fuel/gasoline is extremely • Inspect electrical equipment, extension • Have the equipment serviced or repaired flammable – keep clear of...
-
Page 4: Table Of Contents
Ravenger 1950 Wood Chipper and Shredder Table of Contents Safety ............................. 2 Parts Identification ........................5 Before Use Checklist ........................6 Assembly ..............................6 4-Stroke Engine Oil ............................8 Air Filter ................................8 Fuel ................................8 Spark Plug ..............................9 Engine Starting and Stopping ....................10 Environmental Considerations ........................ -
Page 5: Parts Identification
Ravenger 1950 Wood Chipper and Shredder Parts Identification Wood chippers come with all parts required for normal use. A basic toolkit may also be included. It is strongly recommended that you familiarise yourself with all major components of the machine before using it or performing any maintenance tasks. -
Page 6: Before Use Checklist
Ravenger 1950 Wood Chipper and Shredder Before Use Checklist Ensure that you carry out all procedures below before starting the engine or operating Failure to follow the checklist and carry out the procedures the equipment. correctly may result in making the product warranty void. - Page 7 Ravenger 1950 Wood Chipper and Shredder Wheels 1. With the machine frame jacked off the ground safely and sufficiently to get the wheels on, slide the axle through the axle mounts (A) on the bottom of the frame. 2. Place a wheel spacer (B), followed by an inner wheel washer (C) onto each end of the axle.
-
Page 8: 4-Stroke Engine Oil
Ravenger 1950 Wood Chipper and Shredder 14. Insert a towing arm locking pin (C) through the frame and handle and secure the pin using an R-clip (D). A locking pin and clip is also supplied for securing the other end of the towing arm. -
Page 9: Spark Plug
Ravenger 1950 Wood Chipper and Shredder 4. Using a funnel, carefully fill the tank with fuel. Do not fill above the top of the strainer (if equipped) or otherwise overfill the tank. 5. When finished, re-install (rotate right) the fuel filler cap until firm. Wipe away any residual fuel from the machine. -
Page 10: Engine Starting And Stopping
Ravenger 1950 Wood Chipper and Shredder Engine Starting and Stopping Before starting the engine, ensure that you have followed all procedures described in Before Use Checklist. The product is NOT supplied with engine oil, although traces of oil from the manufacturing process may be present. It is essential to add adequate engine oil of the correct type to the engine before use –... -
Page 11: Environmental Considerations
Ravenger 1950 Wood Chipper and Shredder Environmental Considerations Altitude If the engine is being used in altitudes at or above 1500m (approximately 5000’), adjustments to the carburettor may be required. This is because there is less oxygen in the air as altitude increases, which effectively “enriches”... -
Page 12: Operation
Ravenger 1950 Wood Chipper and Shredder Operation The product is NOT supplied with engine oil, although traces of oil from the manufacturing process may be present. It is essential to add adequate engine oil of the correct type to the engine before use – see... -
Page 13: Adjusting The Output Flap
Ravenger 1950 Wood Chipper and Shredder 4. Remove the 2 bolts (A) securing the blade shaft access cover (B) and remove the cover – this allows access to the blade shaft so you can rotate the blades 5. Using a suitable spanner on the end of the blade shaft, rotate the shaft as required. -
Page 14: Maintenance
Ravenger 1950 Wood Chipper and Shredder Maintenance Running petrol engines in confined areas CAN KILL IN MINUTES. Engine exhaust fumes contain carbon-monoxide – a deadly gas that you cannot smell or see. NEVER run a petrol engine in confined areas EVEN IF windows and doors are open. -
Page 15: Checking And Changing Engine Oil
Ravenger 1950 Wood Chipper and Shredder Frequency – Whichever Comes First First Month or Every 3 Months Every 6 Months or Every Year or Component/Task Every Use 20 Hours Use or 50 Hours Use 100 Hours Use 300 Hours Use... -
Page 16: Checking, Cleaning Or Replacing The Air Filter
Ravenger 1950 Wood Chipper and Shredder 1. Place the machine on a suitable work surface that is flat and level and have a container ready to catch drained oil. 2. Clean the machine around the oil drain plug (D) and oil filler (A) so that no dirt or other material enters the engine when the plug or cap is removed. - Page 17 Ravenger 1950 Wood Chipper and Shredder 1. Insert the air filter element, and ensure it is correctly positioned in relation to the air intake assembly as it will seat and seal properly in one position only. Secure the air filter element with the wing-nut (rotate right and tighten by hand.
-
Page 18: Spark Plug
Ravenger 1950 Wood Chipper and Shredder Spark Plug If the spark plug is damaged (cracked insulator, broken or eroded electrodes etc), replace it. • Always use spark plugs of the correct “heat range” - see Specifications. The spark plug is used to ignite the air/fuel mixture inside the engine. The spark plug has electrodes on one end and an electrical terminal on the other. -
Page 19: Blades
Ravenger 1950 Wood Chipper and Shredder Blades If a blade is damaged (cracked etc), replace it. • Ensure that blades are kept in good condition and correct clearance is maintained - see Specifications. • Ensure that all bolts securing the blades are firmly tightened –... -
Page 20: Blade Removal/Installation
Ravenger 1950 Wood Chipper and Shredder Blade Removal/Installation The blades can be removed from the machine in order to be sharpened or replaced. Note that the blades may have 2 cutting edges that allows you to switch the blade around to use the other cutting edge. -
Page 21: Belt Tension Adjustment
Ravenger 1950 Wood Chipper and Shredder Belt Tension Adjustment To adjust belt tension: 1. Remove (rotate left) the 8 bolts (A) securing the drive belt cover (B), and remove the cover. 2. Loosen (rotate left) the 4 engine mounting bolts (C) at the front and rear of the engine. Do not remove the bolts. -
Page 22: Belt Removal/Installation
Ravenger 1950 Wood Chipper and Shredder Belt Removal/Installation The drive belts can be replaced. When replacing belts, always use the correct belt type (see Specifications) and replace both belts. 1. Remove the drive belt cover. 2. Loosen the engine mounting and locating bolts. Back off the rear engine locating bolts sufficiently so that the engine can be moved enough to remove/install the belts. -
Page 23: Cleaning Guidelines
Ravenger 1950 Wood Chipper and Shredder Cleaning Guidelines Do not use solvents, chemicals or abrasives when cleaning the machine, as some surfaces may be damaged. • Do not use high-pressure sprayers near the blade shaft bearings as bearing damage may result. • Wear gloves or use suitable tools to assist in cleaning – do not use bare hands. -
Page 24: Troubleshooting
Ravenger 1950 Wood Chipper and Shredder Troubleshooting Running petrol engines in confined areas CAN KILL IN MINUTES. Engine exhaust fumes contain carbon-monoxide – a deadly gas that you cannot smell or see. NEVER run a petrol engine in confined areas EVEN IF windows and doors are open. - Page 25 Ravenger 1950 Wood Chipper and Shredder Possible Fault Action Blocked air filter Check and clean the air filter. Idle speed requires adjustment Adjust idle speed until engine runs smoothly and at a reasonable speed when idling. Difficulty restarting the engine after use or engine stops suddenly during use.
-
Page 26: Specifications
Ravenger 1950 Wood Chipper and Shredder Machine jamming. Possible Fault Action Remove overly large branches from machine. • Reduce size of material being chipped.• Material too large / incorrect type Reduce feed rate of material. • Ensure all chutes are free of obstructions and non-chippable material (stones, metal etc). -
Page 27: Service And Maintenance Record
Ravenger 1950 Wood Chipper and Shredder Service and Maintenance Record Use the following tables as a record of machine servicing and maintenance. Keeping accurate records will help ensure better machine service life and may simplify fault diagnosis and any possible warranty claims. - Page 28 ©2019 Michigan USA. All rights reserved. No part of this document, including descriptive content, concepts, ideas, diagrams or images may be reproduced or transmitted in any form or by any means, electronic or mechanical, including photocopying, scanning or recording, or any information storage and retrieval system, without express permission or consent from the publisher.
Need help?
Do you have a question about the Ravenger 1950 and is the answer not in the manual?
Questions and answers