Advertisement
Table of Contents
- 1 Table of Contents
- 2 Statement
- 3 Attention
- 4 Packing List
- 5 How to Install this System
- 6 How to Set up Recording
- 7 How to Playback Recorded Video
- 8 How to Backup Recorded Video
- 9 How to Set up Internet Connection of NVR
- 10 How to Remote View from Cellphone
- 11 How to Remote View from Computer Application
- 12 How to View from IE Browser
- 13 Frequently Asked Questions
- 14 Warranty
- Download this manual
Advertisement
Table of Contents

Summary of Contents for CANAVIS CA-672-4H1M
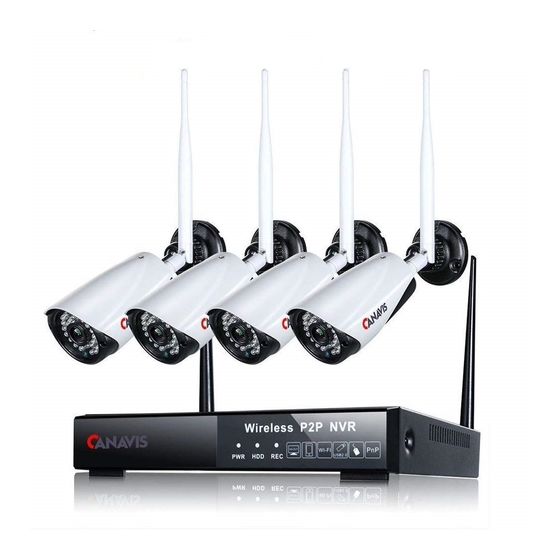
- Page 1 Wireless Camera System Friendly Reminder: Please make sure you have a monitor, smart mobile phone of Android / iOS to work with this system. - 1 -...
-
Page 2: Table Of Contents
Directory * Statement ---------------------------------------------------------------- Page 1 * Attention ---------------------------------------------------------------Page 1 * Packing List -----------------------------------------------------------Page 1 * How to install this system? --------------------------------------------Page 2 * How to set up recording? ---------------------------------------------Page 8 * How to playback recorded video?------------------------------------Page 10 * How to backup recorded video?------------------------------------Page 11 * How to set up internet connection of NVR?------------------------Page 12 * How to remote view from cellphone?--------------------------------Page 14 * How to remote view from computer application?-----------------Page 29... -
Page 3: Statement
This guide is for Wireless Camera System. Contents of this manual may be modified and updated based on new function. The function of the actual products maybe a little different from the guide, please operate it based on the actual products. -
Page 4: How To Install This System
How to install this system? 1. How to connect each port of NVR? Antenna Audio output VGA output HD output Network port USB port×2 Power supply port : DC12V... - Page 5 2. How to install wireless camera Attention: The camera should install on the wall with suitable thickness, which can sustain 4 times weight of camera. 2.1 Interface of wireless camera Name Description Bracket Support 2 axis adjustment Antenna Transfer and receive wireless signal...
- Page 6 Rear cover Rear cover of the case Front cover Front cover of the case Double loop glass Prevent inside light-leaking of lens Power supply DC 12V Ethernet port connect Ethernet cable, 10/100M auto-adjustable Antenna connector Connect to camera antenna 2.2 Installation step Hole location sticker: put the sticker on the wall, punch with 5mm drill in the marked areas, make sure the deep of hole is over 30mm at least.Then punch expansion screws in hole.
- Page 7 Note: This wireless camera needs wired power input connection 3.2 NVR Please make sure the power supply is matched with wireless NVR, and ground connection work well in socket. When power supply connected, indication lamp 【PWR】turn on continuously, it means system runs smoothly. Indication lamp 【HDD】turn on means system is installed hard disk and running.
-
Page 8: How To Set Up Recording
How to set up recording? Reminder: The default log-in user name of NVR menu is “admin”, and the default password is blank, you don’t need to enter anything to log in at the first time. After logging in NVR menu, please modify it to be your private password as soon as possible to keep your privacy safe. - Page 9 3. Manual Record Main Menu →【Manual Record】→ choose recording channel → 【Save】 4. Motion Detection Record Main menu →【System Setup】→ Alarm Setting→ Alarm Type → Channel → Click Enable Switch → Set Sensitivity & Area & Time → Open Screen Linkage → Choose Channels for recording when Motion Detection Alarm triggered.
-
Page 10: How To Playback Recorded Video
In record setting, choose period for recording → click 【Motion】→【Apply】.Users can click 【Copy】, copy to other channels with the same mode. How to playback recorded video? Main Menu →【Playback】→ choose channel and date →【Query】... -
Page 11: How To Backup Recorded Video
Click the play icon in in the following picture, then the recorded video will come out. And then choose the period you wanna view in How to backup recorded video? Main menu → 【System Setup】 → Recording Setting →【Backup】 → choose channel and time →... -
Page 12: How To Set Up Internet Connection Of Nvr
Attention: If target file can not be searched out, please click 【Clean】and then click 【 Add 】 . Please remove the files which no need before backup. Ensure insert device( like U Disk) in 20 seconds, as system reserved searching time for only 20 seconds. - Page 13 ① DHCP: open DHCP, device will connect to Internet automatically, no need data This is the most common and easy way. setting. ② Manual setting: Fill in IP address, DNS data, and click【Save】. How to check NVR connects with internet successfully or not? Right click mouse →...
-
Page 14: How To Remote View From Cellphone
If Status shows “ Not Online” more than 5 minutes, there is mistake for data setting, NVR is disconnected with Internet. Please check step 1 & 2 and make sure NVR is connected to Internet. How to remote view from cellphone? 1. - Page 15 ④ Download from the following website: http://www.danale.com/app_dl/ 2. Register a Danale account: You can use your phone number(Please remember to choose your phone number’s email address country) or as a user name, and set your own Danale account’s password.
- Page 17 3. Make sure internet connection of NVR is succeed. 4. Log in your Danale account and then add device: ① Click , and then click...
- Page 18 ② Right click mouse of NVR → System Setup → Network → Mobile. And then scan the QR code of “Device ID”, you’ll be able to add device into your cellphone App successfully.
- Page 19 You can also manual input the Device ID number for adding device into your Danale account.
- Page 21 ③ Name this device as you like, for example office, shop, yard etc... 5. Danale Function Description: ① Click device in list to enter preview interface:...
- Page 22 ② Icon : Preview camera video one by one;...
- Page 23 ③ Icon : Preview all cameras at one time:...
- Page 24 ④ Icon : View camera video in full screen; By left clicking the on the top right side in full screen, you can adjust the video...
- Page 25 quality as you need; → Click this icon to take a video demo when needed; → Audio is not available in this system; → Click this icon to take a picture demo when needed, pictures will be saved in your cellphone; ④...
- Page 26 ⑤ Icon : Playback Hard disk video;...
- Page 27 Reminder: Please be noted that this system’s Cloud Video(Cloud Service) is not available. ⑥ Icon : System Setting;...
- Page 28 You can edit the name of system (like Yard, Front Door etc.); You can turn on / off or set the sensitivity of motion detection in “Security settings”; Reminder: This system’s sound detection is not available for now. As for “Device settings”, usually you don’t need to set anything in it. ⑦...
-
Page 29: How To Remote View From Computer Application
How to remote view from computer application? Reminder: Before remotely viewing through DanaCMS, please make sure you already registered a Danale account and added devices in it. 1. Software install: choose related client software to download Danale at http://www.danale.com/ according PC system. - Page 30 In right list, green means online, gray means offline, double click to view online camera, select to set related device.
-
Page 31: How To View From Ie Browser
How to view from IE browser? 【Please be noted this way is only available for local area network】 1. Please be noted that NVR’s WAN port should be connected with router 2. DHCP should be √. - Page 32 3. Input the DHCP-IP address on IE. 4. Log in IE, input the NVR’s log-in user name and password ( Default user name: admin, password is empty)
- Page 33 Reminder: After you changed user name and password of NVR, this login user name and password should be changed,too. Or you’ll be not able to log in through IE browser. 5. An example of Live View: ① Click Channel 1 as the channel you wanna view; ②...
-
Page 34: Frequently Asked Questions
Frequently Asked Questions 1. How to install a hard disk drive on NVR? Attention: Please use suitable and professional 3.5” hard disk (<4TB). Make sure power turned off before installing. For the system pre-install hard disk, no need to install hard disk in NVR. ①... - Page 35 ③ After connecting hard disk cable, place hard disk like the following picture in...
- Page 36 according position; ④ Lock the hard disk by turning screws into the 4 holes on NVR bottom. ⑤ Recover the roof of NVR. Done. 2. How to format hard disk?
- Page 37 1. Enter NVR Menu--System Setup--Record--Disk 2.Click the hard disk 3.Click “Format”--”OK”--”OK”...
- Page 39 3. What to do if there is nothing show on monitor after plugging in power for this system? / How to match code for cameras? Click right button on main interface, click 【IP Camera】 If just matching code for 1 piece camera, please connect camera and NVR with network cable via NVR WAN port.
- Page 40 If you want to match code for several cameras at one time, please connect cameras to a switch, and connect this switch with NVR via WAN port. Click 【Match Code】 , system will match the code between camera and NVR. When finished code matching, please double click the “IP Addr”...
- Page 41 4. How to set up Repeater Function? With latest repeater function, this system offers a new camera signal connection type with further transmission distance and wider coverage area by upgrading original device. Camera in further area can be connected to nearer cameras via antenna signal and connect to NVR finally.
- Page 42 Delete Click repeater to enter interface above→ put mouse in camera needed to delete→ left click→ delete→ save. The camera which is deleted will connected to NVR automatically after 30S. 5. How to modify NVR’s login user name and password? ①...
- Page 43 ① Click “Forget password?” ② Note down the serial number in the coming interface + the time showing in your after-sale@canavis.cn NVR, and then email these 2 factors to ③ We will unlock your NVR and make temporary passwords for you.
- Page 44 ① Before you setting motion detection,please make sure your NVR is connecting with internet successfully. ② Enter NVR menu--System Setup--Alarm ③ Tick the “Enable” to enable motion detection; Setup the “Sensitivity” as you want,the higher,the more sensitive; Tick “Screen” if you hope to get a screenshot when motion detected; Tick “Email”...
- Page 45 Click “Set Time”to set up the time you wanna detect; ④ The above setting is only for 1 channel,if you want same setting in the other channels,you can do as the following: Click the “Copy” on the bottom right,and choose the channels,and then “SAVE”...
- Page 46 ⑤ If you want every channel to be different setting,please do as the following: Click “Channel” and change to the channel you wanna set, and then repeat the Step 3. ⑥ Setting up Email Alert We suggest you to use Gmail email as email sender. And set up in NVR system like the following: Enter NVR Menu--System Setup--Network--Email;...
- Page 47 After finishing the above 6 steps,you’ll be able to receive emails with screenshot when motion detected. 8. How to reset NVR? ① Right click mouse -- NVR Menu -- System Setup -- System -- Maint. ② Click “Default” -- “OK”-- “OK”...
- Page 48 9. How to change NVR’s resolution? Right click mouse -- System Setup -- System -- General -- Choose the resolution which match with your monitor -- Apply...
- Page 49 10. How to name each channel? ① Right click to enter NVR menu--System Setup--Channel ② Choose and click the channel you wanna change name,and then click “Edit OSD”...
- Page 50 ③ Edit the name you like in the “Name” column. ④ Tick “ Name Display” Tick the position you wanna put on screen (Top left? Top right? Bottom left? Bottom right?) If the position of channel name needs to be adjusted,you can also change the value of number in “X”...
- Page 52 11. How to upgrade NVR? ① Put the upgrade software in a USB memory card; ② Enter NVR menu--System Setup -- System-- Maint.-- NVR Start Attentions: Please insert the USB device and click “NVR Start” button to start upgrading, do not turn off power of NVR. 12.
- Page 53 1. Click 2. Click”Share”...
- Page 54 3. Click “Add user” 4. Click “Manual input”...
- Page 55 5. Input the Danale account with which you wanna share this system. 6. Select the system you wanna share out,and then click “Send Invitation” After finishing the above 6 steps, the other users you are sharing with will get...
- Page 56 messages, they just need to get in messages and click “Accept”, then they’ll be able to view through their cellphone App.
-
Page 57: Warranty
If it is our company's fault, we will bear the freight charges. For example, the type of the shipped product is incorrect or the product is defective. 5. If you need to return a product that requires repair, set the following information and send it to after-sale@canavis.cn Order Time: Order Number/ID: Product Name:...
Need help?
Do you have a question about the CA-672-4H1M and is the answer not in the manual?
Questions and answers