Table of Contents
Advertisement
Address:
Tel:
Fax:
Enquiries E-mail:
Sales E-mail:
After Sales E-mail:
Service E-mail:
Jan 2012
T190 Iss.2
Operating Manual
Culture Safe CO
Touch 190S
LEEC Ltd
Private Road No. 7
Colwick Industrial Estate
Nottingham NG4 2AJ
UK
+44 115 961 6222
+44 115 961 6680
general@leec.co.uk
sales@leec.co.uk
customer.service@leec.co.uk
service@leec.co.uk
Incubators
2
Touch 190
Page 1 of 38
Advertisement
Table of Contents

Related Manuals for LEEC Culture Safe Touch 190

Summary of Contents for LEEC Culture Safe Touch 190
- Page 1 Operating Manual Culture Safe CO Incubators Touch 190 Touch 190S Address: LEEC Ltd Private Road No. 7 Colwick Industrial Estate Nottingham NG4 2AJ Tel: +44 115 961 6222 Fax: +44 115 961 6680 Enquiries E-mail: general@leec.co.uk Sales E-mail: sales@leec.co.uk After Sales E-mail: customer.service@leec.co.uk...
-
Page 2: Table Of Contents
CONTENTS 1. SAFETY 1.1. LEGAL CONSIDERATIONS 1.2. INTENDED USE 1.3. SYMBOLS USED IN THIS MANUAL 1.4. GENERAL SAFETY INSTRUCTIONS 2. DESCRIPTION 2.1. CONSTRUCTION 2.2. DOORS 2.3. CONTROL SYSTEM 2.4. CO2 SENSOR 2.5. DIAGRAMS 3. DELIVERY, TRANSPORTATION AND STORAGE 3.1. UNPACKING 3.2. - Page 3 7. SD CARD DATA LOGGING 7.1. START LOGGING 7.2. CHANGING FILENAME 7.3. REMOVING THE SD CARD 8. HIGH TEMPERATURE 200 ° C STERILISATION 8.1. PREPARATION 8.2. STARTING THE CYCLE 8.3. STERILISE PHASE 8.4. COOLING PHASE 8.5. ABORTING THE CYCLE 9. ERROR MESSAGE SCREENS 10.
-
Page 4: Safety
This manual contains information for installing, operation and maintenance of the incubator. It cannot cover all possible uses and applications. Please contact your dealer or LEEC directly if you have a special application or the manual does not describe your problem in enough detail. -
Page 5: General Safety Instructions
If in doubt please consult the Health and Safety Officer of your organisation. Only skilled electricians or engineers authorised by LEEC can perform repairs or maintenance on this incubator. Only original spare parts from LEEC can be used. There are no user serviceable parts within the incubator. -
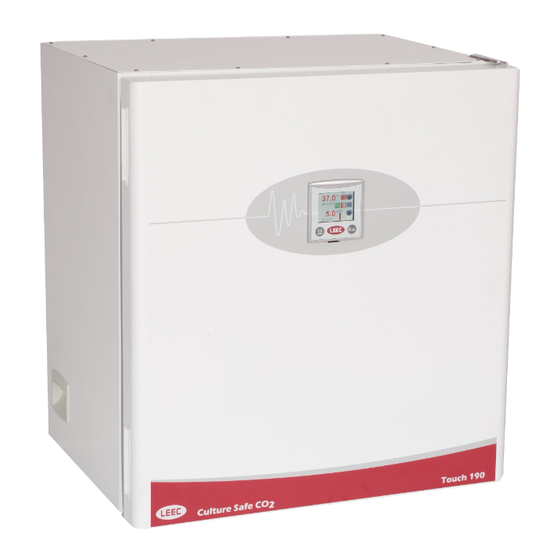
Page 6: Description
Culture Safe Touch CO2 incubators are fitted with the latest generation of programmable controller, ensuring precise control of temperature and CO2 levels. Accurate and stable heating throughout the entire chamber is ensured by the unique LEEC designed five sided direct heating element. In addition a separate independently controlled door heater is fitted to ensure that the inner glass door is free from condensation. -
Page 7: Control System
A RS232 serial port is fitted as standard. This allows you to connect the incubator to a PC so that you can remotely access the SD card data. PC software is required to do this. Contact your dealer or LEEC directly for advice. - Page 8 2.5.2. Inner view Sampling port inlet sensor return Chamber PT100 Shelves Left hand racking Right hand racking Service port sensor intake Inner door gasket Water tray 2.5.3. Rear connections Ethernet Inlet BMS relay Sampling port 4-20mA re-transmit RS232 serial Mains inlet Inlet fuse F1 Power switch Jan 2012...
-
Page 9: Delivery, Transportation And Storage
3. Delivery, transportation and storage. Unpacking 3.1. Inspect the packaging for signs of transportation damage. Carefully undo the top of the cardboard packaging and gently slide the packaging over the incubator. Inspect the incubator and inform the carrier immediately if there are any signs of transportation damage. Remove any packaging material from within the chamber. -
Page 10: Storage
The incubator can be placed on a table or worktop. Please ensure that the site is sufficiently strong enough to carry the weight of the incubator. LEEC do not recommend placing the incubator directly on the floor as this increases the risk of contamination. -
Page 11: Shelves And Usable Space
Place the tray is on the floor of the incubator, locating it with the side racking. Carefully fill the tray with 1.5 litres of distilled, sterilised water. LEEC recommend that you clean and refill the tray every week. Any spillages within the chamber should be removed and cleaned immediately. Water left on the chamber floor will cause condensation to form. -
Page 12: Gas Connection
(PRV) must be used. The CO inlet to the incubator is via a 4mm barbed push fitting. PRV’s with the correct fittings and other gas accessories can be supplied by LEEC. Section 10 For correct connection of CO follow these steps in order: 1) Connect the supplied tubing and HEPA filter to the gas supply. -
Page 13: Electrical Connection
Electrical connection 4.5. Risk of injury. Risk of damage to unit. Observe correct mains supply voltage. Risk of electrical shock. Do not connect with wet hands. No user serviceable parts. Do not remove service panels. Disconnect unit in an emergency. Before connecting the incubator, check that the electrical supply corresponds with the values on the incubator data plate. -
Page 14: Setting Time And Date
Setting time and date 5.2. After the controller has booted up, the time and date screen will be shown. Time and date are shown in the format hh:mm:ss and dd/mm/yy. If the time and date is correct press: Proceed to step 5.3 If the time and date are incorrect press the time display. -
Page 15: Main Display
Main display 5.4. The main screen shows chamber set points (SP) and process values (PV). It also shows the status of any alarm and has touch screen buttons for accessing further functions. Temperature process value Chamber temperature set point process value Chamber CO set point Sterilise cycle start... -
Page 16: Changing Co Set Point And Alarm Thresholds
The high and low alarm limits are relative to the chamber set point. For instance if the set point is 37.0 ° C and the high alarm limit is + 1.0 ° C then the alarm will trigger at 38.0° C. If the set point is changed to 36.5 °... - Page 17 Use the key pad to change the set point. Maximum set point is limited to 20.0% Minimum set point is limited to 0.0% Press to confirm selection. If the CO set point is 0.0% then CO control is disabled. Use the keypad to change the high alarm threshold. Press to confirm selection Use the keypad to change the low alarm threshold.
-
Page 18: Alarm Status Screen
Alarm status screen 5.7. The alarm icon gives a visual indication of alarm status. Pressing the alarm icon opens the alarm status screen: High temperature alarm Low temperature alarm High CO alarm Low CO alarm Door open alarm SD card alarm Low gas pressure alarm In an alarm condition an audible buzzer sounds and the alarm icon changes to red. -
Page 19: Graphical Display
6. Other features Graphical display 6.1. The controller has a built in feature that allows the user to view graphs of both temperature and CO stores a minimum of 3 days of graphical data. When the internal memory is full it will over-write the oldest data first. -
Page 20: Door Alarm
Utility Menu 6.2. On the main screen press the utility menu symbol: The utility menu combines all of the incubator settings menus in one place. You will already be familiar with some of these. Clock menu. Section 5.2 Temperature menu. Section 5.5 menu. -
Page 21: Incubator Info
Press the info icon: The information screen shows the incubator Serial Number as well at what release of software / firmware the controller is using. This information is important should you require any assistance from LEEC. Historical event log. 6.5. -
Page 22: User Security
6.6. User security This incubator allows for a user name and password to be programmed. This stops any unauthorised changes to incubator settings. 6.6.1. Entering a user name and password To enter a user name and password press the User icon: Press here on Line 1 to enter user name. -
Page 23: Sd Card Data Logging
The incubator is supplied with a 2 GB SD card. This SD card is pre-formatted to work with the controller’s operating system. Only cards supplied by LEEC can be used. Using any other type of card will not work with the incubator and will cause the controller system to crash. -
Page 24: Start Logging
7.1. Start logging If the card is already inserted when the incubator is powered up then logging will start automatically. If the SD symbol is grey then the incubator is logging. If it is red then it is not logging. Press the red SD icon in the Utility Menu. -
Page 25: Changing Filename
7.2. Changing filename. You can easily change the filename to start a new log. Press the filename on the screen, in this case 12345. Enter a new file name, in this case 67890. Press to store selection. Press to confirm the new filename: The controller will then locate the new file and start logging: Jan 2012 T190 Iss.2... -
Page 26: Removing The Sd Card
7.3. Removing the SD card Always perform the following steps before removing the SD Card. Failure to follow these steps will results in corrupted data. On the SD Card status screen press the SD card tools icon: Press the remove card icon: Press the confirm icon: It is now safe to remove the SD card. -
Page 27: High Temperature 200 ° C Sterilisation
8. High temperature sterilisation Risk of damage to unit. The Touch 190S is not intended to be used as an autoclave and must not be used for sterilising any other equipment. Only the shelves, racking and water tray can be left inside the incubator during sterilisation. - Page 28 When you have emptied the water tray, place it back inside the chamber and close the doors. Press the grey tick to acknowledge this: All checks are now complete. Press to proceed. This shows that the door locks have activated and that Operator 6 is logged on. Press to proceed Sterilise cycle...
- Page 29 The sterilise cycle consists of 3 distinct phases. They are: Heat up. • During the heat up phase, maximum power is applied to the heating elements. CO control is disabled to protect the sensor and the door locks are activated. 2 hour dwell.
-
Page 30: Cooling Phase
Cooling phase 8.4. After the 2 hour dwell is completed the incubator goes into the cooling phase of the sterilisation cycle. The doors are locked during this phase. CO control is disabled. The chamber temperature is displayed The cooling phase ends once the temperature falls below 38.0° C Press to continue to main screen. -
Page 31: Error Message Screens
Repeat the steps above to fix this. Boot screen error Take a picture of the screen. Turn power off for 1 minute. If problem persists contact LEEC Service with details of picture. Jan 2012 T190 Iss.2 Page 31 of 38... -
Page 32: Options
Options Volt free alarm relay (BMS) 10.1. All touch screen incubators are fitted as standard with a volt free changeover relay for connection to a building maintenance system (BMS). This relay changes state whenever the incubator is in an alarm condition. The relay changes back to its original state once the alarm condition clears. -
Page 33: Multi-Doors
RS 232 communication is fitted as standard. This allows for the SD card data to be remotely accessed and downloaded. A PC with a serial (COM) port is required. Software is required. Please contact LEEC limited for further details Ethernet communication (ETH) 10.4. -
Page 34: Cleaning
Cleaning Electrical hazard. Do not spill water or cleaning fluids over the inner or outer surfaces. Disconnect before cleaning. Completely dry the unit before reconnecting the power. Outer surfaces 12.1. Always disconnect the incubator before cleaning. It is recommended that the exterior of the incubator regularly wiped clean. Use a non-abrasive soft cloth dampened with a warm soapy water solution. -
Page 35: Service
All LEEC Touch 190 incubators are supplied with a two year manufacturer’s warranty from the date of installation. To register your warranty, please fill in the User Guarantee Registration Card and post to LEEC Limited or to your local distributor. -
Page 36: Technical Information
Technical information Technical data 15.1. TEMPERATURE MANAGEMENT Range ° C 5° C above ambient to 60° C Control ° C 0.1° C Stability ° C ±0.1° C @ 37.0° C Uniformity ° C ±0.25° C @ 37.0° C Door recovery, 30s opening minutes CO2 MANAGEMENT Range... - Page 37 Dimensional drawings 15.2. Jan 2012 T190 Iss.2 Page 37 of 38...
- Page 38 EC Declaration of Conformity Jan 2012 T190 Iss.2 Page 38 of 38...
Need help?
Do you have a question about the Culture Safe Touch 190 and is the answer not in the manual?
Questions and answers