Advertisement
Quick Links
AD8232 Heart Rate Monitor Hookup Guide
learn.sparkfun.com tutorial
Available online at:
Contents
Introduction
Introduction
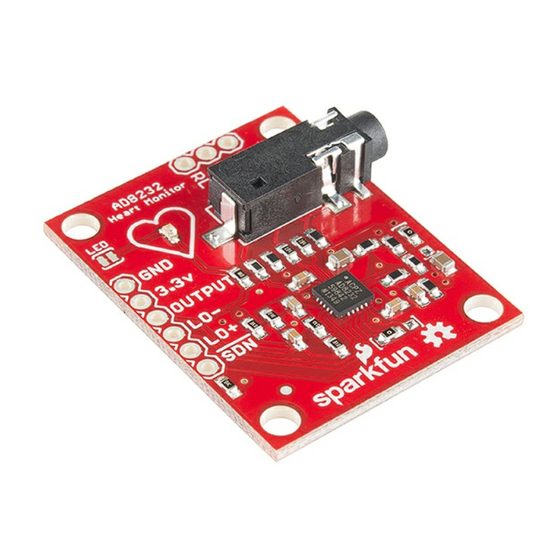
The
AD8232
is a neat little chip used to measure the electrical activity of the heart. This electrical
activity can be charted as an ECG or Electrocardiogram.
diagnose various heart conditions. Now for the disclaimer:
NOTE: This device is not intended to diagnose or treat any conditions.
http://sfe.io/t250
Page 1 of 15
Electrocardiography
a
is used to help
Advertisement

Summary of Contents for Sparkfun Electronics AD8232
-
Page 1: Table Of Contents
AD8232 Heart Rate Monitor Hookup Guide learn.sparkfun.com tutorial Available online at: http://sfe.io/t250 Contents Introduction Understanding the ECG Connecting the Hardware Uploading the Sketch and Connecting with Processing Tips and Tricks Resources and Going Further Introduction AD8232 is a neat little chip used to measure the electrical activity of the heart. This electrical activity can be charted as an ECG or Electrocardiogram. -
Page 2: Understanding The Ecg
Covered in this Tutorial In this tutorial, we will go over the basics for getting your AD8232 Heart Rate Monitor up and running. First, an overview of the board and all its features will be presented. Then, we’ll show you how hook it up to your favorite microcontroller and how to create visual data using Processing. - Page 3 Credit Wikipedia.org Page 3 of 15...
- Page 4 Diagram of the heart. Credit Wikipedia.org PR Interval The PR interval is the initial wave generated by an electrical impulse traveling from the right atrium to the left. The right atrium is the first chamber to see an electrical impulse. This electrical impulse causes the chambers to “depolarize”.
-
Page 5: Connecting The Hardware
Wikipedia.org Connecting the Hardware In this guide, we’ll connect the AD8232 Breakout to an Arduino microcontroller. We will build a simple cardiac monitor that will allow you to measure the electrical activity of the heart in real time! Materials required for this example... - Page 6 SparkFun Single Lead Heart Rate Monitor - AD8232 SEN-12650 The AD8232 SparkFun Single Lead Heart Rate Monitor is a cost-effective board used to measure the electrica… View AD8232 Heart Rate Monitor Example on SparkFun.com Page 6 of 15...
- Page 7 We’ll connect five of the nine pins on the board to your Arduino. The five pins you need are labeled GND, 3.3v, OUTPUT, LO-, and LO+. Board Pin Function Arduino Connection Label Ground 3.3v Power 3.3v 3.3v Supply OUTPUT Output Signal Leads-off Detect - 11 Leads-off Detect + 10 Shutdown...
- Page 8 Connecting Headers to the Board You can use any method you’d like to make your connections to the board. For this example, we’ll solder on a five-pin length of male-male header strip and use a breadboard and jumpers to make our connections.
- Page 9 Connection Diagram Now that the electronics are complete, let’s look at sensor pad placement. It is recommended to snap the sensor pads on the leads before application to the body. The closer to the heart the pads are, the better the measurement. The cables are color coded to help identify proper placement. Cable Signal Color...
- Page 10 Sensors connected to Heart Monitor Page 10 of 15...
-
Page 11: Uploading The Sketch And Connecting With Processing
Typical Sensor Placements Uploading the Sketch and Connecting with Processing By this point, you should have the hardware connected and ready. The example sketch can be found on github here. You can cut and paste the code straight from github or clone the repository and open the file. For more on using the SparkFun Github repositories, read this handy tutorial. - Page 12 Upload sketch to Arduino Pro-Mini Now that you have a sketch running, let’s get the processing sketch ready. The processing sketch will give you a visual output of what’s going on. The example processing sketch can be found here. The example Processing sketch works with the Processing IDE v2.2.1. Later versions may not work with the example code so makes sure to download the stable release for v2.2.1 from the Processing IDE Download page.
- Page 13 Run the Processing sketch If the processing sketch does not work, you may need to modify the following line: myPort = new Serial(this, Serial.list()[2], 9600); You may need to change the parameter inside Serial.list()[ N ]. A List of available COM ports will appear in the lower portion of the sketch window.
-
Page 14: Tips And Tricks
If everything is working correctly, you should see a nice box pop up and start displaying the output signal. “Normal” heart rate of an SFE engineer If your subject decides to remove the sensors, the leads off detection will kick in and display a flat blue line. -
Page 15: Resources And Going Further
You may have to adjust sensor placement for different individuals. Resources and Going Further Thanks for reading. For more resources on the AD8232 Heart Rate Monitor, check out the following links: AD8232 Datasheet AD8232 GitHub Repository For more Electronics Fun, check out these other SparkFun tutorials:...


Need help?
Do you have a question about the AD8232 and is the answer not in the manual?
Questions and answers