Table of Contents
Advertisement
Advertisement
Table of Contents

Related Manuals for Supersonic SC-813


Summary of Contents for Supersonic SC-813
- Page 1 7$%/(7 3& SC-813...
-
Page 2: Important Safety Information
In the Box Please take a moment to make sure that you have ev-erything in the list below. •SC-813 tablet •Power Adapter •USB cable •User’s manual... - Page 3 2. V-/V+ 3. RESET Use a needle or paper clip to reset unit 5. USB Connect to USB device or a computer to transfer data (e.g. Music, videos, photos, files) 6. HOST 7. HDMI 8. Headphone 9. DC Connect the power cable to charge to the device. 10.
-
Page 4: Basic Operation
Basic Operation Charging your device To ensure the longevity of your battery, please charge your tablet for 10 hours upon initial charge. Afterwards,charge the device accordingly as needed. Connect the DC adapter that is supplied with your device and plug it into an AC outlet that supports 100-240V ~50/60 Hz If battery is 0% please plug in charging cord for about 3-4 hours for a full charge. -
Page 5: Touch Panel
Touch Panel Click – Use finger or capacity panel pen to touch once, to select or activate function, select menu, or turn on applications. Tap and hold – Tap and hold for 2 seconds, a pop up menu with options will display. - Page 6 Slide – Slide up, down, left or right for fast scrolling, browsing page and display screen. Drag – drag an icon to relocate the position. Double Click – Double click to enlarge or shrink the display size of the picture or while browsing a website.
-
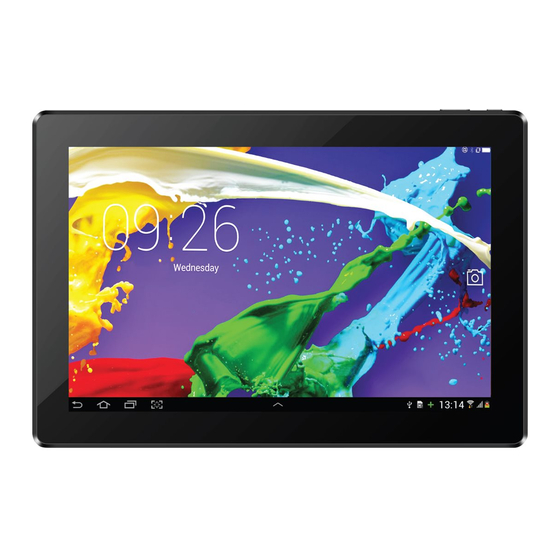
Page 7: Home Screen
Home Screen ⑥ ① ② ③ ④ ⑤ ⑦ ① Google search ② Tap to turn on voice search, it will search according to voice input ( Make sure WI-FI is on) ③ List of current running applications ④ Back to Home screen ⑤... -
Page 8: Adding Widgets To The Home Screen
To place an app icon shortcut on another home screen, drag it to the edge of the screen and wait for a new home screen to appear. (If the current home screen is empW\ the tablet will not create a new home screen). Adding Widgets to the Home Screen Some apps have Widgets that can be placed on a Home screen. - Page 9 Icon Icon Description WiFi signal Wifi connection, icon is full under strong signal Status of battery or if device is being charged Battery At the bottom of each screen, there will always be a navigation bar with five buttons. Return to the previous screen. Once you back up to the Home screen, you cannot go back any further.
-
Page 10: Internet Browsing
To enter into the application page,please slide upward on the home screen. Internet Browsing The Browser app lets you browse and view websites. 1) Go to Application page and select the CHROME icon. 2) Tap the address bar and enter in a URL. Browser Settings When browsing a webpage, tap the upper right “... -
Page 11: E-Mail Account Setup
Add/Delete Webpage Tap “ ” at the upper right corner, then press “New Tab” to add a webpage. Tap “X” to delete the webpage. E-Mail E-Mail Account Setup 1. Enter Application page and select “G-Mail.” 2. Enter Email address and Password. 3. -
Page 12: Google Play Music
Google Play Music Click “Play Music” in application page. With your Music Library displayed, select a track to begin playback. Video Player The built-in front camera can take pictures and video. Tap in the application page, then slide right on the screen and it will display the camera and video shooting mode. -
Page 13: Take A Photo
Take a Photo 1. Tap the Camera icon ( 2. To capture a photo, tap Shoot a Video 1. Tap select video. 2. Tap to record a video. 3. Tap to stop recording. 4. You can find the video file in the video player. Camera Settings In camera and video mode, tap &... -
Page 14: Managing Application Files
Managing Application Files Installation of Applications In the Android system, all application files are in APK format. APK files can be installed through a memory card, internal memory or downloaded from third party providers. Close Running Applications 1. Go to the settings menu page. 2. -
Page 15: Connecting A Usb Device
3.Click “Tap for more options” and choose “Transfer files”. You will now be able to transfer files to your computer. Connecting a USB device ‡ USB Keyboards and mice are supported by this device. View media files on USB storage with pre-loaded ‡... -
Page 16: Inserting A Memory Card
Inserting a Memory Card You may install a memory card to expand your device’s storage space. 1. This device supports a memory card with up to 32GB capacity. 2. Insert a memory card into the card slot. Make sure that the memory card is inserted all the way into the slot. Before removing the card, make sure your device is not accessing data on the card. -
Page 17: Language And Input
Tap a network name to see more details or to con nect to it. If the network is secured, you will be prompted to enter a password or other credentials. (If you don’t know the password, you will need to ask the owner of the network to provide it.) If the tablet finds a network that you connected to pre viously, it will connect to it automatically. -
Page 18: Date And Time
Date & Time When connected to the internet, turn on “Automatic date & time,” so the device can obtain real date & time. Developer Options Enter Setting Menu, then select “About Tablet,” then tap “Build number” about 8 times until the Developer Options menu appears on the screen. - Page 20 Security You can protect your device and data by setting a screen lock or encrypt- ing your tablet. Set a screen lock To set a screen lock, tap Settings Security Screen lock from application list. None Deactivate the screen lock. Pattern Draw a pattern to unlock.
- Page 21 Reset tablet You can reset system and desktop settings to their original values by the following steps: S ystem Select Settings Reset options from list. Warning!: Erase all data (factory reset) will erase all data from your device and SD card, including your google account, system and application data and settings and any other downloaded applications.
- Page 22 Setup Google Account + Add account To setup Google Account, tap Settings Users ! accounts Google from application list, then follow the on-screen instructions to create a new one.
- Page 23 Alarm From application list, tap Clock, and then select to add alarm. Tap the numeric pad to set alarm time, when you are finished, tap OK. Tap the time to change alarm time. To activate a preset alarm, set the alarm to ON. To cancel an alarm, set the alarm to OFF.
- Page 24 2. When the alarm sounds, to stop the alarm, click DISMISS, To repeat the alarm after a specified length of time, click SNOOZE. To delete an alarm, tap...
- Page 25 Ensure the wireless network is working by testing it using another wireless device. can restart the device then check if the record function works correctly.
-
Page 26: Fcc Statement
2GB DDR3 13.3”TFT IPS LCD (1920X1080), Capacitive touchscreen Camera (2.0MP+5.0MP) Octa Core Bluetooth Rechargable Li-poly battery power 10000mAh Power Adapter (5V,2A) Google, Android, Google Play and other marks are trademarks of Google LLC. FCC Statement Changes or modifications not expressly approved by the party responsible for compliance could void the user’s authority to operate the equipment. - Page 27 Warranty Basic Warranty Statement Supersonic Inc.(”Supersonic”) warrants this product to the original purchaser ONLY, to be free from defects in materials and workmanship under normal use, for ninety (90) DAYS from the date of original purchase. Proof of purchase (receipt) required.
Need help?
Do you have a question about the SC-813 and is the answer not in the manual?
Questions and answers