Table of Contents
Advertisement
Advertisement
Table of Contents

Subscribe to Our Youtube Channel
Summary of Contents for Anran DVR Kit
- Page 1 DVR Kits Quick Installation Guide www.anran-cctv.com...
-
Page 2: Table Of Contents
Content 1. Thanks--------------------------------------------------------------------2 2. Safety tips--------------------------------------------------------------- 2 3. What else do you need------------------------------------------------ 2 4. Know the hardware----------------------------------------------------3 5. Things to check before installation------------------------ ---------3 5.1 Package Includes-------------------------------------------------- 3 5.2 A test run------------------------------------------------------------3 6. Setup the System for Live View-------------------------------------- 4 6.1 Preparation--------------------------------------------------------- 4 6.2 Steps to setup the system---------------------------------------- 4 6.3 Set password--------------------------------------------------------5... -
Page 3: Thanks
This is a quick user’s guide explaining how to set the system up and get it running. If you need customer support, please email us at support@anran-cctv.com. You can expect a response within 24 hours 2. Safety Tips (Please Follow) 1. -
Page 4: Know The Hardware
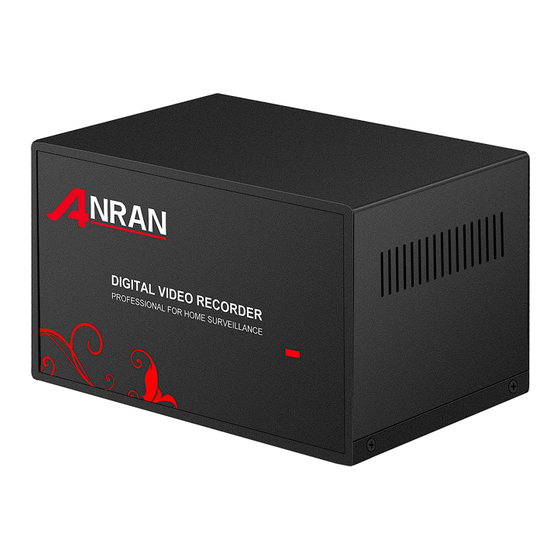
with an Internet connection you can have the system's full capabilities. Hardwire the NVR via a network cable to your router to get online. 4. Know the hardware (DVR) ① USB Ports: For mouse and data backup ② WAN/ LAN Port: Connect your DVR to the Internet ③... -
Page 5: A Test Run
6 to run the system. If everything works well, you can then go ahead and mount cameras to where you want. If there is any exception, please contact ANRAN support or your vendor. 6. Setup the System for Live View ①... -
Page 6: Set Password
1. Connect the monitor/ TV to the DVR via its HDMI or VGA port. 2. Connect the USB mouse to the USB port of DVR. 3. Connect the DVR’s WAN port to your router with a network cable. 4. Connect the camera to the DVR using a BNC cable 5. - Page 7 Default Password: no password (means leaving the password empty, just click “OK”, you can login directly) Tips: To protect your privacy, please set your password at your earliest convenience. Right click mouse→go to Main Menu→System→Account → Modify Pwd and then set a password. password can only be 6 to 12 digits, and no special characters.
-
Page 8: Name Cameras
④Name cameras Click right go to Main Menu → System → Channel Title; You can name each camera here. 7. Network setting -Get the system ONLINE The camera system supports P2P phone remote monitoring. Without Internet connection, the system will still allows you to do everything locally, however, you can view and playback the recordings via your phone whenever and wherever you want after the camera system is connected to the Internet. -
Page 9: Viewing The Camera On Smart Phone
and click “Application”. Step2. Right click→Network settings→Phone APP, you can see Network Status shows “Connected”, means the NVR has been successfully connected to the network. You also could find the Device ID number on this interface. 8. Viewing the Camera on Smart Phone... - Page 10 ①Add camera to your phone Step1.Download the APP and install it on the phone. ----Please search “Danale” in Google play or Apple store and install it on your phone. ----Scan the following QR code to install it. iOS client link Android client link Step2.
- Page 11 Step3. Login APP and click the button“ ” to add devices. Step4. You can add the device by automatically searching or scan the NVR’s device ID.
- Page 12 A. If your mobile phone is in the same LAN with the NVR (normally means they are connected to the same router), you can add the device by automatically search. Please enter your WiFi password, and then click “Next”. The app will automatically search the device which in the same LAN with your phone, then you can add the device which you want to add.
- Page 13 Tips: Device ID Number: Go to NVR system and right click → Network settings→Phone APP, you can find the Device ID and SN QR code. Step4. You can view the camera videos on your phone.
- Page 14 ②Share your video screen The first person who adds the device will be the only administrator. The others who want to add the device to their Danale APP, they need to be shared by the administrator. Please refer to follow steps to add device by administrator's share.
- Page 15 Step2. Let your family or friend login the Danale APP, click top left corner →Message→Agree. Step3. Then they can view the video on their phone APP. ③ Playback on mobile The DVR must be installed a hard disk and record the video successfully before you playback it.
-
Page 16: View Camera On
the App will automatically playback camera1, refer to the pictures below, you can switch the channels by yourself. 9. View camera on PC "Danale"CMS is a PC client software, which you can view the cameras video in local and remote. Please download and install the "Danale"CMS client software on your PC from the below link https://intl.danale.com/support... - Page 17 You can use the mobile phone Danale APP account to login the "Danale"CMS client software, and the device which added by the Danale APP will auto added to the "Danale"CMS. Step1: Open "Danale"CMS, you can use the mobile phone Danale APP account to login.
-
Page 18: Record Video
10. Record Video ①. System with preinstalled hard drive Kits with preinstalled hard drive will automatically start to record videos when system powered and run. Only thing to check is if hard drive is "Formatted". You can check it in “Main Manu→System→HDD Manage Disk”. - Page 19 ②. System without preinstalled hard drive Please refer to FAQ#Q1 to install the SATA hard drive and format it. After it's done, the system will record automatically. ③. Record setting The DVR needs to install a hard drive disk for recording. Without hard drive, the system can show live viewing, but can’t record, playback neither.
- Page 20 Stop: Whatever state the channel is, the corresponding channel recording stops when stop button is selected Period: Set the time section of common recording. The recording will start only among the set range. Regular: Record according to time section setting. Detect: Within the set time section, trigger the motion detect video blind, video loss or abnormal analysis.
- Page 21 Detect Record. Detect Record means to record only when movement is detected. For example, if you want the system to record detect 8am — 23:59. Below is the setting you should do. ④ Setup a record plan Different recording modes can be combined to make up a record plan.
-
Page 22: Playback Video
For example, if you want the system to record detect 8am— 23:59 and record 00:00-8am. Below is the setting you should do. 11. Playback video The NVR must be installed a hard disk and record the video successfully before you playback it. Step1. - Page 23 state. 12. Backup data The system allows you to backup specific files from NVR onto an external...
- Page 24 USB drive. The following instructions will show you how to find backup specific files. The NVR support USB backup. After insert the USB storage Right click→ Main Menu →Record→Backup→Search→Backup By this way, you can get the recorded video via USB 13.
- Page 25 Step1: Please Login the Google account, click Signing in to Google to set “2-Step Verification” is off, and turn on the “Allow less secure apps”. Step2: Please enable alarm and email alerts function. Right click mouse go to Main Menu→Alarm→Motion Detect→Click Enable, then click Advanced to choose Record Channel and check the Send Email.
-
Page 26: Faqs
Step3: Go to NVR system and right click→Network settings→Email, please set up email in NVR as below picture show. If mail tested succeeds, it is working. 14. FAQs Q1: How do I format the hard drive? A: Right click go to Main Menu→System→HDD Manage→Format Disk, then click Format Disk and format HDD... - Page 27 Q2. Where to find the Device ID of the system and NAT status? A: Right click go to Network Settings→Phone APP. Check the “Net Status”, when it showing “Connected”, NVR was successfully connected the network. Then you can get the APP QR code and Device ID number QR code.
- Page 28 Q3. How to setup motion detection recording? A: The NVR needs to install a hard disk drive for recording. Without hard drive, the system can show live viewing, but can’t record, playback neither.Motion Record means to record only when movement. 1.Go to Main Menu→Record→Record select channel, tick Schedule and Detect.
- Page 29 2. Motion detect setting Right click go to Main Menu→Alarm→Motion Detect→Advanced. Tick “Enable”, select “Sensitivity”, “Region”, “Record Channel”, “Buzzer”, “Send Email” according to your needs and click “OK” to save. It will record if the system detected the motion.
- Page 30 Q4. What to do if NVR can't connect cloud? Please refer to Q2. If the NAT status is not connected, it means the system failed to connect the cloud. You can try to do something as below. 1. Please check the yellow and green light on the Ethernet port of NVR. Green light should be light, and yellow light should be blinking which indicates the recorder connecting to router successfully.
- Page 31 Please use your TV remote control to switch signal source. If the signal source is right but you cannot get display, this is typically caused by resolution compatibility issue. The default NVR resolution is 1920x1080, please ensure TV resolution is 1920x1080 or bigger, also the video mode is correct.
- Page 32 If NVR can't recognize HDD, we can try methods below. 1. If hard drive is not from us, please make sure your hard drive meets all requirements below: a. The type should be SATA. b. Recommended use of specifications from500G to 4TB hard disk, 2.
- Page 33 Step1. Please capture a picture of the date show on the NVR and send it to our support E-mail (support@anran-cctv.com). Step2. We will generate a password when we get your mail, and send the new password to you.
-
Page 34: Limited Warranty Terms & Conditions
15. Limited Warranty Terms & Conditions 1. The standard warranty time of ANRAN is 12 months from the date of purchasing for products with the condition 'New'. Warranty on new products is one years from purchase date, unless some item that have a special stated. - Page 35 25000 square feet factory location in Shenzhen, China.Committed to providing easy and user-friendly video security and smart security solutions to all customers. ANRAN has been well received in a wide range of countries and areas, like the United States, the United Kingdom, Australia, European Union and much more.
Need help?
Do you have a question about the DVR Kit and is the answer not in the manual?
Questions and answers
My camera stop to function and I can't access the sistem
I have 4 cameras connected and recording but when I setup "PATROL" there are 4 camera shots and 4 blank shots as the routine rolls around. How can I set it so that only the 4 cameras are showing and not the blank screens where there are no cameras.
I don’t have images