Table of Contents
Advertisement
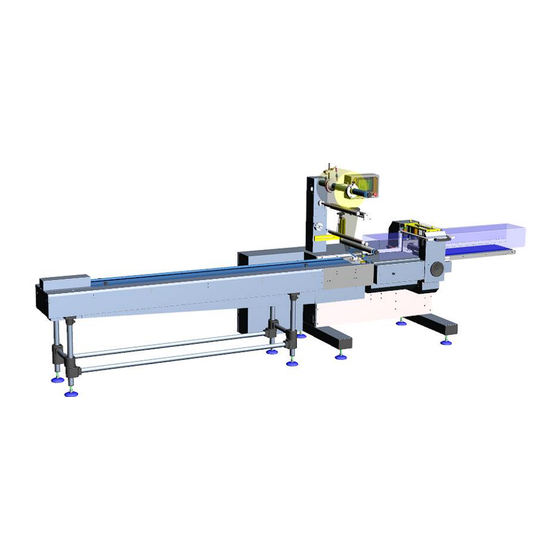
"LYRA"
Order DELFIN:
Year of construction: 2017
Instruction Manual
ORIGINAL INSTRUCTIONS
DELFIN S.r.l. – Via Keplero, 18
C.F. e P.IVA 02528290246
36034 MALO (VI) Italy
REG.IMPR.VICENZA N. 186653/1996
Tel.: +39 0445 580688 Fax: +39 0445 580766
R.E.A. N. 237768
e-mail:
info@delfin.it
http://www.delfin.it
Cap. Soc. Є 100.000,00 i.v.
Advertisement
Table of Contents

Summary of Contents for Delfin LYRA
- Page 1 “LYRA” Order DELFIN: Year of construction: 2017 Instruction Manual ORIGINAL INSTRUCTIONS DELFIN S.r.l. – Via Keplero, 18 C.F. e P.IVA 02528290246 36034 MALO (VI) Italy REG.IMPR.VICENZA N. 186653/1996 Tel.: +39 0445 580688 Fax: +39 0445 580766 R.E.A. N. 237768 e-mail: info@delfin.it...
-
Page 2: Table Of Contents
Reel assembly and disassembly................62 Film dragging device ..................63 Automatic film junction ..................64 Film editing ..................... 67 Fin wheel assembly's pulling/sealing set .......... 70 General instructions ..................70 Description of the components ................71 Manuale Lyra 600 sx elettr eng... - Page 3 Replacement of sealing jaw supply wires ............123 18.5 Check of belts/chain conditions and tension ............ 124 18.6 Periodically lubrication .................. 125 Packaging problems and solutions ..........128 Touch Screen panel ................. 131 20.1 Home page ....................133 Manuale Lyra 600 sx elettr eng...
- Page 4 Manual mode page ..................148 20.17 Outfeed conveyor page (optional) ............... 149 20.18 Electronic clutch limiter page ..............150 20.30 Recipes page .................... 151 20.31 List of recipes page ................... 152 Attached list of documents .............. 154 Manuale Lyra 600 sx elettr eng...
- Page 5 Pag 5 / 154 This page has been intentionally left blank Manuale Lyra 600 sx elettr eng...
- Page 6 We remind you that we have at your disposal our technical assistance office for any questions you may have for repairs and maintenance, this to ensure the maximum security to the personnel and to ensure a long machine life. Kind regards The manufacturer Manuale Lyra 600 sx elettr eng...
-
Page 7: General Information
Edition 1.0 Year and month it was printed : The manual is to be read and understood by : Loading and unloading personnel Installation personnel Machine operator Maintenance personnel Manuale Lyra 600 sx elettr eng... -
Page 8: Information Property
We invite the customer to advise the manufacturer in case the machine changes ownership or address. The manufacturer reminds the client of his obligations to respect local laws regarding safety and hygiene in the work place. Manuale Lyra 600 sx elettr eng... -
Page 9: Meanings And Symbols
Is important information the can avoid injury to the personnel responsible for the machine in all its life span Identification data of the manufacturer DELFIN S.r.l. Via Keplero, 18 36034 Malo (VI) ITALY Tel. 039/0445/580688 Fax. 039/0445/580766 E-mail: info@delfin.it Internet: http://www.delfin.it Manuale Lyra 600 sx elettr eng... -
Page 10: Machine Identification Data
Machine type _______________________________ Volt ______________ Model ______________________________________ Hz _______________ Serial number _______________________________ Kw _______________ Year of construction _________________________ Phase ____________ Certificate of origin __________________________ Weight ____________ EC conformity declaration See attached 1 EC conformity declaration. Manuale Lyra 600 sx elettr eng... -
Page 11: Warranty
NOTE The inobservance of the information in this manual will exclude manufacturer from any responsibility in case of accidents to persons and or property or malfunctioning of the machine. Manuale Lyra 600 sx elettr eng... -
Page 12: Technical Assistance
serial number year of construction. 1.10 Use of the manual Read the manual carefully, Chapter 1 “General information”, Chapter 2 “Safety information“, Chapter 3 “Technical data“, Chapter 4 “Installation“, Chapter 5 “Controls“. Manuale Lyra 600 sx elettr eng... - Page 13 Pag 13 / 154 This page has been intentionally left blank Manuale Lyra 600 sx elettr eng...
-
Page 14: Operators' Safety And Protective Devices
The use of a lower or greater number of operators, with inferior or divergent qualifications, or the use of intervention procedures differing from those indicated in this document, seriously jeopardizes the safety of the operators themselves and/or may impede the achievement of an excellent production. Manuale Lyra 600 sx elettr eng... - Page 15 Manufacturer’s technician Qualified technician that the manufacturer places at the disposition of clients to carry out complex repairs in particular situations, as agreed with the client Manuale Lyra 600 sx elettr eng...
- Page 16 Intervening on and restoring the protective devices on the machine. Machine safety measures. Functioning modes of the machine. Restarting the machine after a sudden or emergency arrest. Machine cleaning operations. Manuale Lyra 600 sx elettr eng...
-
Page 17: Machine Work Zones
Loading of product on the infeed conveyor (with machine running); cleaning (only with machine at a standstill and power feeds cut off); maintenance (only with machine at a standstill and power feeds cut off). Manuale Lyra 600 sx elettr eng... - Page 18 Access to the machine’s work zone (Z fig. 2.3.1) for machine cleaning and maintenance is allowed only for the assigned staff, with the machine at a standstill and with the electrical and pneumatic power feeds cut off. Manuale Lyra 600 sx elettr eng...
-
Page 19: Description Of The Command/Control And Work Stations
In case of danger, the operator may stop the machine through the emergency stop button (2 fig. 2.4.1.1). Fig. 2.4.1.1 Control and work stations Manuale Lyra 600 sx elettr eng... - Page 20 5. In zone ZE no preparation interventions are done but is normally used to gain access to the transversal sealing group (PL3 station fig. 2.4.1.1). 6. In zone ZF adjustment of the product brushes according to pace of the product itself (maintenance technician, PC station). Manuale Lyra 600 sx elettr eng...
-
Page 21: Designed Use And Prohibited Use
The machine was designed and built to work in closed facilities and be protected from atmospheric agents. The machine must be installed, connected and tested by the manufacturer’s technicians or those of the commissioner. Manuale Lyra 600 sx elettr eng... - Page 22 Using the machine for other purposes will exempt the Manufacturer from any liability for eventual accidents to persons or things and will immediately invalidate the warranty, due to which the User will be the sole person responsible before the authorized Bodies Manuale Lyra 600 sx elettr eng...
- Page 23 Use that does not comply with national norms or specific local norms. Lack of recommended maintenance. Unauthorized modifications or interventions. Use of non-original spare parts or not specific parts for the model Nonobservance, even partially, of instructions Exceptional events. Manuale Lyra 600 sx elettr eng...
-
Page 24: Protective Devices, Signs And Ppe
The resistance of the guards is adequate to resist the normal strains when running, undergoing cleaning, maintenance, and possible bumps caused by the operator and for remote cases of chain breakage. Fig. 2.6.1.1A Guards – infeed conveyor Manuale Lyra 600 sx elettr eng... - Page 25 <OFF> (right), you may open the moveable guard and let the machine run in low speed in <IMPULSE> mode. ATTENTION The <IMPULSE> mode may be used only by qualified and trained personnel (mechanical maintenance technician) for machine preparation interventions including film insertion. Fig. 2.6.1.1B Guards–longitudinal sealing group Manuale Lyra 600 sx elettr eng...
- Page 26 The resistance of the guards is adequate to resist normal functioning strains, or due to cleaning, maintenance, and other eventual bumps caused by the operator. Fig. 2.6.1.1D Guards – transversal seal/cut group Manuale Lyra 600 sx elettr eng...
- Page 27 <IMPULSE> mode. ATTENTION The <IMPULSE> mode may be used only by qualified and trained personnel (mechanical maintenance technician) for machine preparation interventions including film insertion. Fig. 2.6.1.1E Guards – outfeed conveyor Manuale Lyra 600 sx elettr eng...
- Page 28 (2 fig. 2.6.1.1G) you need to press the <RESET> button (3 fig. 2.6.1.1G) on the control panel. Fig. 2.6.1.1G Tear-cut protection device Manuale Lyra 600 sx elettr eng...
- Page 29 <RESET> button (3 fig. 2.6.1.1H) pressed on the control panel. Fig. 2.6.1.1H Protective device – emergency stop button Manuale Lyra 600 sx elettr eng...
- Page 30 (7 fig. 2.6.1.1I). The safety module is controlled by the following protective devices: -Intra-locking moveable guards; -Emergency stop button; -Flexible coupling; -circuit breakers of motors Fig. 2.6.1.1I Protective devices – electrical system Manuale Lyra 600 sx elettr eng...
- Page 31 (2 fig. 2.6.1.1J). Fig. 2.6.1.1J Pneumatic system ATTENTION The air resulting from the power supply must be filtered and dried using special devices, before entering the air treatment unit of the packaging machine. Manuale Lyra 600 sx elettr eng...
- Page 32 Danger obstacle Low temperature below. risk. Danger hot Danger of general surface. crushing. Danger sharp Danger rotating object. rollers. Danger automatic General danger. start. Danger fall with Danger obstacle at altitude. the top. Manuale Lyra 600 sx elettr eng...
- Page 33 Pag 33 / 154 Fig. 2.6.2.2 Plaque for the general safety instructions on the back of machine Additional symbol, located on the rear of the machine, indicating the prohibition of removing the guards and protective devices. Manuale Lyra 600 sx elettr eng...
-
Page 34: Residual Risks
(see Chapter 2.8 - General instructions for safety and prevention). In particular, the persons in proximity with the work zone become “exposed persons” only when they insert their upper limbs into the work zone. Manuale Lyra 600 sx elettr eng... - Page 35 Comment on The danger zone of the infeed conveyor is not protected by residual risk guards. Risks for persons Very slight injuries to fingers and hands. Fig. 2.7.1.1A Position of residual risk no 1 Manuale Lyra 600 sx elettr eng...
- Page 36 During the packaging cycle the operator does not need to enter the danger zones. Risks for persons Injuries to fingers or hands. Fig. 2.7.1.1B Position of residual risk no. 2 Manuale Lyra 600 sx elettr eng...
- Page 37 During the packaging cycle the operator does not need to enter the danger zones. Risks for persons Serious injuries to hands and fingers. Fig. 2.7.1.1C Position of residual risk no. 3 Manuale Lyra 600 sx elettr eng...
- Page 38 During the packaging cycle the operator does not need to enter the danger zones. Type of hazard Serious injuries to hands or fingers. Fig. 2.7.1.1D Position of residual risk no. 4 Manuale Lyra 600 sx elettr eng...
- Page 39 During the packaging cycle the operator does not need to enter the danger zones. Risks for persons Serious injuries to hands or fingers. Fig. 2.7.1.1E Position of residual risk no. 5 Manuale Lyra 600 sx elettr eng...
- Page 40 The temperature remains hazardous for about 30 minutes after the machine has stopped. Risks for persons Serious injuries to hands or fingers. Fig. 2.7.1.1F Position of residual risk no. 6 Manuale Lyra 600 sx elettr eng...
- Page 41 Comment on zone. residual risk The temperature remains hazardous for about 30 minutes after the machine has stopped. Risks for persons Serious injuries to hands or fingers. Fig. 2.7.1.1G Position of residual risk no. 7 Manuale Lyra 600 sx elettr eng...
- Page 42 During the packaging cycle the operator does not need to enter the danger zones. Type of hazard Injuries to hands or fingers. Fig. 2.7.1.1H Position of residual risk no. 8 Manuale Lyra 600 sx elettr eng...
- Page 43 Besides, the levels of exposures emitted may vary from country to country. This information, however, allows the machine user to make a better assessment of the dangers and risks involved. Manuale Lyra 600 sx elettr eng...
- Page 44 The client is charged with the task of properly informing his own staff of the dangers arising from sound emissions. Only adequate protection may help avoid the danger of partial loss of hearing. The Client is obliged to respect the national norms in force on these matters. Manuale Lyra 600 sx elettr eng...
-
Page 45: General Instructions For Safety And Prevention
The operator assigned to the machine will have to always use the personal protective equipment foreseen by EU directives and national norms; he will furthermore follow the instructions given in this manual. Manuale Lyra 600 sx elettr eng... - Page 46 The machine will be used only for the purposes it was designed for (see Chapter. 2.5 Designed and unforeseen use). It is prohibited to eliminate and/or tamper with the protective devices installed on the machine. The writings, signs, warnings must not be removed or made unreadable. Manuale Lyra 600 sx elettr eng...
- Page 47 Pag 47 / 154 This page has been intentionally left blank Manuale Lyra 600 sx elettr eng...
-
Page 48: Technical Data
Manuale Lyra 600 sx elettr eng... - Page 49 Pag 49 / 154 This page has been intentionally left blank Manuale Lyra 600 sx elettr eng...
-
Page 50: Installation
Operators responsible for moving: N. 1 qualified technician for handling and installation Personal protective equipment to be used: working gloves + accident prevention shoes + protective helmet Manuale Lyra 600 sx elettr eng... - Page 51 NOTE Before any lifting of the machine, you must disconnect the infeed conveyor from the machine. The infeed conveyor must be lifted separately from the machine. Manuale Lyra 600 sx elettr eng...
- Page 52 (fig. 4.1.4). NOTE To lift the infeed conveyor using the same procedure adopted for the machine, using forklift (fig. 4.1.4). Fig. 4.1.4 Lifting of the infeed conveyor Manuale Lyra 600 sx elettr eng...
- Page 53 (pos.2 Fig. 4.1.6), to adjust the feet loosen the counter nut (pos.1 Fig. 4.1.6). Once the operation has been completed remember to fasten the counter nuts. Fig. 4.1.6 Adjust the machine feet Manuale Lyra 600 sx elettr eng...
-
Page 54: Electrical Connection
Electrical connection The machine is supplied with a male sprocket fixed to the machine body, and a female sprocket that is to be connected to the electrical cable. Fig. 4.2.1 Electrical connection Manuale Lyra 600 sx elettr eng... -
Page 55: Compressed Air Treatment Group (Optional)
Pag 55 / 154 Compressed air treatment group (optional) Reference fig. 4.3.1. 1. Exclusion air supply valve and pressure relief. 2. Filter. 3. Pressure regulator. 4. Manometer. Fig. 4.3.1 Compressed air treatment group Manuale Lyra 600 sx elettr eng... - Page 56 Pag 56 / 154 This page has been intentionally left blank Manuale Lyra 600 sx elettr eng...
-
Page 57: Controls
The machine can run only at a low safety speed pre-determined by the manufacturer. When the key selector is set to this position, you can run the machine with the safety guards open (if required for carrying out setting operations on the machine). Manuale Lyra 600 sx elettr eng... - Page 58 Manuale Lyra 600 sx elettr eng...
- Page 59 Pag 59 / 154 This page has been intentionally left blank Manuale Lyra 600 sx elettr eng...
-
Page 60: Film Roll Holder Shaft And Calander Assembly
This is very important for a correct forming of the material in the forming box area. The extra braking tension is obtained by tightening the leather cord. Manuale Lyra 600 sx elettr eng... -
Page 61: Description Of The Components
(pos. 3 fig. 6.2). The shaft is attached to the main machine structure (column). This shaft act as a support for the reel, while it unwinds. Fig. 6.2 Reel holder description Manuale Lyra 600 sx elettr eng... -
Page 62: Reel Assembly And Disassembly
3 fig. 6.4) and do the adjustment by fasten or unloosen the ring nut (pos. 4 fig. 6.4) e) Open the plastic jaws of the reel holder by acting on the regulation knob (pos. 2 fig. 6.4). Manuale Lyra 600 sx elettr eng... -
Page 63: Film Dragging Device
Now the film is ready to be introduced into the automatic film junction (pos. 3 fig. 6.2). There is also a photocell indicating the film ending (pos. 2 fig. 6.5). When the film ends, the machine stops. Fig. 6.5 Automatic film junction device Manuale Lyra 600 sx elettr eng... -
Page 64: Automatic Film Junction
6) put the selector (Fig. 6.3 pos. 1) in the central position, the red light will switch off and the green light will switch on. Now the machine is ready to do the automatic junction of the film when the reel will end. Fig. 6.6 Junction area Manuale Lyra 600 sx elettr eng... - Page 65 (pos. 2 fig. 6.8A). The distance between the rolls and the pressure against the film are regulated automatically by pneumatic cylinders (pos. 3 fig. 6.8A). Fig. 6.8A Rolls for film dragging Manuale Lyra 600 sx elettr eng...
- Page 66 Pag 66 / 154 Fig. 6.8B Manuale Lyra 600 sx elettr eng...
-
Page 67: Film Editing
All the possible positions are indicated by metric rules and can be written down on the technical sheet. The technical sheet is supplied with the machine from our factory or by the technician that installs the machine. Manuale Lyra 600 sx elettr eng... - Page 68 The packaging machine is equipped with a shaping tunnel composed of a trainer fixed / adjustable, which allows to adjust according to the size of the product. Manuale Lyra 600 sx elettr eng...
- Page 69 Pag 69 / 154 This page has been intentionally left blank Manuale Lyra 600 sx elettr eng...
-
Page 70: Fin Wheel Assembly's Pulling/Sealing Set
(2 fig. 7.1); shut-off valve closed (3 fig. 7.1). Assigned personnel: One mechanical maintenance technician PPE to be used: safety gloves + overalls + safety shoes Figure 7.1 – Electric feed section Manuale Lyra 600 sx elettr eng... -
Page 71: Description Of The Components
The film is threaded in between the fin wheels by opening the fin wheels (Pneumatic Fig. 7.3 selector pos.1). NOTE The heated fin wheels (center set) opens automatically when the machines is stopped, when the start button is pressed the fin wheels will automatically close. Manuale Lyra 600 sx elettr eng... -
Page 72: Adjustment Of The Fin Wheel Pressure
The fin wheel pressure is adjusted by specialized technical personnel at the manufacturer, and it should therefore not be necessary to carry out any further adjustments. ATTENTION Before starting the machine make sure the fin wheels have reached the desired temperature. Manuale Lyra 600 sx elettr eng... -
Page 73: Replacement Of A Resistance/Probe
Remove the broken resistance and replace with a new one, carry out the above operation in the inverse way. Fig. 7.5 View of the guard under the fin wheels Manuale Lyra 600 sx elettr eng... - Page 74 3) The thermocouple wires is found on the 4 track slip ring). The thermocouple wires are thinner than the resistance wires and are of two colours red & blue. 4) Remove the broken thermocouple and replace with a new one, carry out the above operation in the inverse way. Manuale Lyra 600 sx elettr eng...
-
Page 75: Adjustments Of The Motorized Reel (Optional)
2.6.1.1C pos. 1 and unscrew the screws in fig. 7.8 pos. 3. Now you can regulate the position of the support (fig. 7.8 pos. 4) e re-fix the screws. Fig. 7.8 Adjustments of the reel Manuale Lyra 600 sx elettr eng... - Page 76 Pag 76 / 154 This page has been intentionally left blank Manuale Lyra 600 sx elettr eng...
-
Page 77: Transverse Sealing Jaw Assembly
(2 fig. 8); shut-off valve closed (3 fig. 8). Assigned personnel: One mechanical maintenance technician PPE to be used: safety gloves + overalls + safety shoes Fig. 8 – Electric feed section Manuale Lyra 600 sx elettr eng... -
Page 78: Jaw Teeth Adjustments
It is recommended to contact the local distributor or manufacturer, before carrying out these adjustments. The fin wheel pressure is adjusted by specialised technical personnel at the manufacturer, and it should therefore not be necessary to carry out any further adjustments. Manuale Lyra 600 sx elettr eng... -
Page 79: Jaw Teeth Adjustment On A Sealing Jaw With Longitudinal Sealing Pattern
It is therefore not present the adjustment of the tension of the spring of Figure 8.1.3. Jaw teeth adjustment on a sealing jaw with longitudinal sealing pattern Fig.8.2.1 Knife fastening (back of jaw) Manuale Lyra 600 sx elettr eng... - Page 80 NOTE The instructions for the adjustment of the knife is also valid for the adjustment of the anvil. Manuale Lyra 600 sx elettr eng...
- Page 81 Pag 81 / 154 Fig. 8.2.3 View of transverse sealing jaw assembly Fig. 8.2.4 View of upper transverse sealing jaw gear Manuale Lyra 600 sx elettr eng...
- Page 82 The pressure of the upper transverse sealing jaw against the lower jaw will depend on the nature, thickness and quality of the film to be sealed. The more/less pressure is adjusted by turning the screws (Fig.8.2.3 pos. 3), (30 mm. spanner), conversely to remove the pressure. Manuale Lyra 600 sx elettr eng...
-
Page 83: Jaw Teeth Adjustment On A Sealing Jaw With Transverse Sealing Pattern
ATTENTION The slip rings of the sealing jaw assembly will have electrical supply to them, it is therefore necessary to pay careful attention not to touch them with your hands or arms. Manuale Lyra 600 sx elettr eng... - Page 84 K) Disconnect the electrical supply from the machine. l) Re-block the two bolts and the grub screw on the upper jaw. m) Re-assemble the back guard of the transverse sealing jaw assembly, and connect the electrical supply to the machine Manuale Lyra 600 sx elettr eng...
- Page 85 To lower the height you have to turn the wheel clockwise to raise it should turn counterclockwise. The height adjustment is used to obtain the transverse weld always at the center with respect to the height of the product. Manuale Lyra 600 sx elettr eng...
-
Page 86: Assembly And Adjustment Of The Knife
12) Fasten he slip torque rings 5-6 turns (Fig. 8.1.3 pos. 1) with a section spanner supplied with the machine (only with mechanical torque limiter). 13) Re-assemble the back guard and connect the main electrical supply. Manuale Lyra 600 sx elettr eng... -
Page 87: Replacement Of The Brushes On The Slip Ring Holders
Remove the worn out carbon brushes and replace with the new ones. d) Fasten the screws of the replaced brushes (Fig.8.6.1 pos. 1) with a screw driver. Fig. 8.5.1 Back view of the machine Manuale Lyra 600 sx elettr eng... -
Page 88: Heat Adjustment And Replacement Of The Heaters
The heater wires are to be connected to the two tracks on the internal side of the machine (Fig.8.6.1 pos.4) Re-assemble the guards that have been dismantled and connect the electrical supply. Manuale Lyra 600 sx elettr eng... - Page 89 Pag 89 / 154 Fig. 8.6.2 View of transverse sealing jaw assembly Manuale Lyra 600 sx elettr eng...
- Page 90 Pag 90 / 154 This page has been intentionally left blank Manuale Lyra 600 sx elettr eng...
-
Page 91: Torque Limit (Safety Clutch) On The Sealing Jaws (Only For Mechanical Torque Limiter)
Fig. 9.1 Positioning of the micro-switch on the disengaging disc Manuale Lyra 600 sx elettr eng... - Page 92 Pag 92 / 154 Fig. 9.2 Re-phasing hand wheel on the transverse sealing jaw assembly Manuale Lyra 600 sx elettr eng...
- Page 93 Pag 93 / 154 This page has been intentionally left blank Manuale Lyra 600 sx elettr eng...
-
Page 94: Bag Length Adjustment With Neutral Film (Not Film Registered Film), On An Electronic Machine
Fig. 11.1 Page on touch screen for bag length adjustment. To adjust the bag length proceed as follows: a) Press on the window position 1 in order to open the numerical table. b) Digit the desired bag length. c) Press ENTER. Manuale Lyra 600 sx elettr eng... - Page 95 Pag 95 / 154 This page has been intentionally left blank Manuale Lyra 600 sx elettr eng...
-
Page 96: Setting To Work The Photocell Group
Place a spot of the film between the roller and the projector and run a quick press on the button (4 fig. 13.1). The photocell is now configured. The orange LED will light when the film pass through the spot. Fig. 13.1 Photocell head Manuale Lyra 600 sx elettr eng... - Page 97 Pag 97 / 154 This page has been intentionally left blank Manuale Lyra 600 sx elettr eng...
-
Page 98: Adjustment Of The Bag Length With Print Registered Film (Optional)
Push the button position 2 in order to open the page shown below in the photo. e) Push the button position 3, the page relative to the photocell for print-registered film will appear. Manuale Lyra 600 sx elettr eng... - Page 99 If you press button position 9, the notch will retrieve of 1 mm. To exit press button position 4 o) By pressing the button position 10 film move up to film black print mark and after slops to the setting value (11). Manuale Lyra 600 sx elettr eng...
- Page 100 Pag 100 / 154 This page has been intentionally left blank Manuale Lyra 600 sx elettr eng...
-
Page 101: Infeed Conveyor
(2 fig. 15.1); shut-off valve closed (3 fig. 15.1). Assigned personnel: One mechanical maintenance technician PPE to be used: safety gloves + overalls + safety shoes Fig. 15.1 – Electric feed section Manuale Lyra 600 sx elettr eng... - Page 102 Fig. 15.2 View of infeed conveyor When the long or short pitch is used, the ratio between the infeed conveyor and the jaws must correspond, this ratio is obtained on the control panel (touch screen). Manuale Lyra 600 sx elettr eng...
-
Page 103: Pusher Dismantling And Assembly
Fig. 15.4 pos. 1). If the pusher is small use a pair of pliers. To assemble the pusher proceed in a conversely. Pay attention that the pusher is inserted firmly in the pusher holder. Manuale Lyra 600 sx elettr eng... -
Page 104: Pusher Support Dismantling And Assembly
If the pusher support is assembled in the wrong position the product will not be in phase with the sealing jaws. h) Re-assemble the parts dismantled. Manuale Lyra 600 sx elettr eng... -
Page 105: Adjustment Of The Infeed Conveyor Side Guides
(Fig. 15.2 pos. 2), move them towards the back of the infeed conveyor. If the machine is set up to pack a variety of product heights the machine will be supplied with more than one set of side guides. Manuale Lyra 600 sx elettr eng... -
Page 106: Infeed Conveyor Chain Tensioning
(Fig. 15.6 pos. 4) is parallel to the plate ( Fig. 15.6 pos. 2). Fig. 15.6 View of the end of the infeed conveyor Manuale Lyra 600 sx elettr eng... - Page 107 Pag 107 / 154 This page has been intentionally left blank Manuale Lyra 600 sx elettr eng...
-
Page 108: Forming Box Adjustments
(2 fig. 16.1); shut-off valve closed (3 fig. 16). Assigned personnel: One mechanical maintenance technician PPE to be used: safety gloves + overalls + safety shoes Figure 16 – Electric feed section Manuale Lyra 600 sx elettr eng... -
Page 109: Fixed Forming Box
Centering of the adjustable forming box in respect to the machine axis, proceed as follows: Loosen the blocking screw and position the center of the adjustable forming box in the center of the fin wheel axis. Manuale Lyra 600 sx elettr eng... - Page 110 The adjustable forming tunnel must be positioned with the horizontal setting as close as possible to the infeed conveyor. Check that the inclined part of the stainless steel wings do not touch the infeed conveyor worktops. Fig. 16.2.1 View of adjustable forming box Manuale Lyra 600 sx elettr eng...
- Page 111 These supplementary tops allow products to be fed inside the tunnel without interfering with the film diagonals (products which need the use of this particular system, will be indicated in the final test form). Manuale Lyra 600 sx elettr eng...
- Page 112 1) and move the calander arm ( Fig. 16.2.4 pos. 2) horizontally, once the correct tension is achieved, re-block the blocking handle ( Fig. 16.2.4 pos. 1). Fig. 16.2.4 View of film tension calander Manuale Lyra 600 sx elettr eng...
-
Page 113: Fixed Adjustable Forming Box
Make sure that the bearings (Fig. 16.3.2 pos. 4) against which the film flows are disconnected from the cores (Fig. 16.3.1, pos. 3) of at least 15-20 mm. Fig. 16.3.2 Height adjustment film Manuale Lyra 600 sx elettr eng... - Page 114 Then insert the new souls paying attention to the dowel pins (Fig. 16.3.4 pos. 4). d) Screw the leaflets. Fig. 16.3.4 View replacement of internal cores trainer Each machine comes with the souls necessary depending on the size of the product Manuale Lyra 600 sx elettr eng...
- Page 115 Pag 115 / 154 This page has been intentionally left blank Manuale Lyra 600 sx elettr eng...
-
Page 116: Discharge Belt Conveyor
(2 fig. 17.1); shut-off valve closed (3 fig. 17.1). Assigned personnel: One mechanical maintenance technician PPE to be used: safety gloves + overalls + safety shoes Figure 17.1 – Electric feed section Manuale Lyra 600 sx elettr eng... -
Page 117: Maintenance
Check that at the machine outfeed the rollers protrusion to left and to the right of the conveyor is equal (if this condition is not fulfilled, follow the procedure described below). Fig. 17.2 Outfeed conveyor font view Manuale Lyra 600 sx elettr eng... - Page 118 The above maintenance work must be carried out by specialized personnel. ATTENTION To replace the feeding conveyor a suitable technical preparation is necessary. Contact the Manufacturer/Seller for assistance before carrying out this task. Manuale Lyra 600 sx elettr eng...
- Page 119 Pag 119 / 154 This page has been intentionally left blank Manuale Lyra 600 sx elettr eng...
-
Page 120: Use And Maintenance Of Machinery
(2 fig. 18.1.1); shut-off valve open, if applicable (3 fig.18.1.1). Employees operation: No. 1 mechanical maintenance technician PPE to be used: safety gloves + overalls + safety shoes Figure 18.1.1 – Electric feed section Manuale Lyra 600 sx elettr eng... -
Page 121: Use And Maintenance
Load the products to be wrapped on the infeed conveyor and proceed to the product timing through the apposite push-button and hand wheel until achieving the appropriate timing between infeed conveyor and sealing jaw as described in Chapter 12. Manuale Lyra 600 sx elettr eng... -
Page 122: Scheduled Maintenance
Periodically check the chains or toothed belts, they are to be tightened if loose and if worn out replace them with new chain. (All the chains and belts fitted on the machines are high-quality: if used and lubricated correctly, they will last forever). Manuale Lyra 600 sx elettr eng... -
Page 123: Replacement Of Sealing Jaw Supply Wires
The two pieces of wire used are for mobile laying, or rather very flexible. Should the need arise, replace them with wires with the same characteristics. ATTENTION While replacing them, take particular care to their connection: never invert their polarities! Fig. 18.4.1 Supply wires Manuale Lyra 600 sx elettr eng... -
Page 124: Check Of Belts/Chain Conditions And Tension
Check of belts/chain conditions and tension Every three months check the conditions of the toothed belts (Fig. 18.5.1 pos.1) and chain (fig. 18.5.1 pos. 2), tightening or replacing them, if necessary. Fig. 18.5.1 Drive belt compartment Manuale Lyra 600 sx elettr eng... -
Page 125: Periodically Lubrication
Pay attention not to apply grease to the slip rings and brush holders. g) After having completed the above operation, re-assemble all the guards previously removed. Do not for any reason switch on the machine before having carried out this operation. Manuale Lyra 600 sx elettr eng... - Page 126 Alpha max 220 Transmission V.E Reducer oil A.T.F. Dexron fluid Autran DX AGIP A.T.F. Dexron CHEVRON A.T.F. Dexron ESSO A.T.F. Dexron FINA A.T.F. Dexron MOBIL A.T.F. 220 SHELL A.T.F. Dexron CASTROL TQ Dexron II Manuale Lyra 600 sx elettr eng...
- Page 127 Pag 127 / 154 This page has been intentionally left blank Manuale Lyra 600 sx elettr eng...
-
Page 128: Packaging Problems And Solutions
Chapter 7. 2) Check that the film does not slip between the wheels of the first group (towards the infeed conveyor) and put the two wheels closer as described in Chapter 7, if necessary. Manuale Lyra 600 sx elettr eng... - Page 129 If this is not sufficient, then adjust the knife Chapter 7. c) If the knife still does not cut it may be necessary to replace the existing knife with a new one or you can have the knife sharpened. Manuale Lyra 600 sx elettr eng...
- Page 130 Pag 130 / 154 This page has been intentionally left blank Manuale Lyra 600 sx elettr eng...
-
Page 131: Touch Screen Panel
In this way if the operator opens a guard ext. the machine will come to an immediate halt; conversely the machine will only run if the start button is kept pressed. 6) Free 7) Emergency stop button: Used to bring the machine to an immediate halt in case of an emergency. Manuale Lyra 600 sx elettr eng... - Page 132 Pag 132 / 154 Pin order to pass to the first page of the touch-screen you must press button ref.1 Manuale Lyra 600 sx elettr eng...
-
Page 133: Home Page
10) Button to open / close the wheels. 11-13) Buttons showing the active film reel holder 12) Button to open / close the rubber roll. GREEN = close, GRAY = open 14) Button to discharge the machine. Manuale Lyra 600 sx elettr eng... -
Page 134: Alarm
25) Alarm for triggering of motor thermal switch for fin seal wheels control. 26) Alarm for triggering of motor thermal switch for rotary transversal sealing unit. 30) Alarm involving motor of out feed conveyor. Other indications will follow on the next page. Manuale Lyra 600 sx elettr eng... -
Page 135: Alarm
14) Alarm indicating that the pre-set temperature for the pre-heating sealing wheels (skates) has not yet been reached. 21) Alarm wrong reading photocell reading notch. 31) Alarm step on the infeed conveyor (if request). Manuale Lyra 600 sx elettr eng... -
Page 136: Temperature Control Page
9B) Buttons to set the temperature range of the bottom transverse sealing jaw at which the machine works. The temperature indicated by the red numbers is the actual temperature. The temperature indicated by the green rectangle is the temperature imposed. Manuale Lyra 600 sx elettr eng... -
Page 137: Block Notes - Setting
18) Button to enter the No product no bag page (optional). 19) Button to enter the automatic junction page (optional). 21) ON/OFF button for the film ending control (optional). 22) Button to enter the gusseting page (optional). Manuale Lyra 600 sx elettr eng... -
Page 138: Block Notes - Setting
5) Button position 5 is to close this page. 14) Button to pass to the page of manual mode. 17) Button to pass to the page of the outfeed conveyor (optional). 23) Button to pass to the page of electronic clutch limiter. Manuale Lyra 600 sx elettr eng... -
Page 139: Block Notes Page
15) Position of the transverse sealing jaws To write the data mentioned above proceed as follows: Press on the desired icon. A numerical table will appear, digit the desired value. To confirm press the Enter button. Manuale Lyra 600 sx elettr eng... -
Page 140: Product Counter Page
7) The button position 7 is to reset the number of bags imposed, once this is done the machine will start counting again from 0. 8) Button ON / OFF of the product counter to stop the machine. Manuale Lyra 600 sx elettr eng... -
Page 141: Photocell For Print-Registered Film Page (Optional)
- Press the button 11. - A table number will appear, enter the data. - Confirm with Enter. 13) Display error reading photocell, value expressed in millimeters. 14) Display step notch, value expressed in millimeters. Manuale Lyra 600 sx elettr eng... -
Page 142: 20.10 Product Phase Page
Open the numeric table and digit the pitch number 1-2 or 3. Press Enter to confirm. 11) Window to visualize the value in mm of the pitch chosen with the previous button 10. 12) Button ON/OFF infeed conveyor step controller. Manuale Lyra 600 sx elettr eng... -
Page 143: 20.11 Transversal Sealing Unit Slowdown Page
GREEN= to work with the euroslot hole GRAY= to work without euroslot hole 11) Button to confirm the number of jaws, the machine is working with. 12) Button to set the machine once the number of jaws has been confirmed. Manuale Lyra 600 sx elettr eng... -
Page 144: Printing Unit Page (Optional)
8) Phasing adjustment, in cam degrees (if required). To set the desired value, proceed as follows: - Press the desired button. - You will see a table of numbers, type the given. - Confirm with Enter. Manuale Lyra 600 sx elettr eng... -
Page 145: No Product No Bag Page (Optional)
12) Button to discharge the machine. To enter the desired value, proceed as follows: • Press the green key of interest. • A numeric keypad appears, type the desired data. • Confirm with Enter. Manuale Lyra 600 sx elettr eng... -
Page 146: Automatic Film Junction (Optional)
10) Button to set the distance in millimetres, in which the machine doesn’t read the notch. 11) Number of good bags, during the film junction. 12) Number of default bags, during the film junction. Manuale Lyra 600 sx elettr eng... -
Page 147: Gusseting Page (Optional)
9) Button to set the duration of the blowing device for double product removal. To enter the desired value, proceed as follows: • Press the green key of interest. • A numeric keypad appears, type the desired data. • Confirm with Enter. Manuale Lyra 600 sx elettr eng... -
Page 148: 20.16 Manual Mode Page
8) By pressing this button you can move the transversal sealing jaws, in the other direction. 9) By pressing this button you can move the outfeed conveyor manually (optional). 10) By pressing this button you can move the motorized reel manually (optional). Manuale Lyra 600 sx elettr eng... -
Page 149: Outfeed Conveyor Page (Optional)
2) Key to return to the previous page. 3) Button to close this page. 4) Set the distance between two consecutive products, in millimetres. 5) Set the final time of work of the outfeed conveyor, after the machine STOP, in seconds. Manuale Lyra 600 sx elettr eng... -
Page 150: 20.18 Electronic Clutch Limiter Page
9) By pressing this button you can set the activation threshold value of the electronic limiter for the motorized reel (optional). 10) By pressing this button you can set the activation threshold value of the electronic limiter for the infeed conveyor. Manuale Lyra 600 sx elettr eng... -
Page 151: Recipes Page
Load the recipe by pressing the button position 5. ATTENTION! This operation must be carried out with the machine in stop. Use the password 28028 to save / modify the recipes, when requested. Manuale Lyra 600 sx elettr eng... -
Page 152: 20.31 List Of Recipes Page
2) Button to close this page. 3) – 6) Buttons to slide the recipe list. 4) Name of the recipe selected. 5) Number of the recipe selected. 7) Button to return to the previous page. Manuale Lyra 600 sx elettr eng... - Page 153 Pag 153 / 154 This page has been intentionally left blank Manuale Lyra 600 sx elettr eng...
-
Page 154: Attached List Of Documents
Pag 154 / 154 Attached list of documents Attached 1 EC Conformity declaration Attached 2 EC Electrical diagrams Manuale Lyra 600 sx elettr eng...
Need help?
Do you have a question about the LYRA and is the answer not in the manual?
Questions and answers