Table of Contents
Advertisement
Advertisement
Table of Contents

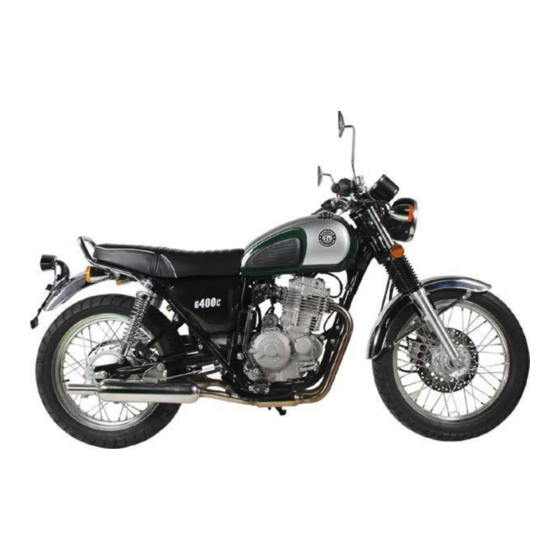
Summary of Contents for GENUINE MOTORCYCLES G400C
- Page 1 Owner's Manual Read this manual carefully before operating this vehicle.
- Page 2 GENUINE MOTORCYCLES G400C OWNER'S MANUAL USER GUIDE...
-
Page 3: General Information
Important Information Please read the user’s manual carefully before operating this vehicle. This manual contains a large amount of information of operation and cautions, which will help you to handle and control of the motorcycle. For your safety, please pay significant attention to the cautions as follows: Warning ——Failure to follow this information may lead to safety problems. -
Page 4: Table Of Contents
Index General Information……..……………………….……… ..1-7 Switches on right handlebar………………………………………22 Adding Fuel………………………….………………..……… II. User Instructions…………...…………………….………..…8 Mirrors……………………………………………………………24 Safety & Protective Gear…………………………………………...8 Gear Shift …………………………...…………………….…...24 Do not ride while under the influence……………………..…..…..9 Throttle…………………………………………….…..…….25 Safe riding principles……………………………………...…………9 Brakes…………………………………...……………………..25 Being seen……………………..………………………………….10 Kick starter………………………………………………………...26 Know your Motorcycle…………..…………………………………...10 Side stand………………………………………….……………...26 Loading &... - Page 5 Side stand………………………………………………….……60 Inspection and adjustment………………………………..……..…34 Bolts, nuts and fasteners……………..………………….………61 Maintenance Schedule……..……………………………..…35-36 Vehicle Washing…...………………………………….……………61 Spark Plug ………….…..………………………………………… 37 Storage…………………………………………………….……. 62 Timing phase……..………………………………………...……..…37 Special Torque Values…………………………………..……...63 Engine Oil………...…..…………………….……………………..38-40 Standard Torque Values…………………………………….……..64 Engine Compression………..………………………………...40-41 Valve Clearance & Adjustment……..……..…………………..…41-42 VII. Engine Management System……………………………….65 Air Filter……….………..………………..........…43 EFI System Composition………………………………………65-66 Idle Speed……...…………..……………..……..……………….……44 Major Components of EFI System………………………...67-68...
- Page 6 Technical Data Item Data Length*Width*Height 2105mm*760mm*1130mm 82.9 in x 29.9 in x 44.5 in Wheelbase 1420mm 55.9 in 160mm 6.3 in Minimum ground clearance Dry weight: 151kg, Curb weight: 160kg, 353 lbs. Complete vehicle weight Cradle type Frame type 28° Rake angle spring &...
- Page 7 Rear brake Drum brake Fuel tank volume 13±5L Fuel grade 87 Octane or higher Mode Single-cylinder Oil –cooling 4-stroke engine Cylinder bore 85.0mm Cylinder stroke 70.0mm Displacement 397.2cc Compression ratio 8.8:1 Max. power 19.5 kw (26.15 hp) @ 7000rpm Max. torque 30.0 N.m (22.13 ft lb) @ 5500rpm Intake: 0.07-0.10 mm ;Exhaust: 0.08-0.12 mm Valve clearance (cold)
- Page 8 Engine oil charge volume 2.2L Oil paper filter Engine oil filter element Electric motor starting Electric / Kick start 1600±150r/min Idle speed Clutch Wet clutch, coil clutch, paper friction wafer Clutch operating system Manual mechanical Variable speed gear 5-speed constant mesh 2.667 Primary reduction ratio Ⅰ...
- Page 9 Electric generator Permanent magnet DC magneto Battery 12V 9Ah Gel type Power supply system DC power supply, electric generator is only used to recharge battery Fusible cutout 15A/10A Spark plug NGK DPR8Z Spark plug gap 0.6-0.7mm Ignition coil type Open magnetic circuit Fuel supply mode Electronic fuel injection, ECU control Ignition mode...
-
Page 10: User Instructions
Wear protective gear User Instructions Wearing appropriate protective wear can prevent or reduce injuries from accidents. Important safety information • Helmet – The majority of serious motorcycle injuries and Your safety is very important. Your motorcycle can provide deaths are the direct result of a head injury. Drivers and many years of service and pleasure, if you take responsibility for passengers should always wear a helmet to prevent or reduce the your own safety and understand the challenges while riding. -
Page 11: Do Not Ride While Under The Influence
the operating conditions, your ability and experience. Do not ride while under the influence • Always inspect your motorcycle each time you use it to make Before getting on your bike, make sure: sure it is in safe operating condition. •... -
Page 12: Being Seen
Know Your Motorcycle Being seen • Get training if you are inexperienced. Many motorcycle accidents are caused by car drivers who do • Beginners should get training from a certified instructor. not see motorcycle riders on the road. To reduce the chance of an •... -
Page 13: Loading & Carrying Passengers
Loading & Carrying passengers Caution The design of the motorcycle requires even distribution of all You should avoid carrying passengers or large loads until you loads. Be aware that improper loading of goods will adversely have gained sufficient experience riding alone. Extra weight affect the performance and stability of the vehicle. -
Page 14: Gasoline And Exhaust Fumes
• Start slowing earlier as you approach a stop. Caution • Maintain a larger cushion of space ahead and to the sides. · To avoid scalding by muffler, do not park the vehicle near • Wait for larger gaps when you want to cross, enter or merge into walkways. -
Page 15: Fuel-Saving Tips
To ensure a comfortable and safe riding experience, please Fuel-Saving tips read this instruction book carefully. The way you drive your motorcycle will have a direct impact ·The pictures and illustrations in this book may be different on your fuel consumption. from the actual vehicle, due to cosmetic differences between •... -
Page 16: Vehicle Layout
Ill. Vehicle Layout Speedometer Tachometer Left handlebar Fuel cap... - Page 17 Front wheel Rear wheel Exhaust Pipe Rear brake...
- Page 18 Front turn signal Rear turn signal Front Fork Assembly Rear shock absorber Gearshift pedal...
-
Page 19: Instrument Gauges
Instrument Gauges Fuel Level Low Speedometer Fuel light on indicates fuel tank level is low. Indicates the motorcycle speed (mph). Do not Trip mileage meter exceed the posted legal speed limit to assure Current trip distance in miles. safe riding. 2. - Page 20 Speedometer Odometer Tachometer Miles Per Hour OTC Indicator Zero Knob Turn indicator High beam indicator Neutral indicator Fuel gauge...
-
Page 21: Gauge Check
Gauge Check 1. Neutral Light 2. Check Engine Light When the ignition switch is in the "on" position, and all other Using the shift lever, shift the motorcycle into neutral. start conditions have been satisfied (see "Start Conditions" The green "N"... -
Page 22: Iv. Controls
Caution IV. CONTROLS ·Do not change the ignition key position when riding. Ignition Switch The ignition switch is used to start the engine and turn the If the key is moved to the position during riding, all engine off. electrical systems will be off. While riding, do not remove the main switch key in order to avoid an accident. -
Page 23: Switches On Left Handlebar
Direction Indicator Hi and Low beam Operation Use the direction indication switch when turning left or right. If Press the button, the switch position will determine the distance the main switch is the run position, the direction indicator of the headlight. will flash when slid to the left or right. -
Page 24: Switches On Right Handlebar
Horn Button Emergency Kill Switch The emergency kill switch is used to turn off the motorcycle if When the main switch is in the "on" position, if you an emergency occurs while riding or if the vehicle falls over press the horn button, will emit a loud sound. -
Page 25: Adding Fuel
Fuel Fill Caution To fuel the motorcycle, place the motorcycle on the side-stand. · The Kill switch should only be used in emergency Open the fuel tank lock cover and using the key, turn the fuel situations. cap and remove the fuel cap from the fuel tank. Add fuel to ·... -
Page 26: Mirrors
Mirrors Clutch lever Blind spot collisions are one of the principal causes of accidents inhigh density traffic.Always adjust your mirrors prior to each ride and use them regularly to monitor traffic behind you and whenever you are making a turn or lane Gear Shift Lever change. -
Page 27: Throttle
Front brake lever Throttle The front brake lever is located on the right hand side of the The throttle controls engine rpm (speed). To increase engine handlebar. Pull toward the grip to slow down or stop the vehicle. rpm, rotate the grip toward you. To reduce engine rpm, rotate the grip away from you. -
Page 28: Kick Starter
Side stand Kick Starter The side stand is used to support your motorcycle when parked. kick starter is used in the event the battery has failed. To operate the side stand, use your foot to lower the stand until it Using the kick starter provides a manual... -
Page 29: Proper Operation
If the engine starts then stalls during idle, restart the engine V. Proper Operation and keep the engine running at a slightly higher speed by lightly applying throttle until engine warm-up is complete. Engine Start Conditions Do not rev the engine during the warm up phase as this can The engine can only be started when both the ignition damage the Oxygen sensor. -
Page 30: Engine Break-In / Maintenance
Engine Maintenance Engine break-in period When the engine has been run-in for 500 miles, a mandatory The initial break-in period of the engine is very important. first service and inspection is required to be performed by an Failure to follow the break-in procedure (or other improper authorized Genuine Service Center to maintain the limited operation) will cause vehicle malfunction or damage. -
Page 31: Pre-Ride Inspection
pad/shoe wear and brake lines/cables prior to operating the Pre-ride Inspection vehicle. If the level of the brake fluid is lower than the In order to ensure safety, the motorcycle must be checked minimum level line, inspect brake lines for leaks or cracks. If before each ride and properly maintained. -
Page 32: Vehicle Operation
Vehicle Operation Caution • Before you prepare to embark on your ride, please make sure - Make sure you are familiar with and follow the safety rules the side stand is in the up position. If you try to shift from and comply with all laws. - Page 33 Launch and Shifting Gears Use the same up-shift procedure for 3rd-5th gear. While sitting on the motorcycle with the engine running at Engage the clutch and the shift pedal downward to down-shift idle in neutral, raise the side-stand and place both feet the motorcycle.
- Page 34 ·When riding in rain or on wet road avoid sudden braking. Caution Accidents can occur, slow down and brake cautiously. - Always start the vehicle from 1st gear, and make the ·Avoid repeated braking / dragging the brake as this can starting process as slow and smooth as possible.
- Page 35 Park - If the handle bar is moved to the right side, or the motorcycle's side-stand is on a slope, sandy, rough or soft ·Shift the motorcycle to neutral and switch off the ground, the motorcycle is prone to fall down. motorcycle.
-
Page 36: Vi. Inspection And Adjustment
Your dealer will inspect your vehicle and perform any Unless stated or indicated in the maintenance period table, you should check and adjust all parts of the G400C motorcycle prior maintenance and adjustments that may be necessary after the to use. -
Page 37: Maintenance Schedule
Maintenance Period Table Maintenance period Odometer in Miles (see note 2 on next page) 3000 5500 8000 13,000 User Inspect Daily 10,500 Items * Engine Oil * Spark Plug ** Valve Gap * Idle Speed * Engine Bolts * Oil Filter * Air Filter * Fuel Filter * Air Cleaner Body... - Page 38 Maintenance Period Table continued Maintenance period Odometer in Miles (see note 2 below) User Inspect Daily 3000 5500 8000 13,000 10,500 Items Throttle Operation Brake Shoes / Pad Wear * Brake System Brake Light Switch * Brake Fluid ** Clutch Suspension Nuts, Bolts, Fasteners Wheel / Tire / Tire Pressure...
-
Page 39: Spark Plug
Spark Plug Timing phase The timing should be verified when the vehicle is new or Remove the spark plug cap, then remove the spark plug with a there is any question about the timing phase. socket wrench. Visually check whether there is damage to the Remove the eyehole cover on the left and the upper spark plug insulator or electrodes. -
Page 40: Engine Oil
Engine oil replacement Engine Oil Use JASO MA2 15W40 in order to ensure maximum engine Drain the oil while the engine is warm. A warm performance. Using a high-quality engine oil designed and engine will ensure quick and complete discharge of tested for use in your vehicle will also extend the life of the the engine oil inside the crankcase. - Page 41 Caution: Oil level check When the engine is at an operating temperature, the engine oil may be very hot, so be careful not to burn yourself. Run the engine for 2-3 minutes. Check whether or not the Place the motorcycle on a flat surface. Remove the drain plug, engine oil level is in the middle of the range on the engine oil then drain engine oil.
-
Page 42: Engine Compression
Compression Check Cleaning the Oil Filter - Remove the engine oil filter cover and remove the engine oil If the engine fails to start or is difficult to start, after all other possible faults have been excluded, a qualified technician filter element. -
Page 43: Valve Clearance & Adjustment
Primary Causes of Low Compression • Incorrect valve clearance • Valve leakage • Cylinder head gasket leak • Worn out piston ring or cylinder • Worn out piston Excessive compression is primarily caused by accumulated carbon deposits inside the combustion chamber or on the piston top. - Page 44 Valve Adjustment Valve Clearance Measurement Specified valve clearance: The valve clearance should be inspected and adjusted on a cold Intake: 0.07-0.10mm Exhaust: 0.08-0.12mm engine by the following procedures: Remove the caps of the central port and the ignition If valve clearance adjustment is needed, loosen the locking nut on timing observation port on the left crankcase cover.
-
Page 45: Air Filter
Air Filter Replace the filter if there are perforations or an Remove the air filter and check for contamination. excess build-up of debris that cannot be easily Removal removed. Open the right side cover. Remove the 4 right side filter cover screws and, open the right cover and remove the air filter. -
Page 46: Idle Speed
Idle speed 1600 r/min ± 150 r/min. Do not adjust idle speed without consulting your Genuine dealer. The G400C idle speed is controlled by the ECU. The idle speed Adjusting screw has been properly adjusted upon delivery. Do not adjust the idle speed. -
Page 47: Throttle
Throttle Retaining nut B: Coarse Adjustment Inspect the throttle cable for deformed, twisted or damaged locations along the cable length. Measure the throttle free-play. Tum the throttle against one side of the free stroke, and draw a straight l i n e between the bar and the balance weight. -
Page 48: Brake System
Front Brake Coarse Adjustment: If the fine adjustment is not sufficient, remove the throttle cable from the throttle body and unscrew the Pull the brake lever lightly until you feel tension, then check the retaining nut B to increase the free-play. Tighten the retaining nut lever free-play. - Page 49 Brake Fluid Level Be sure the motorcycle is on flat ground, turn the bar and check the brake fluid when the brake master cylinder cover is in a level Upper Limit position. Check the brake fluid level through the master cylinder view port.
- Page 50 Pads Brake Adding Brake Fluid If the brake pad wear indicator gaps touch the side of the brake Turn the handle bar so that the brake master cylinder is disc, the brake pads need replacement. horizontal with the ground. Remove dust and foreign material from the exterior of the brake master cylinder.
- Page 51 Brake pedal free-play:18-25mm Rear Brake Push the brake pedal downward by hand, check the brake pedal free-play. The rear brake pedal free-play should be at least 18mm but no more than 25 mm. 18-25m If the free-play is outside this range, the pedal can be adjusted by adjusting the rear brake adjustment nut near the rear wheel.
-
Page 52: Wheels / Tires
Caution Rear Brake Shoes · Change the brake shoes if the wear limit has been reached. Rear brake check: Check the wear of the brake shoes. If the Accidents can occur due to a lack of braking power from worn "△"... - Page 53 Caution When inflating the tire, if the tire pressure fails to reach the standard air pressure, inspect the tire for cuts, embedded Tire pressure should be measured when the tire is at ambient nails or other sharp objects temperature. Wheel Spokes Check the wheel for loose or broken spokes.
-
Page 54: Clutch
If proper free-play can't be achieved by fine adjustment, Clutch remove the clutch cable from the clutch lever and adjust the Check the clutch lever free-play. cable with the adjuster located on the engine end of the clutch Clutch lever free- play: 10-20mm. cable. -
Page 55: Drive Chain
Caution: Chain Adjustment Always ensure the clutch operating handle has the proper free- play! A loose clutch cable will prevent the clutch from Loosen the rear wheel axle nut. Turn the adjusting bolts at the disengaging. A tight clutch cable will cause poor clutch rear of the swingarm until the specified tension is achieved. - Page 56 Inspect the front and rear sprockets for wear. In the event of Caution: serious tooth abrasion, teeth missing or broken teeth, replace The chain adjuster has scale lines on both sides of the the sprockets swingarm. Ensure the wheel is straight. Warning: The rear wheel axle nut must be firmly secured to the tightening torque of 50 ft-lbs...
-
Page 57: Battery
Battery Check Chain Removal Open the left side cover. If the chain needs to be removed, locate the master lock. Clean away any dust and corrosion from the surface of Slide the spring clip to remove, then disassemble the the battery. connecting plate and link. -
Page 58: Fuse Replacement
Fuse Replacement Battery Charging Turn the ignition switch to the “OFF” position. The main The battery will slowly lose power every day. If you plan to fuse is a 15A tube type fuse, and the fuel injection nozzle not ride your motorcycle for an extended period of time, is a 10A tube type fuse. -
Page 59: Brake Lamp Adjustment
Brake lamp adjustment When the brake light switch is in the “ON” position, the brake If the rear brake lamp lights up intermittently, check the rear light should be lit up. If not, a check should be carried out to see whether the brake lamp, circuit and switch are working brake light switch near the right footpeg. -
Page 60: Headlight
Headlight Bulb Replacement Headlight Directional Adjustment Loosen the screw to disassemble the headlight. Before driving, check the brightness, and direction of the Rotate and directly unplug headlamp. Rotate and remove the bulb. The headlamp adjustable in both the horizontal and vertical Install the new bulb in reverse order Headlight bulb 12V55W Screw... -
Page 61: Running Light
Taillight Bulb Replacement Running Light Loosen the screws in the taillight lens Remove the running light socket from the back of Remove the taillight lens the headlight housing. Lightly press bulb, rotate counter-clockwise. Unplug the running light from the socket and replace Remove broken tail light bulb the broken bulb with a new one Install new bulb in opposite order as removal... -
Page 62: Turn Signals
Side Stand Turn Signals Secure the motorcycle in an upright position that allows the vehicle to stand without using the side stand. Inspect the Replacing front or rear lamp bulb side stand by moving it through its range. Determine whether Loosen screws and remove signal lens. -
Page 63: Bolts, Nuts And Fasteners
-Plug the muffler before cleaning, to prevent water from getting Bolts, Nuts and Fasteners inside the muffler. Bolts, nuts and fasteners should be checked periodically and -After washing, dry off the motorcycle. Ride for a distance until tightened to torque specifications outlined later in this manual. the engine has reached a working temperature;... -
Page 64: Storage
① Remove the cover and clean the motorcycle. Change the Return to Service ② Charge the battery and re-install. Maintenance Prior to Storage oil if the vehicle has not been used for over 4 months. ③ Fill the tank with fresh fuel. If the motorcycle will be stored for a long period of time, pay attention to the prevention of moisture, sunshine and rain in ④... -
Page 65: Special Torque Values
Special Torque Values Item Quantity Thread diameter (mm) Torque value (ft-lb) 21-24 M10×1.25 Cylinder head nut M10×1.25 27-33 Magneto flywheel fastening nut M12×1.25 13-15 Spark Plug 30-37 Front wheel axle 44-66 Real wheel axle nut 44-52 Swingarm shaft nut 29-36 Engine hanging bolt Engine cover bolt 18-26... -
Page 66: Standard Torque Values
Standard Torque Values Name and dimensions Torque value (ft-lb) 3.5 - 4.5 5mm bolt & nut 6 - 9 6mm bolt & nut 13 - 18 8mm bolt & nut 22 - 30 10mm bolt & nut 37 - 44 12mm bolt &... -
Page 67: Vii. Engine Management System
VII. Engine Management System The Engine Management System (EMS) is comprised of the following components: Electronic control unit (ECU), throttle body, Idle speed control valve, fuel pump, fuel injector, ignition coil, O2 sensor, throttle position sensor, T-MAP sensor, cylinder head temperature sensor, etc. The EMS uses sensors to collect parameters such as air flow, temperature of inlet air, cylinder head temperature, atmospheric pressure and the operational state of engine (rpm, load, acceleration and deceleration). - Page 68 Actuators: • Fuel pump relay, • Fuel pump • Fuel injector (fuel supply) • Ignition coil • High-tension cord • Spark plug (ignition) • Throttle, Idle speed control valve (air intake) Electronic control unit • ECU...
-
Page 69: Major Components Of Efi System
Major Components of EFI system Cylinder Head Temperature Sensor Throttle body Fuel Injecto Idle Speed Control valve Throttle Position Sensor Intake air pressure sensor... - Page 70 Oxygen sensor Electronic Control Unit (ECU)
-
Page 71: Engine Management Troubleshooting
Engine Management System Troubleshooting EFI systems are complex. As such, there are many possible causes when a running issue is encountered. At times it can be confusing if an issue is caused by a mechanical problem or the EFI components. Always contact your Genuine dealer if you are having trouble with your vehicle's Engine Management System. -
Page 72: Viii. Consumer Information
However, NHTSA cannot become involved in individual problems between you, your dealer, or Genuine Motorcycles. To contact NHTSA, you may either call the Vehicle Safety Hotline toll-free at 1-888- 327-4236 / Hearing Impared (TTY): 1-800-424-9153; go to http://www.safercar.gov; download the SaferCar mobile application;... -
Page 73: Oem Parts And Genuine Approved Accessories
GENUINE MOTOR OIL is the official lubricant of Genuine Motorcycles. GENUINE MOTOR OILS have been designed for and tested in Genuine motorcycles. Be aware that the use of lubricants not approved by Genuine for use in your vehicle can lead to damage to your motorcycle and may void any warranty. - Page 74 GENUINESCOOTERS. COM 2700 W Grand Ave. Chicago, IL USA...
Need help?
Do you have a question about the G400C and is the answer not in the manual?
Questions and answers
What does the small black hose on the bottom of the gas tank connect to?