Table of Contents
Advertisement
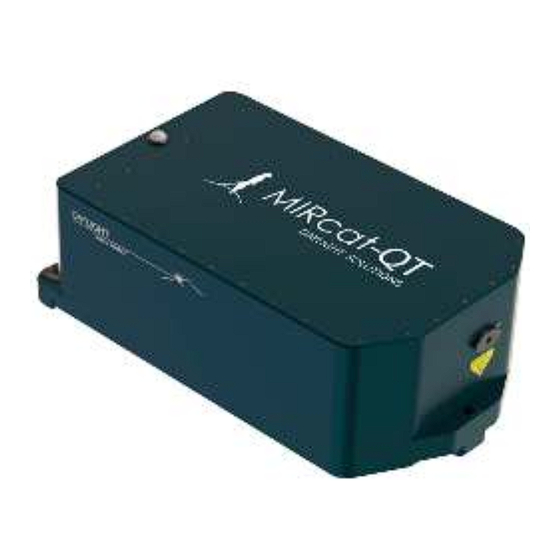
MIRcat™
Ultra-Broadly Tunable
Mid-IR Laser
User Manual
Models: MIRcat-QT-2xxxx & MIRcat-1xxxx
©2017 DRS-Daylight Solutions, Inc. All Rights Reserved.
D11-00028-02 Rev. A
1 5 3 7 8 A V E N U E O F S C I E N C E , S U I T E 2 0 0 , S A N D I E G O , C A 9 2 1 2 8
P H O N E : 8 5 8 . 4 3 2 . 7 5 0 0
F A X : 8 5 8 . 4 3 2 . 5 7 3 7
D11-00028-02_A
Page 1 of 54
Advertisement
Table of Contents

Subscribe to Our Youtube Channel
Summary of Contents for DAYLIGHT SOLUTIONS MIRcat-QT 2 Series
- Page 1 User Manual Models: MIRcat-QT-2xxxx & MIRcat-1xxxx ©2017 DRS-Daylight Solutions, Inc. All Rights Reserved. D11-00028-02 Rev. A 1 5 3 7 8 A V E N U E O F S C I E N C E , S U I T E 2 0 0 , S A N D I E G O , C A 9 2 1 2 8 P H O N E : 8 5 8 .
-
Page 2: Table Of Contents
TABLE OF CONTENTS INTRODUCTION & USER SAFETY .............................. 4 1. L ......................................4 ASER AFETY ARNINGS 2. S ......................................5 AFETY ARNING ABELS 3. L ................................7 ASER MISSION ARNING NDICATORS 4. E ......................................... 7 ROTECTION 5. O ......................................8 PERATING ONDITIONS 5.1 Power Requirements ...................................... - Page 3 TABLE OF CONTENTS About Menu ..........................................45 8. W ................................47 IDTH REQUENCY AND YCLE 9. M (CW) ..................................48 ODULATION UNCTIONS V. COMPUTER CONTROL ..................................49 1. I ..........................................49 NTERFACES VI. SERVICE AND SUPPORT ................................. 50 1. W ..........................................
-
Page 4: Introduction & User Safety
• INTRODUCTION & USER SAFETY The safe and effective use of our products is of the utmost importance to Daylight Solutions. This manual describes the safe installation, use, and maintenance of the ‘MIRcat™ family of widely tunable mid-IR laser systems. This product family includes MIRcat-QT-2xxx (tuning slew rates to >5,000 cm... -
Page 5: Safety Warning Labels
MIRcat OPERATION • 2. Safety Warning Labels Figure 1. MIRcat safety warning labels. (1) Aperture warning label: (1a) invisible output only; (1b) invisible & visible output; (1c) invisible output only, French text; (1d) invisible and visible output, French text. (2) Combination warning/certification/identification label stating emitted wavelengths and maximum emitted average power: (2a) invisible output only, (2b) invisible &... - Page 6 MIRcat OPERATION • DANGER – non-interlocked housing label. Warns of invisible laser radiation when housing is open. AVOID DIRECT EXPOSURE TO BEAM(S). NOTE: MIRcat housing must never be opened by users. Warranty is void if housing is opened by user. DANGER –...
-
Page 7: Laser Emission Warning Indicators
MIRcat OPERATION • 3. Laser Emission Warning Indicators Emission warning light. Indicates laser emission when lit Figure 3. Position of laser emission warning indicator (white LED) on MIRcat laser heads. CAUTION: Laser emission may be present whenever the laser emission warning indicator light is on (white LED is lit). -
Page 8: Operating Conditions
A water chiller with a cooling capacity of up to 150W should be used. Suitable compact, closed-loop chillers are available from Daylight Solutions – please inquire. The chiller should be connected to the MIRcat laser head via cooling lines (clear vinyl tubing with 3/8”... -
Page 9: Cooling Lines - Preventive Maintenance
MIRcat OPERATION • 5.3 Cooling Lines – Preventive Maintenance Periodically, and after moving the laser system, inspect the system for contamination and verify that cooling ports are clear and all cable connections are visibly secure. If liquid cooling is employed, verify the cooling connections are secure. -
Page 10: System Overview
Power supply AC-DC Figure 1. MIRcat system architecture. NOTE: This manual describes the safe installation, use, and maintenance of Daylight Solutions’ MIRcat™ family of widely tunable mid-IR laser systems. This product family includes MIRcat-QT (tuning slew rates to >5,000 cm /s) and MIRcat-1xxx (slew rates up to 100 cm /s) systems. - Page 11 (less than a few 100MHz) if MIRcat is tuned to a single longitudinal mode. Typical tuning curves (output power versus wavelength) are shown below for a Daylight Solutions’ pulsed (Figure 5) and CW (Figure 6) ECqcL™. The plots show the high peak (Figure 5) and average (Figure 6) power and wide tuning ranges attainable with the ECqcL design.
- Page 12 MIRcat OPERATION • Figure 6. Typical CW (average) power output versus QCL drive current recorded at three different wavelengths for CW operation of a Daylight external cavity quantum cascade laser (ECqcL). Figure 7. Typical tuning curve for an example MIRcat configuration of four pulsed QCL lasers. User control of the MIRcat laser system is via a user-supplied computer running a GUI or SDK command set, both of which are included as standard with each MIRcat system.
-
Page 13: Mircat Laser Head - Precautions
MIRcat OPERATION • MIRcat laser head. Daylight’s proprietary HFQD™ (High-Fidelity QCL Drive) circuitry also ensures MIRcat’s QCL chips are protected electronically. MIRcat provides three different wavelength tuning modes: Sweep Mode, Step and Measure Mode, or Multi- Spectral Mode. These are selectable via either the GUI or SDK. MIRcat’s Sweep Scan provides rapid scanning of the QCL across its programmed gain profile, either uni- or bi-directionally. -
Page 14: Computer Control
MIRcat OPERATION • patterns found on metric of English optical benches. If the MIRcat laser head is mounted directly onto an optical table or breadboard, the height of the beam is 4.0 inches (10.61cm). CAUTION: Back reflections can cause damage to the quantum cascade gain media and could void your warranty. -
Page 15: Power Supply
MIRcat OPERATION • 5. Power Supply Figure 9. MIRcat Power Supply (AC-DC converter) The power supply connects to the back panel of the MIRcat laser head. It converts the local AC power to the DC voltage and current required for safe operation of MIRcat. It accepts AC input voltages in the range 90- 264 VAC, and 47-63 Hz. -
Page 16: Getting Started
Failure to do so could void your warranty. If you need to return the laser to Daylight Solutions but can no longer locate the original shipping container, please contact Daylight Solutions’ Customer Service using contact information listed in Section VI ‘Service and Support’... -
Page 17: Setting Up
MIRcat OPERATION • 2. Setting Up If the desired beam height is greater than the 4.0 in. beam height specified for your laser, attach 3 pedestals to the base of the MIRcat laser head with the additional beam height. For example, if the desired beam height is 4.5 inches and the laser beam height is 4.0 inches, use New Focus 3”... - Page 18 MIRcat OPERATION • For CW Operation: Connect liquid cooling to the inlet and outlet ports on the base of the MIRcat laser head. Use the 7/16” plug with 1/4” hose barbs provided to attach clear vinyl tubing, with 3/8” OD and 1/4” ID, to the cooling port quick disconnects, and the other ends to a chiller. Set the chiller temperature to 20°C for normal CW operation.
-
Page 19: Operation
MIRcat OPERATION • For CW-Pulsed Operation: See Section IV-9 on Current Modulation. IV. OPERATION CAUTION: Use of controls or adjustments or performance of procedures other than those specified herein may result in hazardous radiation exposure. This section describes the operation of the MIRcat using the Control Panel GUI (i.e., with external computer control). -
Page 20: Triggering And Acquisition Signals On Db-9 Connector
MIRcat OPERATION • for CW mode or Pulsed >10% Duty Cycle only. Ethernet RJ-45 connector. Not yet supported. DB-9 MIRcat Used to connect the to an external Data Acquisition System. See next section for pin out and signal description. Continued from last page. USB connector MIRcat Used to connect the... -
Page 21: Pin Signal Description (Cont.)
MIRcat OPERATION • output is software controlled by the motion board and will vary, but will generally be in the 100 to several hundred-microsecond range. The actual laser pulse and trigger output (BNC) will be HI for the pulse width specified in the settings screen. - Page 22 MIRcat OPERATION • D11-00028-02-A Page 22 of 54...
-
Page 23: Using The System Interlock
MIRcat OPERATION • 3. Using the System Interlock The MIRcat comes with a safety interlock switch, located on the back panel of the Controller. The interlock must be shorted for the laser to generate an output beam. If you remove the “Safety Switch”, the output beam will be shut off. -
Page 24: Turn The Laser Output On/Off
MIRcat OPERATION • This will trigger a startup sequence as follows: 1. Booting application 2. Reading laser data from module EEPROMs (e.g., laser serial number) 3. Power on self-test After 15 seconds, run the Control Panel GUI to connect to the MIRcat Laser. Note that the laser light itself is not yet turned on, as this requires an explicit command from the Control Panel GUI or an external system. - Page 25 MIRcat OPERATION • • Once the laser is connected, turn the Enable key on the back panel to the horizontal or “On” position. On the Control Panel GUI, in the Tuning menu, press the grey “Arm Laser” button to switch from •...
-
Page 26: Gui Menu Functions
MIRcat OPERATION • 7. GUI Menu Functions This Section describes how to perform all MIRcat functions using the MIRcat Control Panel GUI. The following diagram outlines currently available Control Panel GUI menu options: Main Menus Tune Wavelength or wavenumber Tune to XX.XX µm/cm^-1 Cancel Tune Scan Scan Modes... -
Page 27: Menu Template
MIRcat OPERATION • Menu Template Menu Laser Status QCL Module Laser Parameters Status Arm Laser Turn Laser Emissions ON/OFF The standard menu template allows the user to monitor the MIRcat from each of the six main menus. The left side bar allows the user to navigate between menus and monitor each QCL module temperature and active status. - Page 28 MIRcat OPERATION • The first menu is used to manually tune the laser modules to a desired wavelength or wavenumber. You can see which laser module is ready and monitor the require parameters for normal operation. The user can choose units of either micrometers(μm) or wavenumbers(cm ) in the pulldown menu on the left.
- Page 29 MIRcat OPERATION • NOTE: Manual Tune can be cancelled at any time. Other menus will gray out when inactive. Click on the Arm Laser button, and the laser beeps for a 5 second delay, before Arming the Laser, and turning the Laser Armed LED on top of MIRcat ON, to indicate the laser is armed and ready for light emission.
- Page 30 MIRcat OPERATION • Once the laser has completed tuning to the entered wavelength, the TURN EMISSION ON button becomes active and the user can choose laser light out. The button changes to TURN EMISSIONS OFF. To return to the menu options, click on Cancel Manual Tune to exit Tune menu and select another menu. D11-00028-02-A Page 30 of 54...
-
Page 31: Preferred Tuning
MIRcat OPERATION • Preferred Tuning If the user would like to remain on a QCL during manual tuning, they can click on the header above the QCL number in the QCL Tuning Range Table to select that QCL as ‘Preferred”. Below, QCL 1 is selected as the Preferred QCL. -
Page 32: Scan Menu
MIRcat OPERATION • Scan Menu Scan Settings: The Scan Mode menu allows the user to choose from several different scan modes. The 3 main types are: Sweep Mode, Step and Measure Mode, and Multi-Spectral Mode. The user can also select Sweep Mode Units, Start/Stop values, Bi-directional Scan, Swap Start/Stop values, set the Number of Scans or an infinite number of scans. -
Page 33: Sweep Mode
MIRcat OPERATION • Sweep Mode: Once the Sweep mode is selected from the Scan Mode pull down menu, the user can select between units, enter a Start and Stop wavelength or wavenumber, enter a scan speed, and choose the number of scans, or infinite scans. - Page 34 MIRcat OPERATION • Once the Start Scan button is depressed, the screen will change and update the user on the scan’s progress. The Laser Valid light will come on while each module is on while scanning. The above screen shot is an example of clicking the Extended Info button during a sweep mode. The below screen shot displays the Scan Parameter info.
- Page 35 MIRcat OPERATION • Step and Measure Mode The Step and Measure Mode allows the user to enter a Start, Stop wavelength/wavenumber, Step size in the selected units, enter number of scans or select infinite. The laser will tune to the Start wavelength or wavenumber, turn ON for the preset Internal Trigger Step Time, then turn OFF for the preset Internal Trigger Step Delay Time, and then scan to the next step.
- Page 36 MIRcat OPERATION • When the laser has completed the scan, it will return to the Step and Measure Screen. D11-00028-02-A Page 36 of 54...
- Page 37 MIRcat OPERATION • Multi-spectral Mode This mode allows the user to enter data on what wavelength or wavenumber the laser is going to scan to, dwell with laser ON, then move to the next command. The user can store up to 20 different parameters, such as Wavelength, Dwell time, and Laser Off time.
- Page 38 MIRcat OPERATION • To start the scan, click the Start Scan button. The screen changes to the below display to indicate which module the laser is tuning to. There is a progress bar that helps track the scan’s progress. The user can stop the scan at any time by clicking the Stop Scan button.
- Page 39 MIRcat OPERATION • Above, Module 2 is active, but the Light Valid light is not on while it pauses during the set Off Time. Now the Light Valid button is on while the laser emits. An Audio beep can be heard if selected in the Settings menu. The other option is to set the Manual Scan mode under the Setting menu.
-
Page 40: Settings Menu
MIRcat OPERATION • Settings Menu The Settings Menu allows the user to set the Display Units, Notifications, Global Parameters, Laser Parameters, Process Trigger Modes, and Pulse Modes. The parameters are entered using pull down menus or entering data and the user can use the Tab key to move between fields. NOTE: Users must click the Save Settings button to save the changes before leaving the screen. - Page 41 MIRcat OPERATION • before clicking the Save Settings on the bottom of the screen and all changes will be saved. The “Re-Initialize Tuning” button allows the user to reset the tuning index on the currently selected QCL. This will force the QCL motor to find home index, rather than re-booting the entire system. The “Wavelength (WL:)”...
- Page 42 MIRcat OPERATION • first sweep. Each process trigger only causes the system to sweep one channel and not all of the channels in a sweep. Once done, the system will return to the start position, set up the next scan and wait for Pin 4 to go LO before starting the next channel scan.
-
Page 43: Favorites Menu
MIRcat OPERATION • Favorites Menu The Favorites Menu allows the user to save settings that are used most often. The maximum allowed is 8. If the maximum has been reached the user can select and delete all favorites except for the default. D11-00028-02-A Page 43 of 54... -
Page 44: Contact Us Menu
MIRcat OPERATION • Contact Us Menu The menu is a quick reference for the user to contact Daylight Solutions for customer support or general information. D11-00028-02-A Page 44 of 54... -
Page 45: About Menu
The user can also save the factory set laser parameters in a file by clicking on the Export Configuration. This will make a file that can be sent back to the Daylight Solutions factory for evaluation. A new file with new parameters can be returned from Daylight Solutions factory and loaded into the MIRcat by clicking on Import Configuration. - Page 46 MIRcat OPERATION • 7. Laser Modes Trigger Modes (Tune) Description Internal Trigger Normal Pulsed Operation. A TTL pulse is output on the back panel TRIG OUT BNC that corresponds to the leading edge of the optical pulse. Pulse parameters are set on the Settings>Laser Parameters menu. Users must click ‘Save Settings’...
-
Page 47: Width, Frequency And Duty Cycle
MIRcat OPERATION • Wavelength trigger A TTL pulse is generated on Pin3 of the DB-9 connector at each wavelength step once the step size and wavelength range is entered. 8. Width, Frequency and Duty Cycle The following sections define how to set the width, frequency and duty cycle for the MIRcat laser head using the MIRcat GUI Laser Settings menu. -
Page 48: Modulation Functions (Cw)
MIRcat OPERATION • 9. Modulation Functions (CW) Current Modulation Unlike typical laser diodes, current modulation of a QCL generally does not produce a large change in wavelength. Nevertheless, the MIRcat laser head includes an external Current Modulation input (BNC socket) and associated internal circuity to allow external modulation of the QCL current at up to ~10% of the nominal set value. -
Page 49: Computer Control
Ethernet – although an RJ-45 jack is built into each MIRcat, this is in preparation for potential future Ethernet control of the system. Presently the MIRcat GUI does not support Ethernet control and communication. For more information, please contact Daylight Solutions or your authorized distributor. D11-00028-02-A... -
Page 50: Service And Support
VI. SERVICE AND SUPPORT 1. Warranty Unless stated otherwise in your order documentation, Daylight Solutions, Inc. guarantees its lasers to be free of defects for one year from the date of shipment, or for 2000 hours of operation, whichever comes first. - Page 51 SERVICE AND SUPPORT If you have any questions about your MIRcat, you can reach us at: DAYLIGHT SOLUTIONS, Inc. 15378 Avenue of Science Suite 200 San Diego, CA 92028 Phone: +1 (858) 432 7555 Fax: +1 (858) 432 5737 Email: support@daylightsolutions.com...
-
Page 52: Specifications: Mircat Laser Systems
APPENDIX A VII. SPECIFICATIONS: MIRcat Laser Systems Configuration Options System Configuration Factory-configured for 1, 2, 3 or 4 QC laser modules – refer to the test sheet for your system Modes of Operation Pulsed only, or CW-Pulsed, depending on laser modules selected. Refer to test sheet for your system Wavelength Coverage 3 to 13 µm - depends on QCLs selected. -
Page 53: Appendix A: Dimensions
APPENDIX A APPENDIX A: Dimensions 1. MIRcat Laser Head (-QT & -1xxx models) Note: Dimensions are in inches or [mm] D11-00028-02-A Page 53 of 54... -
Page 54: Power Module
APPENDIX A 2. Power Module Note: Dimensions are in inches or [mm] D11-00028-02-A Page 54 of 54...
Need help?
Do you have a question about the MIRcat-QT 2 Series and is the answer not in the manual?
Questions and answers