
Related Manuals for AudioControl CONCERT XR-8


Summary of Contents for AudioControl CONCERT XR-8
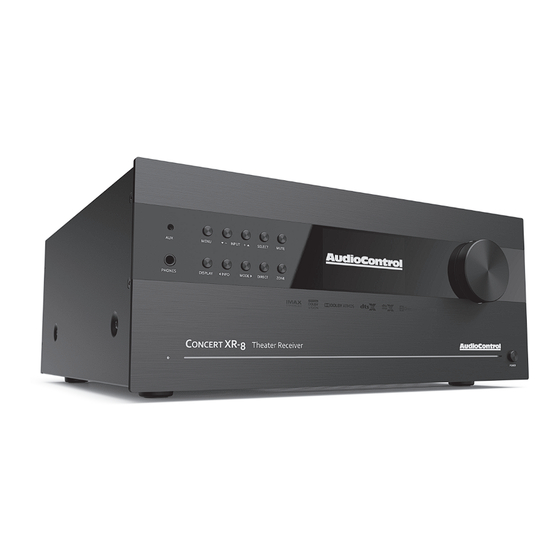
- Page 1 Immersive AV Receivers Installation Manual CONCERT XR- 8 | CONCERT XR- 6 | CONCERT XR-4 ©2020. All Rights Reserved...
- Page 2 CAUTION: Changes or modifications to this device not Failure to follow instructions may lead to battery expressly approved by AudioControl Inc. could void the user’s corrosive chemical leakage or explosion. authority to operate the equipment under FCC rules.
- Page 3 Dolby and the double-D symbol are trademarks of Dolby trademarks owned by Bluetooth SIG, Inc. and any use of such Laboratories. marks by AudioControl, Inc. is under license. Other trademarks and trade names are those of their respective owners. Dolby Atmos, Dolby Audio, Dolby Vision Qualcomm is a trademark of Qualcomm Incorporated, Manufactured under license from Dolby Laboratories.
-
Page 4: Table Of Contents
Table of Contents Introduction ..............5 Key features and highlights . -
Page 5: Introduction
Introduction Greetings from the rainforest On behalf of everyone at AudioControl we want to congratulate you on your selection of the Concert XR series Immersive AV Receiver. Whether this is your first venture into home theater or you are a long time seasoned audio veteran, you will truly enjoy the performance of our amazing sounding receivers. -
Page 6: Key Features And Highlights
Key Features and Highlights Key Features of the Concert XR series While the AudioControl Concert XR series is equipped with a large number of features and functions that are designed to maximize your theater experience, we want to draw your attention to a few that deserve extra attention. These... - Page 7 Key Features and Highlights ANALOG PREAMPLIFIER OUTPUTS The Concert XR series is equipped with Height 1 and Height 2 plus 4 configurable outputs for middle heights, front/rear subs, center heights, or extra wide outputs for a total immersive experience, offering a complete “dome of sound”...
- Page 8 WE WANT TO HEAR FROM YOU Before you get too entrenched in the features of your Concert XR series, we encourage you to take a moment and visit the AudioControl web site at https://www.audiocontrol.com/product-registration/ and register your new Concert XR series. It allows us to keep a record of your purchase of the Concert XR series.
-
Page 9: A Guided Tour Of The Concert Xr Series
Guided Tour of the Concert XR series 1 2 3 6 7 8 9 10 11 12 Front Panel Features SELECT - Used in conjunction with the Set-up Menu function, this button allows you to enter AUX INPUT - This handy 3.5 mm input selections you have made. -
Page 10: Rear Panel Features
115 = 110 - 115 V ~ 22410 70th Ave West | Seattle, WA 98043 230 = 220 - 240 V ~ www.audiocontrol.com Rear Panel Features HDMI OUTPUT - The three HDMI outputs connect to the HDMI inputs of your TV... - Page 11 Guided Tour of the Concert XR series 8. HDMI INPUTS - These inputs allow the 16. AUDIO OUTPUTS - These line-level RCA Concert XR series to accept digital audio outputs for left, center, right, surrounds, and and video signals from source units surround backs, can feed external power amplifier(s), should you choose to not use equipped with HDMI (High Definition...
-
Page 12: Htr-3 Remote Control
WARNING: Before the unit is turned buttons. You can set up the remote on, make sure that this switch is set to for full control of your AudioControl your local AC power voltage. receiver plus various AV sources and displays via the extensive library 19. - Page 13 Control of Your Concert XR series Remote Features Multifunction Remote - the HTR-3 can control up to 8 source devices! It automatically configures to the mode of control of the source selected by the source buttons. Learning - The remote can be configured to control each of your source devices by pressing the number “1”...
- Page 14 Control of Your Concert XR series Buttons/Functions in the Amp Device Mode Pressing the AMP button puts the remote into the correct mode for controlling the functions of the Concert XR series. This allows you to access the menus, adjust bass/treble, turn Room EQ on or off, cycle through decode modes etc... Please note: Not all buttons have a function in AMP mode.
- Page 15 Control of Your Concert XR series Increase volume Decrease volume These affect the unit volume only, no matter which mode the remote is in Red and Green are used with NET radio to add or delete a favorite station. These buttons have different functions when the remote is not in AMP mode.
-
Page 16: Set-Up And Configuration
Avoid placing the Concert XR series directly over large power amplifiers or any other components that generate a lot of heat. Unless they are made by AudioControl, some amplifiers can get pretty hot and have big power transformers that can induce hum into other audio components like the Concert XR series. -
Page 17: Height Speakers
Channels 13-16 Important note - The Concert XR-4 In the Concert XR-6 and Concert XR-8 there are 4 configurable outputs. Here is offers 7.1.4 channel a list of the optional output configurations: outputs. The Concert XR-6 and XR-8 have Channels 13 &... -
Page 18: Power Wiring
Set-Up and Configuration Connection Tips Even if you’re an electronics veteran, this part may seem repetitive, but some things can never be repeated too many times. • Turn off all components before making any connections. • When making connections, make sure that “left goes to left” and “right goes to right.”... -
Page 19: Video Connections
Set-Up and Configuration Don’t worry if your satellite receiver has a coaxial digital output and the Concert XR series SAT input is optical. Refer to the input configuration section on page 22 for more information regarding assigning a digital input to the optical or coaxial connection. -
Page 20: Initial Display Configurations
Navigating the Set-Up Menus 12V Trigger Connections The Concert XR series has two rear-panel 12 volt trigger outputs that can be used to remotely trigger such things as external power amplifier turn-on, projector power on, and screen automation. Each external device must have 12 volt triggering capability for this to work. - Page 21 Navigating the Set-Up Menus To get started in your set up, you can work directly from the front panel of the unit or you can navigate to the set up options through a web browser by going to it’s IP address/setup [http://your IP address/setup/]. The web page menus follow the same format as the front panel menus noted below.
-
Page 22: Input Configuration
Navigating the Set-Up Menus Input Configuration Each input on your Concert XR series has individual audio and video settings that can be adjusted specifically for its use. INPUT - Identifies the currently selected source. Settings are displayed below. NAME - Specific name/label for this input that will show on display device‘s and the OSD. - Page 23 If you set the Speaker Levels on the Concert XR series properly using an SPL meter (like the AudioControl DM-RTA) then you can leave this setting at 0. STEREO MODE - If you are using an external subwoofer, and are listening to stereo (two channel) sources, either digital or analog, you can select to configure how the subwoofer receives it’s bass information.
-
Page 24: General Setup
Navigating the Setup Menus General Setup These menu screens display general information and system controls. (Information Only) Source Input: Displays the currently active audio source input. Incoming Format: Displays format of digital audio stream if present. Incoming Sample Rate: Displays incoming sample rate of digital audio stream, if present. - Page 25 Navigating the Setup Menus DTS Dialog Control - Sets the level the for dialog channel in DTS audio streams. Maximum Volume - Limits the highest volume that will play in the main zone. This is useful if you have speakers, amplifiers, or neighbors, with limited power handling abilities.
-
Page 26: Speaker Types
Navigating the Setup Menus Speaker Types This series of menus allows you to select the types of speakers that you will be connecting to your Concert XR series. “Large” speaker is one that is capable of reproducing a full range (20-20 kHz) audio signal. -
Page 27: Speaker Distance
Navigating the Setup Menus Speaker Distances The Speaker Distance settings help the sound from each speaker arrive at the listening seat at the same time. This provides a much more believable and immersive sound environment. Accurately measure the distance from the center of each speaker to the seated ear position of the main listening seat. -
Page 28: Video Inputs
Navigating the Set-Up Menus Video Inputs If desired, you can assign a video source to each of the “audio only” inputs. The default for each of these settings is “None”. This is a great way to listen to the ball game over the Internet Radio and watch it over your normal video display device, though timing might be a little off. -
Page 29: Surround Modes
Navigating the Set-Up Menus Surround Modes This screen allows you to select the specific decode and down mix options that For more detailed information on the will be available to the listener in Stereo and Multi-channel applications. The various Dolby and options for each format are “Yes”... -
Page 30: Network Settings
Navigating the Set-Up Menus Network Settings Your Concert XR series has the ability of playing Internet radio stations as well as music stored on a network storage device like a PC or USB flash drive. It’s default connection is wired and is set for DHCP - to automatically pick up an IP address if there is a DHCP server on the network. -
Page 31: Streaming Audio
Playing Audio Files via Network Audio or USB Playing Audio Files via Network Audio or USB The network audio client on the Concert XR series is capable of supporting the following file formats: – MP3 – WMA (Windows Media Audio) –... -
Page 32: Automation Integration
There are a wide variety of theater controllers audiocontrol.com available. There are 2 methods of controlling the Concert XR series, other than through the IR remote and the Front Panel. You may choose either RS232 or IP control via the General Settings menu. - Page 33 Automation Integration RS232 Serial Control You must set the external RS232 control system serial port of your control system to match the data communication speed and format of the Concert XR series. If these settings are incorrect, the Concert XR series will not respond to the commands.
- Page 34 Automation Integration Command Structure - Issuing The RS232 serial control structure of the Concert XR series is a string of hexadecimal values with a minimum of six bytes. When issuing a command, the structure of the string is as follows: Start Transmission, Zone Number, Command Code, Data Length, Data and End Transmission.
- Page 35 Automation Integration Command Structure - Receiving Command processing begins when the first 0x0D (carriage return) is received. The Concert XR series will respond, either by making the change specified with a status update answer code or by replying with an error answer code, within 3 seconds.
- Page 36 Serial and IR Code Tables Please head on over to our web site, www.audiocontrol.com, to get the serial/ IP protocol doc. You can find a complete listing of the automation protocol – commands, cheats, rich detail that makes most eyes glaze over – at the product pages.
-
Page 37: Dirac Live Room Calibration
Dirac Live Dirac Live speaker setup system The Concert XR series has an automatic speaker setup system called Dirac Live, from Dirac Research. The supplied microphone is used with your computer on the same network, to measure the sound output of the system. Dirac automatically calculates the speaker settings of all the speakers in the system, and will also apply the optimized EQ settings to the main room. -
Page 38: Troubleshooting
Troubleshooting Troubleshooting Common Problems General There are no lights on the Concert XR series 9 Pressing any button on the front panel should wake the Concert XR series. 9 Verify that the power cord is plugged into a live AC outlet. 9 Verify that the front panel Power switch on the Concert XR series is “On”. - Page 39 Troubleshooting Audio The audio doesn’t match the video 9 The Video and Audio input can be selected independently in the Main Menu. Verify they are set the same. 9 Verify the correct Video Input and Digital Audio input assignments are configured for the Source input button. The sound is poor or distorted 9 Verify the speaker settings configuration matches your speakers.
- Page 40 Troubleshooting Hum on analog inputs 9 Verify that all the two channel analog audio cables are connected properly. 9 If the hum only occurs on one source, try a different set of connecting cables. 9 If the hum occurs on a source with an external connection such as an antenna or cable TV, try disconnecting that input.
-
Page 41: Service
Service SHOULD YOUR CONCERT XR SERIES RECEIVER EVER NEED SERVICE… Before returning any item to AudioControl, you must obtain a return authorization. Tech Support contact and hours: +1 (425) 775-8461 sound.great@audiocontrol.com Mondy - Friday 8 am -5 pm PDT After obtaining a return authorization, please include the following items when returning the unit: Write your RA number on the outside of the shipping box. -
Page 42: Warranty
3. The Concert XR series must have originally been purchased from an authorized AudioControl dealer. You do not have to be the original owner, but you do need a copy of the original sales receipt or invoice. -
Page 43: Legal
Legal LEGALESE SECTION This is the only warranty given by AudioControl. This warranty gives you specific legal rights, and you may also have rights that vary from state to state. Promises of how well the unit will work are not implied by this warranty. Other than what we’ve said we’ll do in this warranty, we have no obligation, express or implied. -
Page 44: Specifications
Specifications Concert XR-4 Specifications Inputs Analog Audio Inputs............6 Stereo Pairs Nominal Audio Input sensitivity . - Page 45 Specifications Concert XR-6 Specifications Inputs Analog Audio Inputs............6 Stereo Pairs Nominal Audio Input sensitivity .
- Page 46 Specifications Concert XR-8 Specifications Inputs Analog Audio Inputs............6 Stereo Pairs Nominal Audio Input sensitivity .
-
Page 47: Appendix A: Feet Removal
Appendix a Appendix A: Feet Removal Procedure Note: If this was your real appendix, please consult your health care professional as it should not look like this. The feet of the unit can be removed to create a cleaner look when fitting the unit into a rack. - Page 48 Appendix a 5. Use the small flat-bladed screwdriver to gently pry the four locking tabs outward to release the foot from the chassis. Use the needle-nose pliers to pull upward at the same time, with (to get all technical for a moment) a bit of a jiggle-joggle motion.
- Page 49 Appendix b Appendix B: This appendix was removed as it became bloated and painful. Concert XR series...
- Page 50 22410 70th Avenue West Mountlake Terrace, WA 98043 USA +1 (425) 775-8461 www.audiocontrol.com P/N 913-166-0 Rev5...
Need help?
Do you have a question about the CONCERT XR-8 and is the answer not in the manual?
Questions and answers