
Summary of Contents for MidNite Solar MNX-240
- Page 1 MNX-240 AutoFormer Instructions AUTOTRANSFORMER Model MNX-240 MidNite Solar 17722 – 67 Ave Ne. Arlington Wa 98223 360.403.7207 www.midnitesolar.com...
-
Page 2: Table Of Contents
MNX-240 AutoFormer Instructions (continued) Precautionary Statements ..........3,4 Product Information ............. 5 System Configuration ............5 Torque Specs ............... 8 Installation ................8 System Orientation .............. 9 Hardware and Tools ............10 Mounting................10 Appendix A Warranty ............11 Appendix B Assembly Diagram ........12 Appendix C Wiring Diagram .......... - Page 3 These instructions are not intended as an exhaustive source of transformer technology but to serve only as a guide for product installation. 3. If service or repair should become necessary please contact MidNite Solar Inc. for further instruction. Do not attempt to service or repair this unit on your own. Improper servicing may result in risk of shock, fire, or explosion.
-
Page 4: Precautionary Statements
2. Si vous ne comprenez pas l’une des concepts ou des instructions contenu dans cette manuel consulter un agent spécialisé. 3. Si des réparations sont nécessaires contactez MidNite Solar pour plus des informations. Danger de choc électrique et de risque de brulure. Rien à dépanner à l'intérieure du cette appareil. Ne pas ouvrir le couver. - Page 5 An autotransformer is a kind of transformer with only one winding, but one or more taps. The MNX-240 has one center tap. An autotransformer is generally used either for providing a second leg in a single phase system giving you 120/240 Vac from a single 120 Vac line or to provide a 120 Vac tap from a 240 Vac line.
-
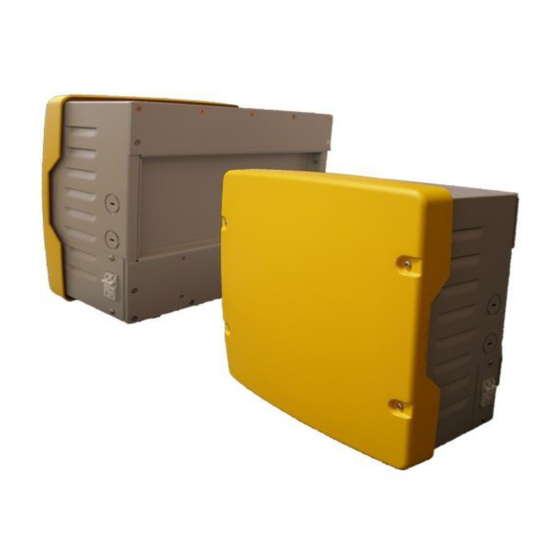
Page 6: Product Information
This Manual contains information for the MidNite Solar SMA MNX-240 6000 watt Autotransformer for single inverter AC coupled systems. The MNX-240 is approved for indoor mounting only. No terminals or lugs are required for AC wiring. AC wiring must be copper wire and rated for 75°C or higher and must be 10AWG minimum. - Page 7 240VAC inverter to make it accessible and useful for the 120VAC Sunny Island. In this configuration, L1 and L2 (240VAC) power is applied to the 25Amp breakers of the MNX-240 Autotransformer. 120VAC is then available from either L1 or L2 to system neutral. See Fig. 3.
-
Page 8: Torque Specs
MNX-240 AutoFormer Instructions (continued) Figure 3 Wiring Attention: All AC wiring to the circuit breaker terminals are to be torque to 20 in-lbs. Wiring to these terminals must ® meet the requirements set by the National Electrical Code ANSI/NFPA 70. AC wiring must be copper wire and rated for 75°C or higher and must be 10AWG minimum. -
Page 9: Installation
Please refer to Fig. 5a and Fig. 5b. The second configuration mounts directly to the tall metal back plate. This configuration comes with the Midnite Solar SMA AC Coupled System, in which the mounting back plate is large enough to accommodate the inverter, e-panel, and autotransformer at the same time. -
Page 10: System Orientation
As you begin the mounting process you will need to know exactly where this unit will be placed in relation to the E-panel and inverter system. When using the MNX-240 in conjunction with the Midnite Solar SMA AC Coupled System, the autotransformer will be mounted at the top end of the mounting back plate, just above the system inverter. -
Page 11: Hardware And Tools
When mounting this unit to the Midnite Solar SMA AC Coupled System follow the steps below. There are three steps in mounting the Autoformer to the back plate of the Midnite Solar SMA AC Coupled System: 1) remove the front cover, 2) mount the Autoformer 3) fasten the Autoformer lid. -
Page 12: Appendix A Warranty
Midnite Solar Inc. warrants to the original customer that its products shall be free from defects in materials and workmanship for a period of five (5) years. At its option, Midnite Solar will repair or replace at no charge any Midnite product that proves to be defective within such warranty period. -
Page 13: Appendix B Assembly Diagram
MNX-240 AutoFormer Instructions (continued) customer and located on MIDNITE SOLAR’S premises caused by fire or other casualties beyond MIDNITE SOLAR’s control. This warranty is in lieu of all other warranties expressed or implied. Appendix B Assembly Diagram: 13 | P a g e... -
Page 14: Appendix C Wiring Diagram
MNX-240 AutoFormer Instructions (continued) Appendix C Wiring Diagram: 14 | P a g e 1 0 - 2 5 2 - 1 R E V :...
Need help?
Do you have a question about the MNX-240 and is the answer not in the manual?
Questions and answers