Table of Contents
Advertisement
Advertisement
Table of Contents

Related Manuals for Elegoo UNO R3


Summary of Contents for Elegoo UNO R3
- Page 1 Elegoo 2.8 inches Touch Screen User Manual ---Arduino version...
- Page 2 Preface 2.8 inches Touch Screen User Manual (Arduino version) is for Arduino UNO board and Mega 2560 board or boards compatible with UNO. Other core boards that provide 3-5V voltage and should be connected with wires when using are not discussed in this manual.
-
Page 3: Table Of Contents
Catalog 1. Product introduction ......................1 1.1. Features ........................... 1 1.2. Module Specifications ....................1 1.2.1. Basic Specifications ................... 1 1.2.2. Electronic Specifications .................. 2 1.3. Interface Definition ...................... 2 1.3.1. Size Specifications ..................... 3 1.3.2. Pins Correspondence ..................3 1.3.3. - Page 4 3.2.7. Example 7 ......................13 3.3. Working with MEGA2560 ..................14 3.3.1. Example 1 ......................15 3.3.2. Other Example ....................17...
-
Page 5: Product Introduction
1. Product introduction 1.1. Features (1)Compatible with Arduino UNO and Mega2560, and can be connected directly by inserting the pin into the interface without wire. (2) Compatible with all kinds of 5V or 3V MCU with 5V-3.3V change-over circuit. (3)320X240 HD resolution, can be used as a touch screen. (4)Adopting 8-bit parallel bus, quicker and smoother refresh than SPI. -
Page 6: Electronic Specifications
1.2.2. Electronic Specifications Table 2. Electronic Specifications 1.3. Interface Definition Figure 1. Interface Definition... -
Page 7: Size Specifications
1.3.1. Size Specifications Figure 2. Size Specifications 1.3.2. Pins Correspondence Table 3. Pins Correspondence between LCD and Arduino... -
Page 8: Con1 Interface
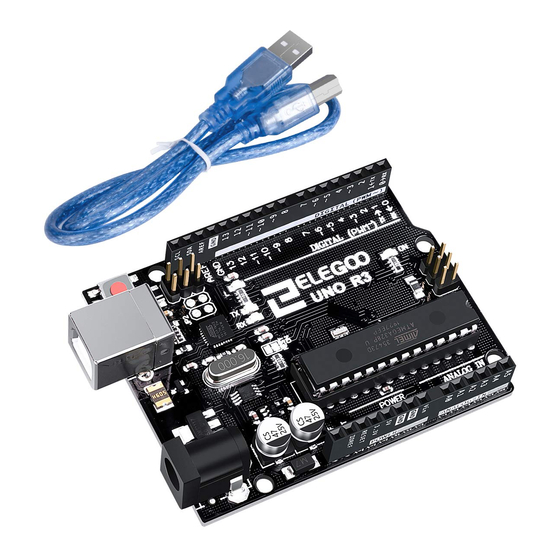
1.3.3. CON1 interface Figure 3. CON1interface Note: Only SD_DO, SD_DI, SD_SS, SD_SCK and Arduino are on, and the rest are independent of Arduino's IO. 2. Preparation 2.1. Hardware Preparation (1)A PC or a laptop (2)A Arduino UNO board (Figure 3) or a Arduino MEGA2560 board (Figure 4). Figure 3. - Page 9 Figure 6. Mini USB Cable (Type B) (4)A 2.8 inches Touch Screen. Figure 7. 2.8 inches Touch Screen. (5)A micro SD card, any storage capacity is ok. Figure 8. Micro SD card...
-
Page 10: Software Preparation
2.2. Software Preparation Download the Arduino IDE from the official site of Arduino. (www.arduino.cc). Install the IDE with default setting, you can select the installing path during the installation. Open the IDE like figure 9. Figure 9. Arduino IDE... -
Page 11: Instruction
3. Instruction 3.1. Import Libraries. Copy libraries from “..\Arduino Demo_UNO&Mega2560\Install libraries”(figure 10) to the Arduino IDE installing path: “..\Arduino\libraries”. Figure 10 3.2. Working with UNO Connect 2.8 inches touch screen with Arduino UNO board(see Figure 11) , then connect the UNO board with the PC or laptop with USB cable. 图... - Page 12 UNO\_9341uno\_9341uno.ino; (2)Click “Tool”--“Board”--“Arduino/Genuino Uno” (See Figure 12) Figure 12 (3)Click “Tool”--“Port”--“COMxx (Arduino/Genuino Uno) ” (See Figure 13) Figure 13 (4)Click the “upload” button , and wait for the completion of the programming. (See Figure 14)
-
Page 13: Example 3
Figure 14 Example 1 is the most basic example program which can run without relying on any library. The result of example 1 is that the whole screen is filled with red, green, blue, white and black in turn and then filled randomly. -
Page 14: Example 5
Figure 15 This example display the simplest alphabetic string and numbers, realizing Vector font scaling which allows you to display any English letter of any font size. 3.2.3. Example 3 (1)Open ..\2.8inch_Arduino_ILI9341_V3.2\Arduino Demo_UNO&Mega2560\Example03-graphicstest\graphicstest\graphicstest.ino (2)-(4)Same as 3.2.1, In Figure 16 is the result. Figure 16... - Page 15 This example demonstrate various GUI Figure Function and realize screen rotation. 3.2.4. Example 4 (1)Open ..\2.8inch_Arduino_ILI9341_V3.2\Arduino Demo_UNO&Mega2560\Example04-Touch\tftpaint\tftpaint.ino; (2)-(4)Same as 3.2.1, In Figure 17 is the result. Figure 17 This example output a touch scren drawing board. 3.2.5. Example 5 (1)Open ..\2.8inch_Arduino_ILI9341_V3.2\Arduino Demo_UNO&Mega2560\Example05-ShowBMP\ShowBMP\ShowBMP.ino;...
- Page 16 from ..\2.8inch_Arduino_ILI9341_V3.2\Arduino Demo_UNO&Mega2560\Example05-ShowBMP\PIC to the root directory of the SD card. Figure 18 (3)-(5)Same as (2)-(4)in 3.2.1, In Figure 19 is the result. Figure 19 This example shows a program of digital photo frame, realizing the function of decoding and displaying BMP photo from the SD card.
- Page 17 3.2.6. Example 6 (1)Open ..\2.8inch_Arduino_ILI9341_V3.2\Arduino Demo_UNO&Mega2560\Example06-Phonecal\phonecal\phonecal.ino; (2)-(4)Same as 3.2.1, In Figure 20 is the result in the 2.8 inches touch screen. In Figure 21 is the result in the computer. Figure 20 Figure 21 This example realize the function of a number pad, showing the character clicked by the touch pen.
- Page 18 3.3. Working with MEGA2560 Connect 2.8 inches touch screen with Arduino MEGA2560 board(see Figure 22) , then connect the MEGA2560 board with the PC or laptop with USB cable. Figure 22 Figure 23...
- Page 19 3.3.1. Example 1 (1)Open ..\2.8inch_Arduino_ILI9341_V3.2\Arduino Demo_UNO&Mega2560\Example01-Simple test\Simple test for Mega2560\_9341Mega2560\_9341Mega2560.ino; (2)Click “Tool”--“Board”--“Arduino/Genuino Mega or Mega 2560” (See Figure 24) Figure 24 (5)Click “Tools”--“Processor”--“ATMega2560 ( Mega2560) ” (See Figure 25) Figure 25 (4)Click “Tools”--“Port”--“COMxx(Arduino/Genuino Mega 2560)” (See...
- Page 20 Figure 26) Figure 26 ( 5 ) Click the “upload” button , and wait for the completion of the programming. (See Figure 27) Figure 27 This is the most basic example program which can run without relying on any library. The result of example 1 is that the whole screen is filled with red, green, blue, white and black in turn and then filled randomly.
- Page 21 3.3.2. Other Example Please other example referring steps 3.3.1. Example05-ShowBMP and SDCard Exten Example can not work on MEGA2560, because SPI IO of MEGA2560 is different from that of UNO. So example need to read the SD card can not work on MEGA 2560. The result of the examples are the same as that on UNO.
Need help?
Do you have a question about the UNO R3 and is the answer not in the manual?
Questions and answers