Advertisement
Quick Links
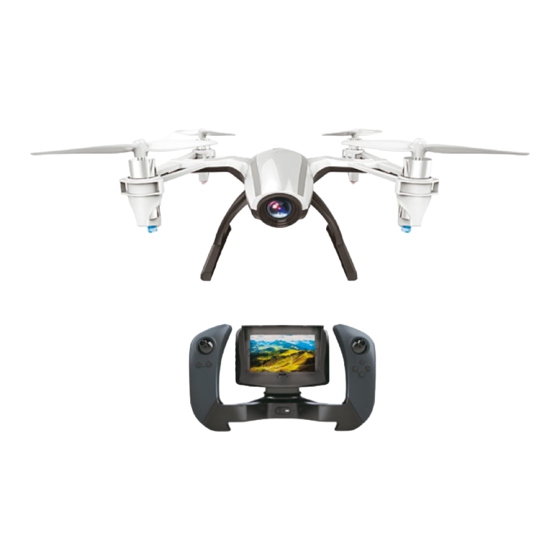
First Person View
Aerial Photography / Real-time Transmission / Live Video and Photo
720P HD Camera / Headless Mode / Low Voltage Alarm / 360° Flip and Roll
U28-1
Notice:
1. RC drone is not ordinary toy. This product is suitable for over 14 years old people.
2. Please choose spacious field to use this drone and keep away from obstacle, crowd,
power lines etc.
3. Do not operate the drone in terrible weather, such as strong wind, thunder rainy,
foggy etc.
4. Do not disassemble or change the drone randomly. If you have any questions about
use, operation, repair etc., please contact the local distributor.
5. The drone inside is consisted of precise electronic components. Humidity or water
vapor may damage electronic components and cause accident.
6. The RC drone is made of metal, fiber, plastic, electronic components etc. Keep away
from heat and sunshine to avoid distortion and damage.
7. Keep your finger and body away from rotating blades, which may cause serious injury
and damage.
8. Please obey local laws and regulations when using this product and never use for
illegal purpose.
9. Please do not touch the hot motor to avoid being burnt.
Name of Parts
1. Drone
Blade Guard
Motor
Blade
Body Light
Landing Gear
Blade Guard Installation Diagram
2
Battery Cover
Drone Body
Camera
Advertisement

Subscribe to Our Youtube Channel
Summary of Contents for Kestrel UdiR/C U28-1
- Page 1 Notice: 1. RC drone is not ordinary toy. This product is suitable for over 14 years old people. 2. Please choose spacious field to use this drone and keep away from obstacle, crowd, power lines etc. 3. Do not operate the drone in terrible weather, such as strong wind, thunder rainy, First Person View foggy etc.
- Page 2 2. Transmitter * Make sure that there is no short circuit of the power wire. * Please use the recommended charger only. Camera Adjustment Camera Adjustment Button * Check the charger’s wire, plug, surface regularly. Do not use any broken charger. Button Forward/Backward/ Throttle/Left and Right...
- Page 3 3. Insert the TF card to the slot at the rear part of the drone body. Operation Instruction of Camera Pairing operation of camera and transmitter VIEW SNAP Press “UP” button Insert the card to the slot for 6 seconds DOWN Insert the card to the slot Diagram 1.
- Page 4 Operation for Picture Taking 2. “JPG” Icon VIEW 1. SNAP Button SNAP DOWN Press SNAP Button and the “JPG” Icon will flash briefly, and then the picture will be stored in the SD card automatically. Adjust the Screen Brightness VIEW SNAP Up Button (brighter) Down Button (darker)
Need help?
Do you have a question about the UdiR/C U28-1 and is the answer not in the manual?
Questions and answers