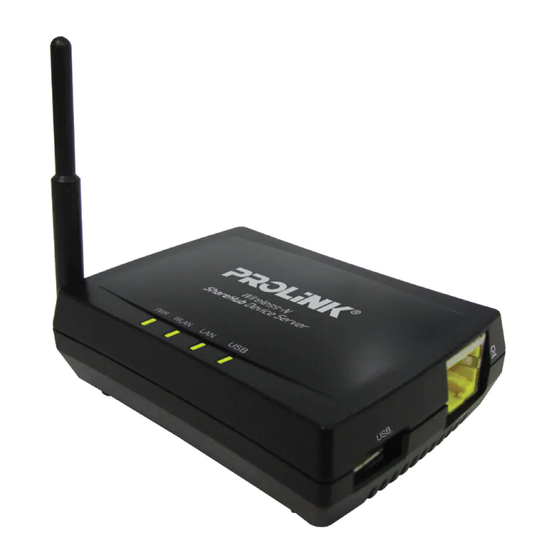
PROLiNK ShareHub PPS2101 User Manual
Hide thumbs
Also See for ShareHub PPS2101:
- Quick installation manual (18 pages) ,
- Quick installation manual (24 pages)
Table of Contents
Advertisement
Quick Links
ShareHub Device Server
Version 1.00
(English)
BEFORE GETTING STARTED
This QIG is designed to aid you to get started with the device. If you experience problems following these guides or
need further information pertaining to the device, please visit our website at www.prolink2u.com. All specifications
are subject to the manufacturer's configuration at the time of shipping and may change without prior notice, written
or otherwise.
Advertisement
Table of Contents

Subscribe to Our Youtube Channel
Related Manuals for PROLiNK ShareHub PPS2101

Summary of Contents for PROLiNK ShareHub PPS2101
- Page 1 ShareHub Device Server Version 1.00 (English) BEFORE GETTING STARTED This QIG is designed to aid you to get started with the device. If you experience problems following these guides or need further information pertaining to the device, please visit our website at www.prolink2u.com. All specifications are subject to the manufacturer’s configuration at the time of shipping and may change without prior notice, written or otherwise.
-
Page 2: Table Of Contents
Table of Contents Table of Contents ................................1 1. Introduction .................................. 1 1.1. About 3 Models Described in this Manual ......................1 2. Product Overview ................................2 2.1. Package Contents .............................. 2 2.2. Setup CD ................................2 2.2.1. Start-up Procedures ..........................2 2.2.2. - Page 3 5. File Server ..................................20 5.1. Preliminary ..............................20 5.2. Connecting USB Mass Storage to the Server ....................20 5.3. Supported Codepages ............................. 20 5.3.1. What is codepage? ..........................20 5.3.2. Filename Encoding of FAT File System ....................20 5.3.3. When do you need to configure codepage? ...................
-
Page 4: Table Of Contents
1. Introduction Thank you for purchasing PROLiNK® ShareHub Device Servers (PPS2101/PPS2101N/PPS2104N). This Server is designed to connect your Multifunction Printer, Scanner, Fax, Hard Drive, iPhone, iPod, USB Digital TV Tuner, Digital Camera, USB Webcam, USB Speaker, USB CD, USB DVD to your network, allowing all network users’ access to these shared USB devices. -
Page 5: Product Overview
2. Product Overview 2.1. Package Contents Verify that nothing is missing from the package by using the checking list below. Please contact your dealer if anything is missing or damaged. All packing materials are recyclable. Please confirm the items in the package below: 1. -
Page 6: Supported Usb Devices
2.2.3. Supported USB Devices The PROLiNK® ShareHub Device Servers supports the following types of USB devices. USB Printer USB multifunction printer (MFP/AIO) USB scanner USB storage (like USB external HD, flash disk, and digital camera) USB speaker ... -
Page 7: Basic Installation
3. Basic Installation 3.1. Connecting the Hardware a) Make sure that your USB devices are switched off and that the Server’s Power Adapter is disconnected. b) Connect the USB devices to the USB ports with the USB cables. c) Connect the Server to the network with a twisted-pair category 5 cable, 10baseT or 100baseTX. d) Turn on the USB devices and make sure it is ready for use. - Page 8 c) If the tool finds ShareHub Device Servers in your local area network, then you have to select a server from the server list. d) Double click the highlighted server (or click the “Configure Server” button) to get the server’s web pages.
- Page 9 Click Wireless icon. g) In order to join an existing wireless network, you have to set the correct SSID, and the correct security method with the correct key information. h) If the wireless network is secured by WEP64 or WEP128, key index and WEP key must be set correctly.
-
Page 10: Assigning An Ip Address To The Server
After properly configuring the wireless parameters, you can remove the network cable and reboot the PPS2101N/PPS2104N. The PROLiNK® PPS2101N/PPS2104N will then connect to your wireless network. PPS2101N/PPS2104N will detect if a network cable is plugged-in or not. If a network cable is plugged-in, PPS2101N/PPS2104N will always connect to the network through the network cable. -
Page 11: Methods For Setting The Ip Address
3.3.4. Server Names and Server Name Rules The default server name of the Server is “PPS2101” (for PROLiNK® PPS2101) or “PPS2101N” (for PROLiNK® PPS2101N) or “PPS2104N” (for PROLiNK® PPS2104N). If you put two or more Servers in your local area network, to avoid using the same server names you have to change the server names by using the ShareHub Device Servers Control Center or the Server’s web pages. - Page 12 c) If the tool finds multiple Servers in your local area network, then you have to select one Server from the Server List. d) Double click the highlighted server (or click the “Configure Server” button) to get the server’s web pages.
- Page 13 e) Login with administrator ID (default: admin) and its password (default: admin). Click the button corresponding to your choice of IP setting methods (static or dynamic using DHCP). When assigning a static IP address you also have to define Subnet Mask. g) Click Submit to save your settings.
-
Page 14: Using The Sharehub Device Servers
ShareHub Device Servers via TCP/IP. The simplest way to do this is using “ShareHub Device Servers Control Center” to search for the PROLiNK® ShareHub Device Servers on the network and change its IP address to be the same subnet as your PC. If the server and your PC are not in the same TCP/IP subnet, ShareHub Device Servers Control Center will show the server in red, as the following figure. -
Page 15: Installation Of Usb Device Driver
4.4. Installation of USB Device Driver Some USB devices, like printers or MFPs (multifunction printers), require to install vendor-supplied driver (usually on CDROM). For those USB devices that do not need to install driver, please skip this section. a) Insert the CDROM into the CD drive and run the “autorun” program. b) Follow the instructions of the installation program to install driver. -
Page 16: Using The Sharehub Device Servers
4.5. Using the ShareHub Device Servers a) In the ShareHub Device Servers Control Center, click the ShareHub Device Servers that has the desired USB device attached. b) Click the desired USB device. c) Click the “Connect” button. Then the message “Manually Connect by your_computer_name” will be shown. d) Now, PC will detect the plug-in of the USB device. -
Page 17: Auto-Connect Printer
After you finish using the USB device, click the USB device in the ShareHub Device Servers Control Center and then click the “Disconnect” button to disconnect the USB device. Other PCs cannot “Connect” the USB device until you “Disconnect” that USB device. That is to say, only one PC is allowed to connect the USB device at the same time. - Page 18 The following figure will appear. d) Choose the desired printer. The desired printer must be the Windows printer (this is a logical printer) that matches the printer attached on the ShareHub Device Servers (this is a physical printer). Then click the “Apply”...
-
Page 19: Network Scanner
g) Even you already properly setup an auto-connected printer, the ShareHub Device Servers Control Center must be running (in the background) while a print job is issued. This means you’d better run the ShareHub Device Servers Control Center every time after you login Windows. In order to skip this manual operation, you can make the ShareHub Device Servers Control Center be run automatically after you login Windows. - Page 20 c) Click the “Network Scanner” button. Then you can see that the ShareHub Device Servers Control Center will automatically do a “connect” operation. The following window will appear. Note: Only applicable to Windows XP. d) Choose one of TWAIN or WIA item. Click “OK”. The following window will appear. Note: Only applicable to Windows XP.
-
Page 21: Usb Storage
4.8. USB Storage You must use “manually connect” for USB storage. After you connect a USB storage, like the following picture, your PC will have a new disk. If the USB storage is a flash drive, the new disk is a “removable disk”. You can see the storage icon in the system tray. -
Page 22: Request To Connect
4.9. Request to Connect If a USB device is manually connected by any other user, basically you cannot connect that device. However, we offer another mechanism called “Request to Connect” to solve this inconvenience. For example, there are two computers – PC1 and PC2. Now the owner of “HP LaserJet P2015” is PC1. Then, the PC2 computer wants to use this HP printer. -
Page 23: File Server
5. File Server This chapter describes the file server function of the Server which allows USB storage devices to be shared across a network by using SMB: NetBIOS over TCP/IP and FTP protocol. 5.1. Preliminary a) This product supports a file format of FAT12/16/32 and NTFS. However, the “write” operation on NTFS is only supported in NetUSB mode. -
Page 24: Configuring The Server's Codepages
5.3.4. Configuring the Server’s Codepages Users can use the following methods to set the Server’s codepage. a) Start ShareHub Device Servers Control Center and Auto-searching Server window will appear. b) If the tool finds the Servers in your local area network, select the Server from the Server List and click “Configure Server”... -
Page 25: Using Shared Storage By Ftp Methods For Windows
h) If you clear Enable SMB/CIFS Print/File Server Authentication in Supported Protocols, you login to the SMB server without requiring authentication; otherwise you have to enter user name and password to login to the Server. You can add user name and password in User Account box by the ShareHub Device Servers Control Center or the Server’s Web page. -
Page 26: The Servers' Web
6. The Servers’ Web Pages 6.1. Introduction The Server runs the http server, httpd on TCP port: 80. Users may use the web pages to see the Server’s system status and configure the Server. 6.2. Using the Server’s Web Pages 6.2.1. -
Page 27: Setting Up Server Configuration
6.2.2. Setting up Server Configuration To set up the Server configuration, click on the “CONFIG” icon ad then the system will request user to enter administrator (default: admin) and password (default: admin) to login. General Configuration Server Information: You have to set the Server Name, which is the name to represent the Server. - Page 28 Administrator: enter your desired administrator name. New Password: enter your desired password. Re-type Password: re-confirm the password. Maintenance If you want to restore factory default values of the Server or upgrade new firmware, you can use the Maintenance tool. Restart: click this button to restart (reboot) the Server.
-
Page 29: Troubleshooting
7. Troubleshooting This chapter provides useful information to help you resolve difficulties that you may experience with your Server. Fault symptoms, possible causes, and remedial actions are provided within a quick reference table. This Server’s USB ports only support MFPs, printers, scanners, mass storage, and USB cameras. 7.1. -
Page 30: Restore Factory Defaults
Server. Finally, the Server will operate using the Factory Default values. 8.3. Default Parameters List 9.3.1. General Information Server Name: PPS2101 (for PROLiNK® PPS2101) or PPS2101N (for PROLiNK® PPS2101N) or PPS2104N (for PROLiNK® PPS2104N) 9.3.2. TCP/IP Automatically get IP by DHCP: Enabled ... -
Page 31: Upgrade Firmware
9. Upgrade Firmware This chapter describes how to upgrade firmware. Please follow one of the following Procedures: Procedure A: Using the ShareHub Device Servers Control Center a) Open ShareHub Device Servers Control Center. It will automatically search the existing Servers and display their statuses. -
Page 32: The Init Button
10. The Init Button The Init button is used for maintenance: Simultaneously press Init button and turn on (by plugging in the power adaptor) the Server until USB1 and USB2 LED indicators simultaneously blinks. (For PPS2101/PPS2101N, only USB LED indicator will blink.) After that, the Server will do the following tasks: a) Perform a Factory Default restoration of the server, which will restore most of the parameters and settings to factory default values. -
Page 33: Appendix G. Technical Support
Register Online For Your Product Warranty @ www.prolink2u.com/register PROLiNK® is a trademark of FIDA INTERNATIONAL (S) PTE LTD and is manufactured under its authority. All other brands, products, services, logos and company names mentioned herein are trademarks of their respective owners. All specifications, designs and...
Need help?
Do you have a question about the ShareHub PPS2101 and is the answer not in the manual?
Questions and answers