
Summary of Contents for Pearl EASY HAMMER
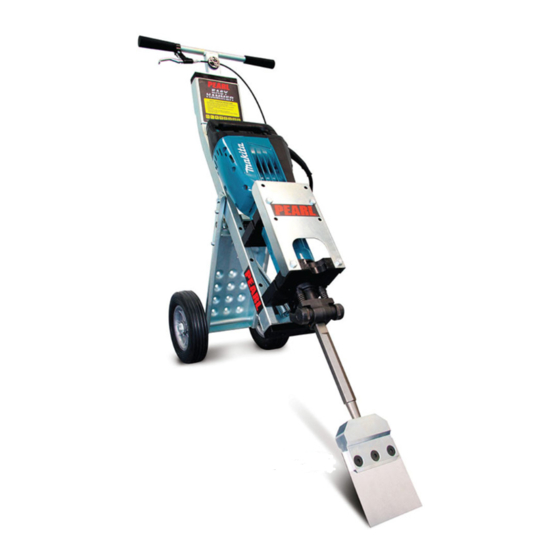
- Page 1 EASY HAMMER ® MANUAL WORKS WELL WITH: • Bosch® 11335K • Milwaukee® 5337-21 • Makita® HM1317CB/HM1307CB • Hitachi® H65SD2 • Dewalt® D25960K Shown with Makita® Tool 5 Adjustable Positions Tile Stripper/Hammer (sold separately) REV.2...
-
Page 2: Table Of Contents
TABLE OF CONTENTS INTRODUCTION ....... 3 Key Terms ......... . 3 Disclaimer . -
Page 3: Introduction
INTRODUCTION This manual is designed to provide the user with the information required to operate and maintain the Easy Hammer® Trolley correctly and safely. CAREFULLY READ AND FOLLOW ALL INSTRUCTIONS PROVIDED BY THE EASY HAMMER® MANUFACTURER. KEY TERMS 1. READ CAREFULLY: Refers to important information that should be paid careful attention. -
Page 4: Product Information
Protection Grounded Large Label There is a safety and information panel provided on the front of the Easy Hammer® Trolley to alert the user of potential safety risks/hazards. Please read and adhere to all instructions on the Unit. SAFETY STICKERS WWW.PEARLABRASIVE.COM... -
Page 5: Warranty
PRODUCT DESCRIPTION AND SPECIFICATIONS The versatile Easy Hammer® packs a punch, saving you a lot of hard work and effort. Let the Easy Hammer® take the workload off your back! TABLE 2: #PA01HT Product Specifications No more struggling or bending trying to handle heavy HEIGHT WHEN 1100mm / 43.3”... -
Page 6: Instructions For Use
INSTRUCTIONS FOR USE DO NOT OPERATE THE EASY HAMMER WITHOUT WEARING THE APPROPRIATE PERSONAL PROTECTIVE EQUIPMENT AND ASSESSING THE SURROUNDING AREA FOR HAZARDS. WARNING! STEP 1 - FITTING A JACK HAMMER Tools Required: • 17mm / 5/8” socket • 19mm / 3/4” socket •... - Page 7 5. Mount the jackhammer shank; see 4. Place top blocks and the cover plate on top of the jackhammer user manual for details. jackhammer and tighten the supplied bolts until they are snug. Brake Lever Adjustment: Adjustment Screw Retaining Screw Instructions: 1.
-
Page 8: Step 2 - Using The Hammer Trolley
INSTRUCTIONS FOR USE (Cont.) ENSURE THE MACHINE IS SWITCHED OFF BEFORE PLUGGING IN. WARNING! ENSURE MOIL IS CORRECTLY INSERTED AND LOCKED IN POSITION BEFORE USE. CAUTION! STEP 2 - USING THE HAMMER TROLLEY STEP 3 - SERVICING THE HAMMER TROLLEY Instructions: 1. -
Page 9: Appendix
APPENDIX A - PARTS BREAKDOWN For part numbers and specifications please see below. P RT N ME P RT NUMBER Lever & Cable ssembly P 01LRCB Handle Grip Set Of 2 P 01HGRP Spring For Hammer P 01SPNG Wheel (Each) P 01WHEL Hand Lever Only P 01LRTH... -
Page 10: Block Set Part Selection
– 10 – P E A R L A B R A S I V E C O . - E A S Y H A M M E R ® M A N U A L... -
Page 11: Servicing Information
Pearl reserves the right to discontinue products at any time without notice. ll illustrations displayed in this manual are the property of Pearl brasive Co. and shall not be duplicated or reproduced without the express written consent of Pearl brasive Co. - Page 12 00-969-5561 PE RL BR SIVE.COM GEORGI • US ONT RIO • C N D 4963 SOUTH ROY L TL NT DRIVE 375-2 PIDO RO D TUCKER, G 30084-3006 PETERBOROUGH, ONT RIO K9J-6X7 ©2014 PEARL ABRASIVE CO., COMMERCE CA 90040 EHMANV2...
Need help?
Do you have a question about the EASY HAMMER and is the answer not in the manual?
Questions and answers