
Subscribe to Our Youtube Channel
Summary of Contents for SHOR-LINE Oxygen Therapy Plus Door
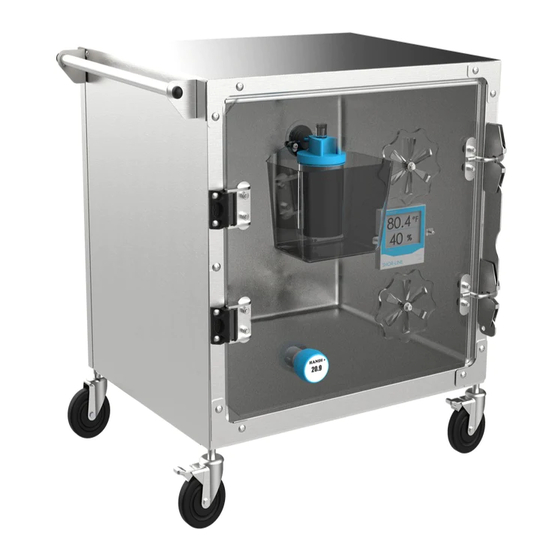
- Page 1 Oxygen Therapy Plus Door A S S E M B LY G U I D E (Cage NOT Included) Oxygen Therapy Plus Door (30x30 Door Configuration Shown) Save This Guide For Future Reference PN: 006.9140.20 January 2019...
- Page 2 INTRODUCTION INTRODUCTION Introduction Thank you for purchasing Shor-Line products. As a leader in animal care equipment, our commitment to provide quality products and personable customer service is the same as it was in 1927. This Guide provides information regarding the installation, use, and care of your Shor-Line product.
-
Page 3: Table Of Contents
SECTION ONE, PRE-ASSEMBLY Shipment Inventory And Inspection..............3 Oxygen Therapy Plus Door - Single Door Configuration ............ 3 Oxygen Therapy Plus Door - Double Door Conversion Kit ..........3 Shipment Inventory ......................3 Shipment Inspection ......................3 Damage Reporting ......................4 Oxygen Therapy Plus Door Sizes .................. -
Page 4: General Information
Refer to the Guide, images and content to assist with the installation of the product. Throughout the Guide, safety notices provide help for a successful installation. The Oxygen Therapy Plus Door is also referred to as the "O2 Door" in this document. SAFETY FIRST! -
Page 5: Safety Warnings Included In This Guide
Keep hands clear of possible pinch areas when assembling parts, which if not avoided, could result in MINOR to MODERATE INJURY. Keep hands, fingers and patients limbs clear of possible pinch areas when adjusting the vents, which if not avoided, could result in MINOR to MODERATE INJURY. Shor-Line.com... -
Page 6: Section One, Pre-Assembly
LATCH BAR W/SEALS ADJUSTABLE VENTS FIGURE 1.2 - Typical Oxygen Therapy Plus Door - Double Door Conversion Kit Shipment Inventory At arrival, unpack and inspect the shipment to ensure it is complete and free of damages that may have occurred during shipping. Compare the packing list with the shipment to ensure all parts/components have been received in good condition. -
Page 7: Damage Reporting
JAMB SEAL DD CONVERSION OXYGEN SENSOR LATCH BAR (SOLD SEPARATELY) NOTE: STAINLESS STEEL CAGES NOT INCLUDED FIGURE 1.3 - Oxygen Therapy Plus Door (30x30" SD & 48x30" DD Shown) Part # Description Single Door Conversion Kit: 914.2424.20 DOOR,24X24,OXYGEN THERAPY PLUS 914.2430.20 DOOR,24X30,OXYGEN THERAPY PLUS 914.2436.20... -
Page 8: Component Parts List
• #6-32X.750 RD HD PHL SS • 065.0600.10 • #6 SPLIT LOCK WASHER, PLTD • 064.0600.10 • #6-32 ACORN NUT SAE HI-CROWN SS 300.2309.00 • COVER,02 ANALYZER,TP 4 DOOR NOTE 1 - Sizes vary, contact Shor-Line Technical Service Department to verify cage sizes (1.800.444.1579) Shor-Line.com... -
Page 9: Hardware Parts List
• .250-20 X 1.000 TRUSS HD PHIL SS • 065.2500.00 • .250 FL WASH SAE SS • 064.2500.02 • .250-20 HX NUT NYLOCK SS NOTE 1 - Sizes vary, contact Shor-Line Technical Service Department to verify cage sizes (1.800.444.1579) Shor-Line.com... -
Page 10: Section Two, Assembly Procedures
Assembly Procedures Oxygen Therapy Plus Door Configurations Oxygen Therapy Plus Door (O2 Door) is available in several sizes. The doors are designed to be installed onto existing (sold separately) stainless steel cages. Verify the width and height of the cage with the dimensions of the O2 Door to be installed. -
Page 11: Cage Door Removal - Double Door
SECTION TWO Cage Door Removal - Double Door Door hinges may vary depending on the release model of the cages. Type III cages are used for this procedure. Contact Shor-Line for door removal procedures for older model cages. STEP 1: Slide the latch bar up and swing the door to the open position (90°... - Page 12 The bottom of the latch bar has open end slots at the end of the bar to easily slide out from behind the latch lower pins. See FIGURE 2.9 SLIDE OUT FIGURE 2.9 - Remove Latch Bottom Shor-Line.com...
-
Page 13: Oxygen Therapy Plus Door Installation
SECTION TWO Oxygen Therapy Plus Door Installation LOOSEN, DO NOT REMOVE The O2 Door and components are packaged in separate boxes. Unpack and organize the door components for assembly and installation. Enlist help and USE SAFE LIFTING PRACTICES during assembly, installation and moving equipment. -
Page 14: Oxygen Therapy Plus Door Installation - Double Door
SECTION TWO Oxygen Therapy Plus Door Installation - Double Door The O2 Door and components are packaged in LOOSEN, DO NOT FULLY separate boxes. Unpack and organize the door REMOVE SCREWS/TRIM components for assembly and installation. If equipped, lock all casters on mobile cage banks to prevent movement during the installation procedures. - Page 15 FIGURE 2.20 - Door Installation FIGURE 2.21 - Door Installation STEP 9: Close the doors, check latch operation and adjust alignment to ensure the O2 Doors latch correctly. FIGURE 2.22 - 48" Wide Oxygen Therapy Plus Configuration (Options Vary) Shor-Line.com...
-
Page 16: Section Three, Use And Care Oxygen Therapy Plus Door Use And Care
• Do NOT move cages with the doors in the open position. Component Instructions Oxygen Therapy Plus Door configurations vary and may or may not include all accessories. Verify which components match the order and proceed to the components/accessories sections required to complete the installation. -
Page 17: Oxygen Analyzer
FIGURE 3.4 - Analyzer Plug Removal FIGURE 3.5 - Remove the O2 Analyzer before cleaning the door. Avoid using cleaning chemicals around the exposed end of the O2 Analyzer. Refer to the manufacturer's operation, safety warnings and maintenance procedures. Shor-Line.com... -
Page 18: Thermometer/Hygrometer
Cage doors can be flipped to swing with a left-hand pull by relocating the hinges, latch assembly and rotating the door. (Single door cages only) Cage Hardware STEP 1: Remove the cage door by following the Type III hinge cage door removal procedure. Shor-Line.com... - Page 19 Install the hinge assemblies to the cage frame, tighten screws to secure the hinges to the frame. See FIGURE 3.14 HINGE GUIDE SLOT INSIDE OUTSIDE OF CAGE OF CAGE HINGE SCREWS HINGE GUIDE SLOT FIGURE 3.13 - Hinge Assembly Rotate FIGURE 3.14- Hinge Assembly Installation Shor-Line.com...
-
Page 20: Door Rotation/Component Relocation
Door Plug - Remove the door plug assembly with a Phillips head screwdriver, turn the screw counterclockwise to loosen, remove. Set aside for the moment. See FIGURE 3.19 O2 ANALYZER O2 ANALYZER REMOVE COVER PLUG ASSEMBLY FIGURE 3.18 - O2 Analyzer Removal FIGURE 3.19 - Door Plug Removal Shor-Line.com... - Page 21 Door Plug - Install the door plug assembly with a Phillips head screwdriver, turn the screw clockwise to secure the plug to the door. See FIGURE 3.25 O2 ANALYZER COVER O2 ANALYZER PLUG ASSEMBLY FIGURE 3.24 - O2 Analyzer Installation FIGURE 3.25 - Door Plug Installation Shor-Line.com...
-
Page 22: Hinge Bushing Procedures
FLAT SIDE TOGETHER cage door. See FIGURE 3.19 STEP 3: Reinstall the cage door. The hinge bushings must completely be seated FIGURE 3.19 - Hinge Bushing Installation into the hinge assemblies for proper operation. Shor-Line.com... -
Page 23: General Maintenance & Care
Shor-Line Technical Services for direction. Do NOT attempt to repair hydraulic leaks. Care Recommendations Routine product care will extend the quality and life of Shor-Line products and aids in protecting animals from transmittable diseases and infections. It is the owners responsibility to set-up scheduled cleaning programs, depending on use of the equipment. -
Page 24: Section Four, Terms & Conditions
Shor-Line. If products are damaged, defective, shorted or appear not to conform to the order, Customer shall discontinue their use and immediately notify the carrier and Shor-Line of such condition and afford a reasonable opportunity to inspect the same. -
Page 25: Limited Warranty
SECTION FOUR Limited Warranty In the event the Customer is not fully satisfied with the quality or workmanship of a product, SHOR-LINE in its sole discretion may arrange either to credit Customer's account (excluding shipping and handling costs) or replace the product. -
Page 26: Contact Information
Vale of Glamorgan CF71 7PF Kansas City, Kansas 66105, USA United Kingdom PHONE: 800.444.1579 PHONE: +44 1446 77 20 41 LOCAL: 913.281.1500 FAX: +44 1446 77 36 68 FAX: 913.281.5339 EMAIL: quality@shor-line.co.uk EMAIL: guides@shor-line.com WEB ADDRESS: SHOR-LINE.co.uk WEB ADDRESS: SHOR-LINE.com Shor-Line.com …...
Need help?
Do you have a question about the Oxygen Therapy Plus Door and is the answer not in the manual?
Questions and answers