Advertisement
Quick Links
Advertisement

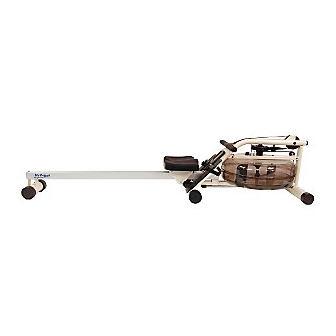
Summary of Contents for MyRower MyRower
- Page 1 | support@myrower.com...
- Page 2 ASSEMBLY Congratulations on purchasing the MyRower! Please see the following pages for instructions on assembling your MyRower. Bits bag contents: • Rail Cross Bolt (90mm) • Rail Cross Nut • Rail Down Bolt (75mm) • 2 x Small M8 Bolt (20mm) • 1 x Small M8 Bolt (30mm)
- Page 3 1.) Remove the bits bag, seat, and rear leg from the cardboard insert. 2.) Remove the cardboard insert. 3.) Lay the box on it’s side so the MyRower is right side up, with the heel rests at the bottom. 4.) Slide the tank assembly out of the tank box.
- Page 4 8.) Slide the rail into position in the gap in the footboard between the heel rests. The seat should be upwards. The rail end should slide in until the end of the rail lines up with the end of the U-bracket of the tank sub frame. 9.) Install the rail cross bolt through the back of the footboard and rail and into the rail cross nut that is inserted to the opposite side.
- Page 5 11.) Stand the unit up and use the 5mm (silver) allen key to install the second small M8 bolt through the hole in the bottom of the tank sub frame, through the U-bracket, and into the rail underside. Tighten the bolt. Using a pair of pliers and the provided allen key, slightly loosen the preattached nut from the rail cross bolt (approximately...
- Page 6 15.) Remove tank stopper, fill with water using included siphon pump, and replace the stopper. Be sure not to fill the tank past the level indicated on the level gauge sticker on the side of the tank just below the seam. 16.) Remove the rubber band on the handle and any other straps or ties that may be on the machine.
-
Page 7: Basic Maintenance
BASIC MAINTENANCE 1.) Periodically ensure all bolts are tight. 2.) Add 1 purification tablet every 6 months. To request extra purification tablets, visit myrower.com 3.) Keep rail and seat wheels clean. 4.)If during the recoil phase the handle does not return towards the front of the machine smoothly, you can add more tension tying an additional knot at the end of the bungee cord under the unit. - Page 8 SAFETY We recommend consulting a physician before starting out with an exercise program. Please read all instructions before using the WaterRower. Additional information on getting started, rowing technique and rowing training advice can be found at www.HowToRow.com. Warning: Please keep hands away from moving parts when rowing machine is in use. For further information on safety tips, please refer to www.waterrower.com/safety.
- Page 9 OPERATION The MyRower uses the effect of drag to provide an exercise which is entirely self paced. Because drag is linked to speed, a crew rowing down a river chooses its intensity of exercise simply by altering the pace at which they row. The faster the boat travels, the greater the drag and the harder the crew works.
- Page 10 MAINTENANCE - CLEANING The MyRower does not require heavy maintenance. We suggest you take care of it as you would with any other piece of furniture in your home. Regularly dust the MyRower with a soft cloth dampened with water or window cleaner. MAINTENANCE - WATER AND TANK We advise using municipal tap water to fill the tank, as it contains additives that keep it free of bacteria and algae.
- Page 11 ROWING TECHNIQUE Following proper rowing technique will allow you to get the best of your MyRower. The rowing action has been broken down into 3 phases and 3 positions to make it easier for you to learn the technique and we hope it will soon become second nature. Position 1: The Release Position The Release Position is at the end of the Drive Phase. Your legs are straight, the handle is...
- Page 12 End at the Release Position. WARRANTY The MyRower was designed to be a home use machine, and is not a commercially rated machine, therefore should only only used in a home setting. The warranty covers the frame and all parts of the MyRower for 1 year.
- Page 13 MONITOR GUIDE Intensity Strokerate strokerate intensity Displays intensity in Displays strokerate meters per second in strokes per minute (m/s) (s/m) Distance distance Displays distance meters in meters Time time mins Displays time in minutes CHANGING THE BATTERIES • Using a Phillips headed screwdriver, remove the screws at the top and bottom of the monitor.
- Page 14 NOTES...
- Page 15 Please make note of your serial number which is located on the level gauge. You will need to reference this for any service or support you may need with your MyRower. Store this pamphlet in a safe place for easy reference.
Need help?
Do you have a question about the MyRower and is the answer not in the manual?
Questions and answers