Advertisement
Quick Links
Advertisement

Summary of Contents for ZDH ZERT Veranda Series
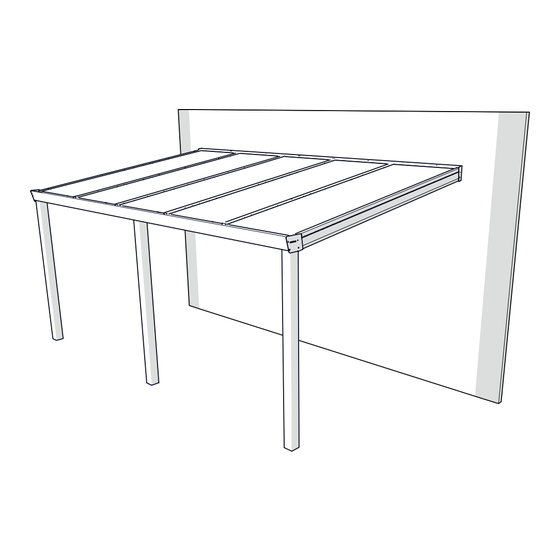
- Page 1 Legend Plus & Expert Plus edition Veranda EN Assembly Instructions V17/16...
-
Page 2: Product Description
Legend Plus & Expert Plus edition EN - Assembly Instructions Veranda Manual for the end user Precautions and Safety Instructions and the installer Warning! • - If your veranda has lighting, the electrical installation may only be carried out by a qualified electrical Dear customer, installation technician. - Page 3 Legend Plus & Expert Plus edition Assembly preparations Carefully unpack the product. Do not use any sharp objects to open the boxes. 10 cm 10 cm ±50 cm ±50 cm ±50 cm ±50 cm 10 cm Pre-drill the wall profile according to the mounting fixings (not supplied). Ø...
- Page 4 Legend Plus & Expert Plus edition Ø 5 mm Ø 5 mm Ø 5 mm Ø 5 mm Ø 5 mm 15 cm 15 cm 15 cm ±50 cm ±50 cm ±50 cm ±50 cm 15 cm Pre-drill the cover profiles with a Ø 5 mm drill bit. ...
- Page 5 Legend Plus & Expert Plus edition 32 mm max. 3 Determine the position of the spotlights in the beams and drill a maximum of three Ø 32 m holes. Lay the cables for the spotlights in the beams from the wall side. Please note! Let the cables protrude 10 to 15 cm.
- Page 6 Legend Plus & Expert Plus edition Place the plastic end piece for the right side on one of the side Place the plastic end piece for the left side on the other side beams. beam. Place the plastic end pieces for the intermediate beams on all Unscrew the leaf trap nut.
- Page 7 Legend Plus & Expert Plus edition Apply sealant to the leaf trap. Insert the leaf trap into the gutter. Standard GIGA Tighten the nut onto the leaf trap by turning it anticlockwise. Apply sealant to the leaf trap. Please note! Glue the leaf trap if you have a GIGA gutter. Cut the rubber seals to twice the length of the beam + 10 cm.
- Page 8 Legend Plus & Expert Plus edition 1 cm Push the rubber seals into all intermediate beams. Cut the rubber seals ± 1 cm longer than the intermediate beams. 1 cm Push the rubber seals into all the side beams. Cut the rubber seals ± 1 cm longer than the side beams. 1 cm Push the rubber seals into all the side covers.
- Page 9 Legend Plus & Expert Plus edition 1 cm Push the rubber seals into all the covers. Cut the rubber seals ± 1 cm longer than the covers. 1 cm Push the rubber seals into all the click frames. Cut the rubber seals ± 1 cm longer than the click frames.
- Page 10 Legend Plus & Expert Plus edition Assembly For construction possibilities of the Legend Plus Edition (STANDARD gutter) with standard length beams see Appendix 1. For construction possibilities of the Expert Plus Edition (GIGA gutter) with standard length beams see Appendix 2. 14 cm 5°...
- Page 11 Legend Plus & Expert Plus edition Place the Acrow props and adjust them to the correct height. Place the gutter onto the Acrow props. Place a side beam against the side of the gutter profile and the wall profile. 4.2x19 (6x) Mount the side caps with seven screws, use these to mark on the side beam where you want to cut.
- Page 12 Legend Plus & Expert Plus edition Saw along the marked line and break the corners of the side beams with pliers. 4.2x19 (1x) 4.2x19 (1x) Attach the side beams with one screw to the supplied mounting brackets as shown above.
- Page 13 Legend Plus & Expert Plus edition 4.2x19 (7x) Refit the side caps on the side of the gutter and the wall profile with seven screws. Fix the side beam with the middle screw (A) in the head plate and seal the front side cover at the gutter. 90˚...
- Page 14 Legend Plus & Expert Plus edition Install the post foundation with integrated rainwater drainage pipe Connect the RWP to the sewer. (RWP). The post foundation is optional. Adjust the gutter so that it is level. Determine the length of the RWP post. 14 cm 28 cm 42 cm...
- Page 15 Legend Plus & Expert Plus edition Install the coupling sleeve. xx mm xx mm Determine the length of the drainpipe. Cut the drainpipe to size. Insert the drainpipe into the post. Place the post with the drainpipe onto the post foundation.
- Page 16 Legend Plus & Expert Plus edition 4.2x32 (2x) Lift up the gutter and allow the leaf trap to drop into the Fix the post to the foundation with two screws. drainpipe. 4.2x32 (1x) xx mm Fix the post to the gutter using one screw. Determine the height of the other posts.
- Page 17 Legend Plus & Expert Plus edition Place the post foundations into the posts at the correct distance. Drill holes in the post foundations. Fix the post foundations using dowels or screws and plugs (not Place the posts under the gutter. included).
- Page 18 Legend Plus & Expert Plus edition X mm X mm Determine the center of the porch on the gutter and the wall profile. xx mm Place the first intermediate beam between the gutter and the Place an intermediate beam on an odd number of roof surfaces wall profile.
- Page 19 Legend Plus & Expert Plus edition Please note! Only screw the mounting brackets to the beams! There should be no screws in the gutter and the wall profile. The beams should still be able to slide. xxx mm Place a second intermediate beam between the gutter and the wall profile. The intermediate beam should be placed in such a way that there is a roof panel width to the first intermediate beam.
- Page 20 Legend Plus & Expert Plus edition Attach the click frames as shown in the image. Position and attach the other intermediate beams and click frames. Slide the intermediate beams tight against the click frames. remain remain Saw the outer click frames to the remaining length and place them in the gutter and the wall profiles. Please note! Do not place a click frame at the power point yet if you are installing spotlights.
- Page 21 Legend Plus & Expert Plus edition (Optional) Feed the cables to the power point. (Optional) Connect the cables to the power point. (Optional) Install the spotlights. (Optional) Install the spotlights.
- Page 22 Legend Plus & Expert Plus edition Do one of the following things: 1. Do you have glass panels? Go to step 54. 2. Do you have polycarbonate sheets? Go to step 55. Place a click frame at the power point. Place two glass panels and go to step 60.
- Page 23 Legend Plus & Expert Plus edition Place condensation tape on the front/gutter side. Push the condensation profile over the condensation tape. Place anti-dust tape on the wall side on the polycarbonate sheet.
- Page 24 Legend Plus & Expert Plus edition Place two polycarbonate sheets with anti-dust tape on the wall side. Using glass: 4.2x25 (4x) Using poly- carbonate: 4.2x32 (4x) Place a side cover profile on one side beam. Fasten the cover profile onto the side beam (work from one side to the other).
- Page 25 Legend Plus & Expert Plus edition Place a cover profile onto the intermediate beam where the sheets are placed. Using glass: 4.2x25 (4x) Using polycarbonate: 4.2x32 (4x) Fix the cover profile onto the intermediate beam. 4.2x19 (1x) Fix the angle plate to the gutter using one screw.
- Page 26 Legend Plus & Expert Plus edition 4.2x19 (1x) Fix the U-profile on the wall side using one screw. Place the remaining polycarbonate sheets or glass panels one by Adjust the posts so that they are level. one and repeat steps 63 to 66 for each sheet/panel. Finally, place the side cover profile on the side beam on the other side of the veranda.
- Page 27 Legend Plus & Expert Plus edition Remove the film on the inside of the polycarbonate sheets. Remove all Acrow props.
- Page 28 Legend Plus & Expert Plus edition Appendix(ces) Construction schedule for Legend Plus Edition Choose the desired roof pitch and determine the desired gutter height. The standard gutter height is 2100 mm. Calculate the height of the wall profile by adding the gutter height to the H1 value of your specific setup. Indicated below is the distance from the posts to the wall (DpB), the fall (H1) and the length of the intermediate and side beams (TrL): Legend Plus Edition D=200 cm: Legend Plus Edition D=250 cm:...
- Page 29 Legend Plus & Expert Plus edition Legend Plus Edition D=400 cm: Legend Plus Edition D=450 cm: 5° 34.9 cm 393.7 cm 395.2 cm 5° 39.3 cm 444.2 cm 445.5 cm 6° 41.7 cm 393.7 cm 394.6 cm 6° 47.0 cm 444.2 cm 444.8 cm 7°...
- Page 30 Legend Plus & Expert Plus edition Appendix(ces) Construction schedule for Expert Plus Edition Choose the desired roof pitch and determine the desired gutter height. The standard gutter height is 2100 mm. Calculate the height of the wall profile by adding the gutter height to the H1 value of your specific setup. Indicated below is the distance from the posts to the wall (DpB), the fall (H1) and the length of the intermediate and side beams (TrL).
- Page 31 Legend Plus & Expert Plus edition Expert Plus Edition D=400 cm: Expert Plus Edition D=450 cm: 5° 34.9 cm 393.7 cm 396.7 cm 5° 39.3 cm 444.2 cm 447.0 cm 6° 41.7 cm 393.7 cm 396.1 cm 6° 47.0 cm 444.2 cm 446.3 cm 7°...
Need help?
Do you have a question about the Veranda Series and is the answer not in the manual?
Questions and answers