Advertisement
Table of Contents
- 1 Table of Contents
- 2 Specifications
- 3 Basic Operation
- 4 Firing the Axe
- 5 Break Beam Eyes Operation
- 6 Regulator and Velocity Adjustment
- 7 Shockwave Board Settings and Functions
- 8 Assembly/Disassembly and Maintenance
- 9 Empire Regulator Service Guide
- 10 Solenoid Service Guide
- 11 Storage and Transportation
- 12 Troubleshooting Guide
- 13 Diagram and Parts List
- 14 Warranty Information
- Download this manual
Advertisement
Table of Contents

Subscribe to Our Youtube Channel
Summary of Contents for Empire axe 2.0
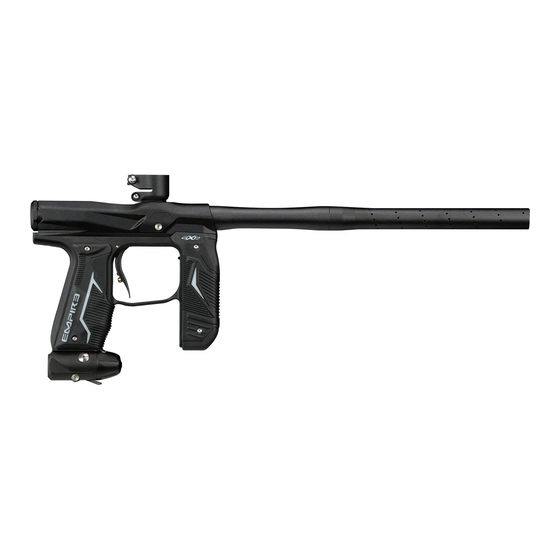
- Page 1 O P E R A T O R ’ S M A N U A L...
-
Page 2: Table Of Contents
Any tampering with the unit voids your warranty. There ar no consumer serviceable parts inside the unit. The use of non factory authorized components within this product may cause a critical failure, fire or shock hazard. Empire Regulator Service Guide...............Page 9 IN NO EVENT SHALL SELLER BE LIABLE FOR ANY DIRECT, INCIDENTAL OR CONSEQUENTIAL DAMAGES OF ANY NATURE, OR LOSSES OR EXPENSES RESULTING FROM ANY DEFECTIVE PRODUCT OR THE USE OF ANY PRODUCT. -
Page 3: Basic Operation
- Make sure there are no paintballs in the marker and that the AXE is turned OFF. The Empire AXE comes equipped to accept standard-gravity feed loaders as well as most agitating and force-feed loaders. Open the clamp lever and place the loader neck directly into the marker feed Notes: neck. -
Page 4: Firing The Axe
LED INDICATION AUTOMATIC OFF FEATURE The LED indicator, located above the button, is used to indicate the current Break Beam Sensor The AXE also has an “Automatic OFF” feature. If you leave your AXE powered on, it will shut itself off System status, the Battery Life Indicator and Trigger Pull indication. The Break Beam Sensor Status is after approximately 60 minutes of inactivity. This time cannot be adjusted. indicated by the blinking frequency of the LED (See Section 5 for further explanation). If the Trigger is EYE FUNCTION being pressed the LED will glow a dim RED which can be seen between blinks of the LED. The AXE board is pre-programmed to activate the eye system each time the marker is powered up. BATTERY LIFE INDICATOR See Section 4 (Break Beam Eyes Operation) for more details. -
Page 5: Regulator And Velocity Adjustment
For optimal performance of the AXE eyes, keep the inside of the AXE breech clean and clear of be above 300 feet per second, please check the fields specific velocity requirements as they vary. broken paint, paint residue, or other debris. Although the eyes can be cleaned via cleaning the breech − To Increase input pressure, turn Clockwise, making small adjustments while checking velocity of the AXE marker, if the eye board needs to be accessed, please follow the steps outlined in the Main using a chronograph. - Page 6 SETTINGS MODE IMPORTANT: When the Firing Mode is changed it will also automatically modify the corresponding Max Rate of Fire and ramping parameters that correspond to that mode. These The AXE must be Off and the Tournament Lock must be Off to begin managing the settings and settings may be changed after Firing Mode is selected functions.
- Page 7 adjustable from 1-15ms in 1.0ms increments. Example: 10 LED blinks = 12.5 BPS Default: De-Bounce = 5.0 ms # LED # LED # LED You must be in the Settings Mode to change the De-Bounce Setting, see above for instructions on BLINKS VALUE BLINKS VALUE BLINKS VALUE how to enter Settings Mode. After choosing De-Bounce Setting (Flashing Red), hold the Trigger to 12.5 display the value, the LED will show flashing Red LED blinks equal to the current value, 17.5 followed by a pause. Pull the Trigger the number of times equal to your new desired setting, one pull per desired setting equal to each millisecond. Once done, the LED will cycle through an array of colors 13.5 to indicate the setting is saved and return to the Settings Mode.
-
Page 8: Assembly/Disassembly And Maintenance
MAINTENANCE OF BOLT AND BOLT GUIDE ASSEMBLY Keep your AXE clean and lubricated to eliminate the friction that would prevent reliable operation. Clean - Inspect the O-rings on both the bolt and Bolt Guide for any wear or damage. Replace damaged or and lube the marker before each use, and do not put it away dirty. Only use oils designed for paintball worn O-rings if necessary. (Fig 7-4) and they may only be used on the regulator. DO NOT USE OIL ON THE BOLT SYSTEM. Do NOT use - Lubricate all O-rings on Bolt and Bolt Guide with Empire marker grease, the supplied grease or a petroleum-based lubricants in the lubrication of this marker. Under any circumstances, do NOT use a paintball specific marker grease. Only a small amount is needed. solvent-based lubricant. Teflon or silicone (Non-spray only) lubricants designed for use on O-rings may be used for lubrication for the bolt area only of the main housing. Only use Paintball specific marker grease, such as Empire Vitamin E grease. The following maintenance procedures described below should be performed before each day of use or every 20,000 shots, whichever comes first. - Page 9 MAINTENANCE OF POPPET Locate the two screws near the corners of the Trigger - Use a 3/32” hex wrench and insert it into the back of the Bolt Guide Cap. Turn counter-clockwise Guard, one on each side of the AXE. Use a 5/64” hex until Bolt Guide Cap is completely removed. (Fig 7-5) wrench to remove those screws. - Inspect and lubricate Bolt Guide Cap O-ring. There are three screws located on the front of the - Carefully insert a non-metallic object (like the back of a pen) into the front of the Bolt Guide. Push Foregrip. One in the center at the very top and two at the Poppet Assembly out the back of the Bolt Guide. (Spring may fall out of Bolt Guide) (Fig 7-6) bottom. Remove them using a 3/32” hex wrench - Lubricate the Poppet O-ring, which is the most important O-ring used in the AXE and should be...
-
Page 10: Empire Regulator Service Guide
WARNING: Remember to remove all gas and ensure marker is discharged before servicing Regulator. - Carefully unplug the solenoid from the Sensor board. WARNING: The following service should be performed by an experienced user. If you are not comfortable - Remove the male Air Transfer Tube assembly from the Air Transfer Plate by unscrewing it counter performing the steps below, please contact Empire customer service at www.paintballsolutions.com clockwise. (Fig 7-12) - Remove the Solenoid from the Air Transfer Plate by unscrewing it counter-clockwise. (Fig 7-13) For ASA/Regulator service you will need the following tools: 3/32” hex wrench, needle nose pliers, - Using a 3/32” hex wrench, remove all of the Air Transfer Plate screws (7 total). (Fig 7-14) - Page 11 4. Use a pair of pliers to remove the tank depression pin from the Pin/Seal Retainer in the tank side 9. Once the silver Piston and washer is removed, insert a 3/32” hex wrench into the tank side of the of the Regulator. Be sure to grab the pin by its smaller section, near the tip. Inspect O-ring on the Regulator to push the silver piston through the front of the Regulator as seen in (Fig 8-12) inside of the pin retainer and replace if necessary (Fig 8-5). 10. Insert a 3/32” hex wrench into the silver cap on side of Regulator to unscrew filter retainer cap. 5. Use a 3/32” hex wrench to unscrew the Lever Retaining Screw (Fig 8-6). The Lever is under The filter will fall out onto the cap once removed. Inspect the O-ring on filter cap and replace if spring pressure, so you may have to push the Lever down slightly to remove the screw. Once the needed. (Fig 8-13) screw is removed, the Lever will fall out and the Pin Depression Ramp with Spring will fall from the bottom of the Regulator (Fig 8-7). (FIG. 8-12) (FIG. 8-13) 11. Proceed to clean the inside of the Regulator and the removed parts with a clean cloth or cotton swab. (FIG. 8-7) (FIG.
-
Page 12: Solenoid Service Guide
IMPORTANT: Never carry your AXE uncased when not on a playing field. The non-playing WARNING: If you are not comfortable performing this maintenance please contact Empire public and law enforcement personnel may not be able to distinguish between a paintball technical support by going to www.paintballsolutions.com... -
Page 13: Troubleshooting Guide
11. TROUBLESHOOTING GUIDE Marker does not turn On Battery may not be fresh If you have tried several different batteries, check to make sure the battery harness is plugged in to the board properly. If it is, unplug the battery from the harness, press and hold the power button for 15sec then release. Plug the battery back in and try again. Board may have moisture damage The circuit board is protected with a moisture resistant coating but occasionally prolonged exposure to moisture can cause a malfunc- tion. If the marker was used in wet conditions unplug the battery and remove both circuit board from marker to allow them to dry for at least 24 hours then try turning it on again. - Page 14 Velocity is Low/Inconsistent or velocity drops during rapid fire Poppet O-ring may be damaged or not properly lubricated See general maintenance section earlier in the manual to see how to properly check and lubricate poppet O-ring. Bolt guide or Bolt O-rings may be bad/may not be lubricated Bolt should stay on bolt guide when turned bolt side down and shak- en. If bolt falls off replace 3 small bolt guide O-rings. Check bolt and bolt guide O-rings for damage. Assure these O-rings are properly lubricated according to general maintenance section of this manual. Possible issue with marker pressure Pressure should be set to around 200psi. If pressure drops during rapid fire and doesn’t recover to set pressure between each shot...
-
Page 15: Diagram And Parts List
12. DIAGRAMS AND PARTS LIST... - Page 16 DIAGRAM DESCRIPTION 72599 Regulator Nut 73247 Barrel Tip (Dust Black) 72489 O Ring - 006/70 Buna (.114 ID) 72488 O Ring - 1mm x 19.5mm ID 70 Buna 10257 O Ring- 012/70 Urethane (.364 ID) 74161 Barrel Back .688 - Dust Black 72652 Regulator Seal retainer 72577...
-
Page 17: Warranty Information
GI Sportz at info@GISportz.com before shipping markers. Do not ship your air supply tank if it is not completely empty and the regulator Empire Paintball removed. Shipping a pressurized air supply tank is unsafe and unlawful. Remove all batteries from 11723 Lime Kiln Rd.
Need help?
Do you have a question about the axe 2.0 and is the answer not in the manual?
Questions and answers