
Related Manuals for Reese Aitchison Seedmatic 40 D Series

Summary of Contents for Reese Aitchison Seedmatic 40 D Series
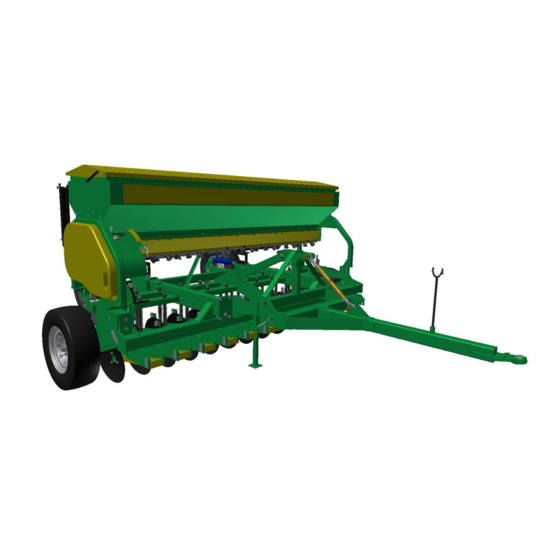
- Page 1 AITCHISON SEEDMATIC 40/4124 D Series DRILLS Concave Disc Openers REESE ENGINEERING LTD 41 KELVIN GROVE ROAD – PO BOX 5056 PALMERSTON NORTH, NEW ZEALAND PHONE: +64 6 357 9323 FAX: +64 6 354 3155 www.reeseagri.com...
-
Page 3: Table Of Contents
Contents INTRODUCTION ..........................3 TO THE OWNER AND OPERATOR ................... 5 TECHINCAL SPECIFICATIONS ....................6 SAFETY FIRST ........................... 7 GENERAL OPERATION IN THE FIELD ................. 10 PASTURELAND FARMING WITH SEEDMATIC ............... 10 MANAGEMENT CONSIDERATIONS ..................10 TECNIQUES AND TIMING FOR PASTURE RENOVATION .......... -
Page 4: Introduction
Your local dealer carries an extensive range of genuine Aitchison spare parts and consumables that also have been engineered to provide long service and life. It is important that only genuine parts are used on your drill. Thank you for making your investment in our expertise. Yours Sincerely, Ross Simpson Director Reese Agri... - Page 5 REESE warrants that the Machine delivered shall conform to the specifications set out in this Handbook. REESE makes no warranty of saleability or fitness for a particular use, nor is there any other express or implied warranty. Subject to such other conditions, warranties, and/or undertakings which may apply from time to...
-
Page 6: To The Owner And Operator
TO THE OWNER AND OPERATOR Your Aitchison Drill was carefully designed and manufactured to give you years of dependable service. To keep it running efficiently, read and follow the instructions in this operator’s manual. Any questions you may have that are not covered in this manual should be referred to your dealer: Dealers Name: _____________________________________________________________________ Address: __________________________________________________________________________... -
Page 7: Techincal Specifications
TECHNICAL SPECIFICATIONS Model 4024D 4024DT 4124D 4124DT 3.425m 3.425m 3.425m 3.425m Transport Width 11.23ft 11.23ft 11.23ft 11.23ft 3.000m 3.000m 3.000m 3.000m Sowing Width 9.8ft 9.8ft 9.8ft 9.8ft 1.750m 1.750m 1.750m 1.750m Height 5.7ft 5.7ft 5.7ft 5.7ft 1420kg 1785kg 1550kg 1915kg Weight Empty 3130lb 3935lb... -
Page 8: Safety First
SAFETY FIRST Keep all covers in place when using the drill. Stop the drill before making adjustments. Lower the drill to the ground or put on props when working around the machine. Tighten all nuts and bolts after initial use. FOLLOW SAFETY INSTRUCTIONS Carefully read all safety messages in this manual and on your machine safety signs. - Page 9 BE SAFE WITH CHEMICALS Direct exposure to agricultural and hazardous chemicals can cause serious injury. Potentially hazardous chemicals used with Aitchison equipment include such items as lubricants, coolants, fertilizer, paint and adhesives. If in doubt, contact your local Aitchison dealer for information about chemical safety and first aid procedures.
- Page 10 PRACTICE SAFE MAINTENANCE Understand service procedure before doing work. Keep area clean and dry. Never lubricate service or adjust machine while it is moving. Keep hands, feet and clothing from power driven parts. Disengage all power and operate controls to relieve pressure.
-
Page 11: General Operation In The Field
GENERAL OPERATION IN THE FIELD When the drill is in work in the field, adjust the top link to make the frame level and the sway chains to give 75-100mm (3-4”) lateral movement. The tractor hydraulics should be set to allow the drill to float over the terrain unimpeded by the movement of the tractor. -
Page 12: Tecniques And Timing For Pasture Renovation
Here is a checklist that should be followed for any CT program (courtesy of Monsanto NZ Ltd): 1. Check that the soil pH is around 6.0. 2. Check soil fertility levels for fertiliser requirement. 3. Ensure your spray boom has a marking system and is fully operational. 4. -
Page 13: Simple Rules To Follow For Successful Pasture Renovation
SIMPLE RULES TO FOLLOW FOR SUCCESSFUL PASTURE RENOVATION... -
Page 14: Micro Insecticide Granules In Pastures
MICRO INSECTICIDE GRANULES IN PASTURES In New Zealand where grass grub is a problem, excellent control has been attained with the use of Gesapon, Dasanit, Dysiston, Mocap, and Lindane in control of this pasture destroyer. Normal rates applied on the pasture surface can be as high as 30 kg/ha (26 lb/acre) but when sown in the soil and hence away from neutralizing effect sunlight, rates as low as four and five kg/ha can be used. -
Page 15: Sowing In Cultivated Soils
SOWING IN CULTIVATED SOILS As this is a Disc Coulter implement with a direct drill type opener, it is important to treat all seed beds as you would a pasture. With a conventional drill one works up the soil into a fine seedbed so that a broad boot type coulter will pass through leaving the seed behind the soil tilth. -
Page 16: Setting Up The Seedmatic For Use
SETTING UP THE SEEDMATIC FOR USE Connecting drill to tractor; 3 Point Linkage Models. Connect the Seedmatic drill to the rear 3-point linkage of you tractor. Adjust the tractors top link arm so the drill frame is sitting parallel with the ground. Adjust the tractors sway chains to give 75-100mm lateral movement. - Page 17 Connecting drill to tractor; Trailed Models. Connect the Seedmatic Drawbar to the tractors Towbar. Make sure you use a safety clip on the drawbar pin. If you are to travel on public roads ensure you fit a SAFETY CHAIN between the Seedmatic Drawbar and the tractor’s Towbar.
-
Page 19: Set The Depth Wheels
Set the depth wheels. With the Seedmatic sitting on hard flat ground, the depth wheels should be 25-75mm clear of the ground, depending on your desired seeding depth. There is an adjustment handle at the top of each depth leg, use this to adjust the legs. There is a depth gauge at the top of each depth leg, check that both depth legs are set at the same height When the drill is in work, the best way to check your seeding depth is to have a... -
Page 20: Calibrating The Drill To Check The Sowing Rate
CALIBRATING THE DRILL TO CHECK THE SOWING RATE NOTE: When new, the Seed Pads may have a white powder (chalk dust) on them. This is to prevent them from sticking together during manufacturing. This chalk dust can impede your seeding rate until it has been removed or until it dissipates. -
Page 21: Laymans Guide To Seed Variance
LAYMANS GUIDE TO SEEDING VARIANCE The Aitchison Sponge Seed Delivery System is a highly accurate, consistent and gentle method for delivery of seeds. We are pleased you chose to make use of our technology. To get started, we have created the attached seed charts. They are guides that will in many cases allow you to start with reasonable accuracy. -
Page 23: Difficult Seeds To Sow
DIFFICULT SEEDS TO SOW There are a number of seeds that are difficult to sow due to their physical shape and weight. These include: Prairie Grass Buffel Grass Callida Rhodes Grass Unclipped oats If seeds adhere to the sponge pad, fit the oat wiper (Part # A2366). If there are problems with large seeds failing to pick up with the sponge it will be necessary to fit the bean spacers (Part # A2365-01) which space out the pads leaving a greater surface to pick up seed. -
Page 24: Rodent Danger
OAT WIPER (Optional) The oat wiper is an optional extra that is designed to wipe clean the sponge pad if heavily awned seeds are not being sown. These will tend to collect on the pad and as the build-up increases inaccuracies in the seeding rates will occur. To fit the wiper, remove the front panel from seed box. -
Page 25: Removal Of Seed From Hopper
To give added protection, sponge pads can be treated with any strongly odoured insecticide powder – DIASINIT, LINDANE, MALATHION, and THIMET. Note: Rodent repellent can also be ordered from Aitchison’s via your local dealer (Part # 9341). REMOVAL OF SEED FROM HOPPER There is probably no easier drill to clean than this Aitchison Drill. -
Page 26: Changing The Gearbox Ratio : Range 1 - Range 2
CHANGING THE GEARBOX RATIO: Range 1 – Range 2 To change range: use a 5mm Hex Key to remove the 4 Cap Screws in each sprocket; replace them end for end. Range 1; Ratio for low seeding rates and small seeds. Range 2;... - Page 27 THE FERTILISER SYSTEM Different types of fertiliser may vary slightly from the general rate of curve shown. The fertiliser rate is verified by using the same calibration procedure as used to calibrate the seed. (Page 20) To change the fertiliser application rate, move the slide in for less or out for more. FERTILISER APPLICATION CHART Note: This chart is a guide only.
-
Page 28: Fertiliser Slide Removal
MAINTENANCE AND CLEANING THE FERTILISER HOPPER The fertiliser hopper should be thoroughly cleaned after use and potential rust areas brushed down with diesel. The fertiliser slide may be easily removed without tools as shown below. Remove the slide at the end of your planting season to ensure it can not corrode in place. -
Page 29: Rear Inspection Panels Removed
REAR INSPECTION PANELS REMOVED GENERAL MAINTENANCE LUBRICATION The gearbox should be kept filled up to the sight glass though top-ups should seldom be necessary. The oils recommended are: BP Vanellus DD50 (GL1 90.), TOTAL Carter (EP 220) or equivalent. NOTE: Do not us a hypoid type of oil, as damage will occur. Machines Grease Points: •... -
Page 30: Care Of The Sponge Pads
CARE OF THE SPONGE PADS The sponge pads are easily accessible for maintenance and cleaning by removing the inspection panel at the bottom of the seed hopper. The seed hopper should be cleaned thoroughly after use as vermin show little respect for a sponge pad if there is seed behind it. - Page 59 MONITOR INSTRUCTIONS Hollin Applications Standard Farm Monitor Basic Functions of: Running Area in Acres or Hectares. Total Area in Acres or Hectares. Speed displayed in Kms/hour or Miles/hour Distance Displayed in Kms.Meters Optional Functions of: Working Time 4 section width switch inputs for spray area Low / High Speed Alarm...
- Page 60 Introduction This is a standard designed control by Hollin Applications for the general use in agriculture. Using a small magnetic reed relay sensor mounted close to the wheel or propshaft with the magnet fixed to the rotating mechanism, the unit counts the number of turns and the rotational speed of the ground wheel.
- Page 61 With the control switched off run the power cable to a suitable 12 volt dc power source. This must have permanent power and not be switched through the ignition or data may be lost at power off. Brown or red core for positive and blue or black for negative.
- Page 62 Start-Up After power on the control displays Area for 2 seconds. During this time the control performs its own self tests. During this period it is also possible for the user to switch To Options mode. CHANGE DISPLAY Pressing Change and Display buttons at the same time, whilst the control is in the initial test mode enters the option change mode.
- Page 63 After the initial 2 second display of area the control will always switch to display the identifier for the last Mode i.e. if switched off in distance then on in distance. There are seven displayed modes of operation. These are swapped sequentially with each press of the display button.
- Page 64 Two Speed Displays Press Display again to change to the speed display. This displays an accurate running ground speed. Initially displays SP:EU for european measurements and displays Ground speed in Km’s per hour DISPLAY Press display once to convert to show in Miles/hour. DISPLAY Initial shown by SP:GB Speed Display is updated every 2 seconds.
Need help?
Do you have a question about the Aitchison Seedmatic 40 D Series and is the answer not in the manual?
Questions and answers