Table of Contents
Advertisement
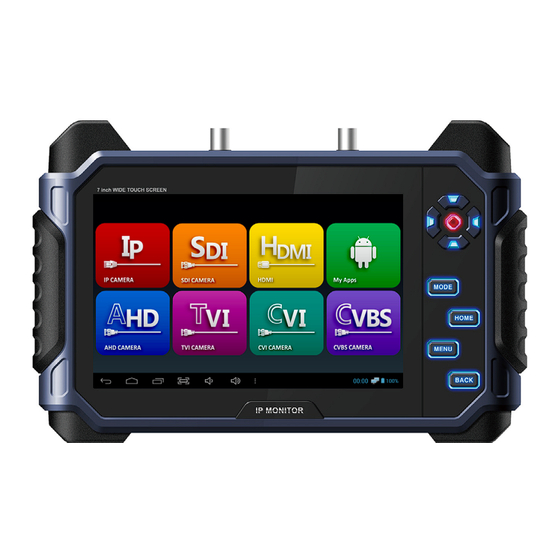
Versatile IP Test Monitor
7 inch wide touch screen
Video Surveillance Products (Installation and management)
This product is for CCTV system installation and management. Some problems may occur with
inappropriate use.
Please read the instructions prior to its use and keep it with the warranty certificate.
Release Version 1.8
Advertisement
Table of Contents

Summary of Contents for SeeEyes SC-IPM07HD
- Page 1 Release Version 1.8 Versatile IP Test Monitor 7 inch wide touch screen Video Surveillance Products (Installation and management) This product is for CCTV system installation and management. Some problems may occur with inappropriate use. Please read the instructions prior to its use and keep it with the warranty certificate.
-
Page 2: Cautions For Use Of This Product
Cautions for use of this product If you give excessive shock to this product or drop it, LCD may be damaged. Therefore, have a special care not to break it. (The damaged LCD is not available for free A/S even in warranty.) Do not spray water directly and wipe this product gently with a dry towel when you clean it. - Page 3 Cautions for use of the memory card Checklist for the memory card selection Micro SD/SDHC/SDXC memory cards are compatible with this test monitor. Compatibility between memory cards and this test monitor depends on the brand and type of memory cards. Memory cards from the following brands are recommended for use with this test monitor.
- Page 4 Cautions for use of the memory card Removal of the memory card Errors may occur in the saved file if you remove the memory card during use. Please refer to the following instructions to remove the memory card. Main Home Enter My Apps page from the Home screen.
- Page 5 Cautions for use of the memory card Storage Screen Check if the Unmount SD card is enabled in the storage page. Recheck the inserted SD card status if the Unmount SD card is disabled even though the SD card is inserted. Please remove the SD card and insert it again. Unmount Screen Select OK when a message for unmounting the SD card is shown on the screen.
-
Page 6: Table Of Contents
Overview Table of Contents Cautions for use of this product Cautions for use of the memory card Overview Table of contents Introduction & Features IP App. functions Viewer App. functions Product components Product Parts and Descriptions Top interface Front interface Bottom Navigation and Tool Bar Backside interface &... -
Page 7: Table Of Contents
Overview Table of Contents Viewer App. Functions Main page Supported resolution SDI / HDMI / HD Analog Signal level meter function Focus meter function & CRC error count function Video menu bar RS-485 Tx. RS-485 Rx. & Analyze function Video recording Video capturing &... - Page 8 Overview Introduction This IP test monitor is a multifunctional test monitor based on Android system for convenient monitoring and maintenance for video surveillance systems. As this tester supports ONVIF, the international standard for IP security products, it is possible to connect with various network cameras easily and check their video.
- Page 9 Overview IP App. functions IP Camera search Discover the IP address of your network camera connected to this test monitor or all network cameras on your LAN by Auto Discovery function. Live video checking Real-time video monitoring of your connected IP camera. IP camera settings IP camera video preview and IP camera address setting change available when building IP systems.
- Page 10 Overview Viewer App. functions HD/EX/3G-SDI Input Support HD/EX/3G-SDI Input. Please refer to page 59 for more information on the supported resolution. HD Analog, CVBS Input Support AHD/TVI/CVI Input. Please refer to page 59 for more information on the supported resolution. HDMI Input &...
-
Page 11: Product Components
Overview Product Components Please check if the following components are all included in your package when you receive this item. Item Name Description IP Multifunctional Charge the battery prior to its use. It may be discharged at Test Monitor the time of delivery. Exclusive bag Keep the test monitor in this bag for its storage or use. -
Page 12: Product Parts And Descriptions
Product Parts and Descriptions Top Interface Name Description The exclusive adapter included in this package is only allowed to recharge this test monitor. DC12V power supply for camera operation is also available ① Power Connector through this port by using the power output lead. There are 5,680 mAH Li- Polymer batteries built in this monitor. -
Page 13: Front Interface
Product Parts and Descriptions Front Interface Name Description IPS 7 inch TFT LCD panel in 1280x800 high resolution with tempered glass is applied. In addition, optical bonding is applied for outdoor environment and ① Touch Screen the fingerprint can be removed easily by applying the anti-fingerprint coating to this test monitor. -
Page 14: Bottom Navigation And Tool Bar
Product Parts and Descriptions Bottom Navigation and Tool Bar Name Description This button is for terminating an App. during operation or returning to the ① Back button previous page. This button is for going to the Home screen. However, in this case, the App. ②... - Page 15 Product Parts and Descriptions Backside Interface Name Description Test monitor stand for convenient monitoring. Adjust the angle of this test ① Monitor Stand monitor. ② Speaker Dual speakers are mounted. Adjust volume. Connection Diagram HDMI Output HD Analog & HD/EX-SDI CVBS Camera Camera Exclusive Adapter...
-
Page 16: Launcher
Product Functions Launcher The following launcher screen will be shown once this test monitor is turned on. Name Description ① IP Camera App. This App. is for IP video. Tap the icon to open the IP App. This App. is for HD/EX/3G-SDI Video. Tap the icon to open the SDI Viewer ②... -
Page 17: Ip Camera Connection And Settings
IP App. Functions IP Camera Connection and Settings Launcher page Select IP Camera App. to connect a network camera. IP App. Home page The IP Camera App. has various functions such as IP search, camera settings, monitor settings, ping test, gallery, etc. If you connect an IP camera by LAN directly, please go to page 18. -
Page 18: Ip Camera Connection By Lan
IP App. Functions IP Camera Connection by LAN This is for connecting an IP camera to the monitor by LAN directly without a DHCP server or a router. Change the monitor IP address to connect an IP camera. 1) When an IP camera is set with the DHCP or default IP address Monitor IP Settings Page Tap the Monitor Settings icon in the IP App. - Page 19 IP App. Functions 2) When connecting an IP camera manually (When you know the camera IP address) Monitor IP Settings Page Tap the Monitor Settings icon in the IP App. main page to see the above page. 'Use Ethernet' on the top of this page shall be marked all the time. Select 'Advanced Configure' at the bottom of this page to open the monitor IP setting page.
-
Page 20: Ip Camera Connection By A Dhcp Server
IP App. Functions IP Camera Connection by a DHCP server This is for connecting an IP camera to the monitor when a DHCP server or a router is connected and it assigns an IP address to the camera and monitor automatically. Monitor IP Settings Page Tap the Monitor Settings icon in the IP App. -
Page 21: Checking Items Prior To The Camera Discovery And Connection
IP App. Functions Checking items prior to the camera discovery and connection Check the following items and move to the next step after completing the monitor settings. IP App. Home Page (Main Page) STEP 1 : Check the PoE status in the upper left corner. Turn on the PoE to supply PoE to your camera. If PoE is off, this monitor will not supply PoE to your camera. -
Page 22: Ip Device Discovery
IP App. Functions IP Device Discovery Camera #1 Camera #2 Camera #3 Camera #4 Search page Once you enter the Search from the IP App. main page, the discovered cameras will be displayed on the screen as shown in the above picture. IP values depend on camera brand due to the different network settings of camera manufacturers. -
Page 23: Ip Camera Connection And Settings
IP App. Functions IP Camera Connection and Settings Camera settings page Once you select the Camera Settings icon or one of discovered cameras in the Search page, the camera setting screen is displayed. Enter any word such as the camera name or installed location to identify the camera in the Name field. - Page 24 IP App. Functions Once the camera is connected, the preview video will be displayed as shown in the following picture. Camera Setting Page Scroll-down the left setup panel after the camera is connected. you can modify the profile settings. After completing all settings, press the Save button to save the configuration to the IP App. main page for future use if you choose so.
-
Page 25: Utilize Configuration
IP App. Functions Utilize Configuration Configuration Menu Screen In the IP App. main page, press and hold the saved configuration or press the SET key to display a context menu. Select Edit to change the configuration and select Explore to check the information of the configured camera. -
Page 26: Ip App. Main Page
IP App. Functions IP App. Main Page Name Description There are Search, IP camera settings, Monitor settings, Ping test, Gallery ① Action Menu Icon icons as shown in the above picture. This is for turning on/off the PoE (Power over Ethernet) function. When the PoE function is on, this monitor supplies PoE to a connected IP camera ②... - Page 27 IP App. Functions Menu in the IP App. Main Page In the IP App. main page, once you press the menu or mode key or touch menu icon , the menu bar will be shown as follows. PoE OFF PoE function is OFF. PoE ON PoE OFF When turning the PoE function on, PoE 48V OUT will be shown on...
-
Page 28: Ip Device Search
IP App. Functions IP Device Search Tap the search icon to start camera discovery as shown below. All IP cameras will be searched automatically when entering this screen. Name Description ① Refresh Touch this button to try the search again. This is a method to search IP devices by using Ping and available for use after ②... -
Page 29: Camera Settings
IP App. Functions Camera Settings Tap the Camera Settings icon in the IP App. main page to test an IP camera. Selecting one of the discovered camera in the Search page also opens Camera Settings as following. Name Description ① Device Type Select your device type such as ONVIF, RTSP and MJPEG. -
Page 30: Camera Network Settings
IP App. Functions Camera Network Settings This function is available only when the camera is connected. Tap the Network Setting icon to enter the following page. Camera Network Information MAC Address is fixed for each camera. Interface Type represents the current network type of the connected camera. -
Page 31: Edit Media Profile
IP App. Functions Edit Media Profile Once a camera is connected, you can edit the media profile. Tap the profile edit icon to see the following image. Name Description You can set its resolution, encoding type, video quality through video ①... - Page 32 IP App. Functions Main page If tapping the at the top right of the screen after a camera is connected, the window will be shown as the following image. Name Description The PoE voltage status sign on the top will move to the left bottom in video full screen mode.
-
Page 33: Live Video Menu Bar
IP App. Functions Live video menu bar In the IP App. video page, you tap the menu or mode key or touch the menu icon to show the following menu bar. Full Image / Full Screen In the full image mode, the full video is displayed. This may result in empty spaces that are not occupied by the video. -
Page 34: Video Recording
IP App. Functions Video Recording Recording Start Button Start recording by tapping button. Recording Status Display The recording time is displayed. The recording is available up to 5 minutes. Recording End Button End recording and save the recorded file by tapping button. -
Page 35: Snapshot Capturing
IP App. Functions Snapshot Capturing Capturing Start Button Start capturing by tapping button. Capturing Status Display Display the capturing status. Capturing Function Termination Select the Capturing in the menu bar. Then, the “√” mark will be removed and the capturing function will be terminated. Press the BACK key to terminate the capturing function. - Page 36 IP App. Functions Audio Input This monitor supports AAC (Advanced Audio Coding), G.711 μ-Law, G.711 A-law codecs. If the camera supports audio, the sound will come out through the monitor's speaker. Please note that a profile may not include audio even when the camera supports audio. You can control the speaker output by using the mute function.
-
Page 37: Pan/Tilt Functions
IP App. Functions Pan/Tilt Functions Opto-mechanical pan/tilt functions are available for PTZ cameras only Pan/tilt the camera by touching the screen and wiping it. Pan/tilt functions are available by both touching the screen and using the arrow keys. The pan/tilt speed depends on each camera brand when operating by the arrow keys. Swipe left from right Swipe up from down Swipe diagonally... -
Page 38: Zoom Function
IP App. Functions Zoom Function If the camera supports opto-mechanical PTZ, enable the Digital PTZ first to use Digital Zoom function. Otherwise, opto-mechanical Zoom will be applied. Zoom out/in the video screen by your fingers. Pinch two or more fingers together to zoom out. Stretch two or more fingers apart to zoom in. - Page 39 IP App. Functions Presets This function is enabled only for cameras supporting presets. Some characters may not be allowed in preset names by some camera brands. Presets function shows a list of defined presets. Type the Preset Name and press the + button to add a preset.
-
Page 40: Configuration Storage
IP App. Functions Configuration Storage You can save the configuration after entering all camera information required and previewing the video. Once you save the configuration, you can easily start its corresponding video from the IP App. main page. All camera settings are saved. When changing the camera settings, please save the configuration again. Stored Information All setting information to set a camera such as Name, IP Address, ID and Password is saved. -
Page 41: Camera Configuration Context Menu
IP App. Functions Camera Configuration Context Menu Press and hold a saved configuration or Set key. A menu will be shown as the following picture. Some functions are not available for RTSP, MJPEG configurations, which are not ONVIF. Name Description ①... -
Page 42: Monitor Ip Settings
IP App. Functions Monitor IP Settings Tap the Monitor Settings icon in the main page of the IP App. to open the Monitor Network Settings page. Tap Advanced Configure at the bottom of the screen to display the following image. Name Description If you check DHCP, a DHCP server can assign IP to this test monitor. - Page 43 IP App. Functions IP Address Selection IP address classes shall match each other. The range of the numbers available for IP address is from 0 to 255. All IP address classes can be identified with the bit of the first number. With other classes, it cannot communicate with each other. Class A: 1.0.0.1 ~ 127.255.255.254 Class B: 128.0.0.1 ~ 191.255.255.254 Class C: 192.0.0.1 ~ 223.255.255.254...
-
Page 44: Ping Test
IP App. Functions Ping Test You can check the connection status of the camera by Ping test. For Ping test, the camera's IP address is used only. Name Description ① IP Address Enter the camera IP address for the Ping test. ②... -
Page 45: Main Page
Viewer App. Functions Main Page Viewer App. means an App. for SDI, HDMI, AHD, CVI, TVI, CVBS. Wi-Fi should be off for SDI input. It may generate some video noise in a long-distance transmission. SDI products should be connected to SDI Input BNC port and HD analog/CVBS products shall be connected to Video Input BNC port for the relevant video signal input. -
Page 46: Supported Resolution
Viewer App. Functions Supported Resolution When entering video, the signal format and resolution are displayed. Select 3G in the input mode for 3G-SDI video input. The Video Input Status window will be closed in 10 seconds after video is entered. HD-SDI Supported Resolution 720p 25/30/50/60 Hz Input 1080i 50/60 Hz Input... -
Page 47: Signal Level Meter Function
Viewer App. Functions Signal Level Meter function 1. SDI Level Meter SDI Level Meter represents the current SDI signal status signal size) in percentage. 100% means the most optimum signal status (the biggest signal size) and the lowest value is 0%. No Good NG displayed in 0~29% Severe signal attenuation... - Page 48 Viewer App. Functions Focus Meter function Focus Meter represents the optimum and current focus status(depth) in numerical values The focus depth is represented in numerical values between 255 and 0. Adjust the optimum and current focus depth to be matched. This value depends on camera or lens types.
-
Page 49: Video Menu Bar
Viewer App. Functions Video Menu Bar Available menu in this bar depends on video signal mode. Press the Menu, Mode button or Menu icon , the Menu bar will be popped up as shown as follows. PTZ Capacity or OSD settings are available through RS-485. It is possible to receive or analyze data by using RS-485. -
Page 50: Ptz
Viewer App. Functions To implement PTZ function, the Mode, Protocol, Address and Baudrate must be set. For RS-485, match the polarity for cable connection. UTC function is activated in HD Analog and CVBS modes and by this function, camera control via coaxial cable is available. - Page 51 Viewer App. Functions RS-485 Tx The current settings are displayed on the top of the screen. Control the directions by arrow keys, referring to the instructions at the bottom of the screen. Name Description ① Setting Status All setting values such as mode, protocol, address, baudrate are displayed. In PTZ mode, you can select and change Pan/Tilt and Zoom/Focus by touch ②...
-
Page 52: Rx. & Analyze Function
Viewer App. Functions RS-485 Rx The current settings are displayed on the top of the screen. Data transmitted through RS-485 cable is displayed in HEX value on the screen. When the data is more than 264 Byte, the previous data will be deleted. Analyze function RS-485 commands received from CCTV controller or external devices are displayed. -
Page 53: Utc
Viewer App. Functions UTC is available in HD Analog and CVBS modes. Camera PTZ or OSD settings are available over coaxial cable without any separate data lines. Name Protocol Supported Items Hanwha (Samsung) Techwin (Winner5), Pelco, ① CVBS Mode Pelco - C D-Max (PIXIM) ②... -
Page 54: Video Recording
Viewer App. Functions Video Recording It is not recommended to record for a long time without any memory card. Mount Micro SD card if the internal storage capacity is not sufficient. You can set the storage location in Settings after mounting Micro SD Card. When recording video, it is saved in MP4 format. - Page 55 Viewer App. Functions Video Capturing It is available to capture and save images in JPG format. Mount Micro SD card if the internal storage capacity is not sufficient. You can set the storage location in Settings after mounting Micro SD Card. How to use Gallery The recorded or captured images are saved in Gallery.
-
Page 56: Poc Function
Viewer App. Functions PoC function Supply power to the camera over coaxial cable. PoC function is activated in SDI mode and available for PoC cameras only. PoC function is optional. Name Description The step before operating PoC. One you select “Yes”, it starts trying to ①... -
Page 57: User Settings
Viewer App. Functions User Settings This menu is to set the storage location, or turn on/off the Level/Focus meter functions. Storage Folder Set where to save the recorded or captured images. Activated only when Micro SD Card is mounted. Level/Focus Meter Turn on/off the Level/Focus meter functions. - Page 58 Appendix App. Update Use update App. to update Launcher, Viewer and IP App. Available during WI-FI only. Enter My Apps to update App. Check updates Check the currently installed version during WI-FI. Not activated when the currently installed App. is the newest version. Start updating Activated when the currently installed App.
-
Page 59: Specifications
Appendix Specifications Model IP Test Monitor Display Resolution 1280 X 3 (RGB) X 800 Size 7.0 inch (Diagonal) Pixel Pitch 0.117(H) X 0.117 (V) mm Brightness 400 cd/m² Viewing Angle 89deg (Horizontal) / 89deg (Vertical) Total: 178deg (IPS Panel) Response Time 11ms HD-SDI 1.485Gbps... - Page 60 Appendix Specifications Model IP Test Monitor SDI LEVEL 0 ~ 100 % ERROR RATE ± 2% Measurement FOCUS LEVEL 0 ~ 255 FOCUS LEVEL 0 ~ 255 INPUT DC 12.6V (Exclusive Adapter) Power DC JACK 12V / 500mA OUTPUT USB 5V HDMI Input / Output HDMI C Type F HD-SDI Input...
-
Page 61: Faq
Appendix Symptom Checking Method Reboot this test monitor. Check the connected cable status. Video may not be displayed, depending on the damage or length of the cable. Check the connected camera status. Viewer Check the termination resistor status. The signal size depends on the termination resistor settings. - Page 62 Appendix Symptom Checking Method When a camera uses any separate RTSP port, it may not be connected. For camera settings, please overwrite and change the RTSP port. - The default RTSP port is 554. It may depend on each camera brand. Video is NOT displayed If you initialize a camera after saving its configuration, it may not be able to connect the camera via the saved configuration.
-
Page 63: Extra Features
Appendix Extra Features Security (Lock) mode Lock mode setting Lock for prevention of robbery Initialization is not available if you do not remember password or pattern once you lock it. Miracast mode Miracast Search products currently available for Miracast by entering Display < Wireless Display <... -
Page 64: Warranty Certificate
Appendix Warranty Certificate Model No. Serial No. Distributor Date you purchased Place you purchased Warranty Period Two (2) years from the date of purchase Name Purchaser Address This product has passed thorough quality control and test, and if this gets broken during normal use, we provide the two-year warranty service.
Need help?
Do you have a question about the SC-IPM07HD and is the answer not in the manual?
Questions and answers