Table of Contents
Advertisement
Advertisement
Table of Contents

Subscribe to Our Youtube Channel
Summary of Contents for JML easy STITCH
- Page 1 AS SEEN ON TV ES_Inst.indd 1 ES_Inst.indd 1 14/11/07 09:11:09 14/11/07 09:11:09...
- Page 2 5. Threading 6. Fitting fabric and sewing 7. Adjusting stitching 8. Bobbin rewinding 9. Replacing the needle 10. Using the foot pedal 11. Connecting the adaptor 12. Trouble shooting 2 - Easy Stitch ES_Inst.indd 2 ES_Inst.indd 2 14/11/07 09:12:08 14/11/07 09:12:08...
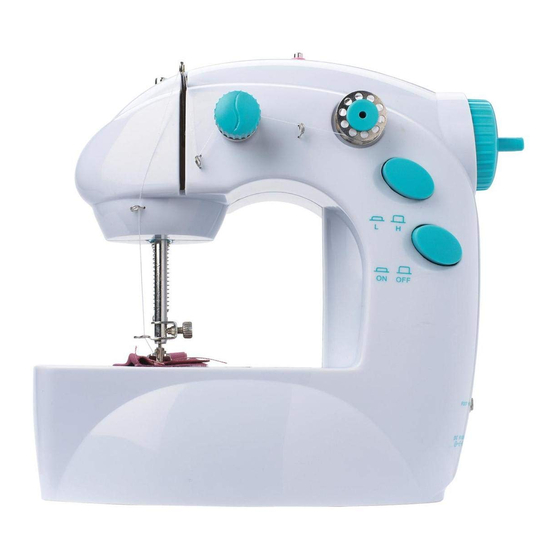
- Page 3 26. BOTTOM BOBBIN 24. AC/DC JACK DC 6V 25. SHUTTLE COVER BUTTON • Foot pedal • Threader • Bobbins • Empty bobbins • Needle (size 90/14) • AC/DC Adaptor Easy Stitch - 3 ES_Inst.indd 3 ES_Inst.indd 3 14/11/07 09:12:08 14/11/07 09:12:08...
- Page 4 6. Do not switch on until the fabric has been put on the unit even though the top and bottom threads are ready. 1. Easy Stitch operates on 4 ‘AA’ Batteries (not supplied). 2. Take the battery compartment cover off from the bottom of the unit.
- Page 5 6. Run thread through the needle (20) from the left hand side to the right hand side. 7. Place the thread under the foot holder towards the back of machine. Easy Stitch - 5 ES_Inst.indd 5 ES_Inst.indd 5 14/11/07 09:12:09 14/11/07 09:12:09...
- Page 6 Place both top and bottom threads towards the rear of the machine under the foot holder (17). Please note: You may need to repeat steps 4-6 a few times to achieve the looping. 6 - Easy Stitch ES_Inst.indd 6 ES_Inst.indd 6 14/11/07 09:12:10...
- Page 7 Please Note: If the fabric is difficult to remove, rotate the hand wheel back and forth and the fabric should then come out easily. Easy Stitch - 7 ES_Inst.indd 7 ES_Inst.indd 7 14/11/07 09:12:11 14/11/07 09:12:11...
- Page 8 Please Note: When adjusting the stitching, check whether the top thread has come out. If so, replace back into position. TOP THREAD CLOTH BOTTOM THREAD BOTTOM THREAD OVER - TIGHT TOP THREAD OVER - TIGHT 8 - Easy Stitch ES_Inst.indd 8 ES_Inst.indd 8 14/11/07 09:12:12 14/11/07 09:12:12...
- Page 9 (3). 10. Insert the pole back inside the hand wheel (4) and rotate clockwise to lock inside (3). 11. Push spindle (8) back into the top of the unit. Easy Stitch - 9 ES_Inst.indd 9 ES_Inst.indd 9 14/11/07 09:12:12...
- Page 10 Insert the foot pedal into the foot control jack (23). This can be used instead of the power switch (1), allowing you to sew using both hands. Make sure to unplug the switch after use. 10 - Easy Stitch ES_Inst.indd 10 ES_Inst.indd 10...
- Page 11 This is suitable for medium Size 90/14 already fitted, weight fabrics there is also a spare Can I use other sizes? 9/70 Fine Fabrics Lightweight Fabrics 11/80 Heavyweight Fabrics 16/100 Easy Stitch - 11 ES_Inst.indd 11 ES_Inst.indd 11 14/11/07 09:12:12 14/11/07 09:12:12...
- Page 12 If you have any queries about this product or would like to know more about JML products please contact us at: John Mills Limited JML House, Regis Road London, NW5 3EG. Email: info@johnmillsltd.co.uk Freephone Customer Service Number 0800 781 7831 Sewing Machine 6V DC, requires 4 x 1.5V AA...
Need help?
Do you have a question about the easy STITCH and is the answer not in the manual?
Questions and answers