Advertisement
Quick Links
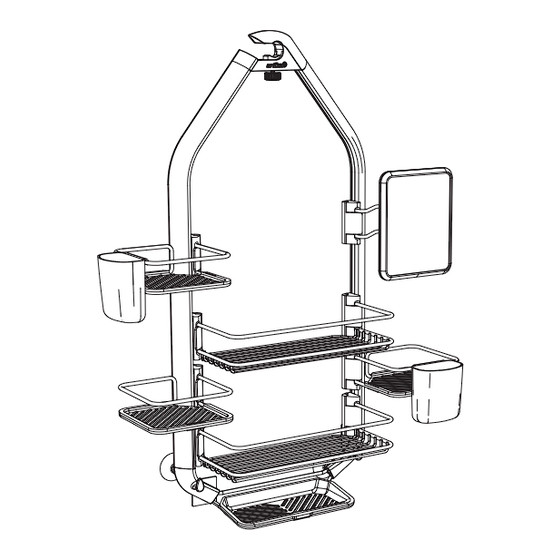
O2, Shower caddy
INSTRUCTION MANUAL
IMPORTANT, RETAIN FOR FUTURE REFERENCE: PLEASE READ CAREFULLY.
O2 , Support de rangement pour la douche
MANUEL D'INSTRUCTIONS
IMPORTANT, CONSERVER POUR CONSULTATION ULTÉRIEURE : LIRE ATTENTIVEMENT.
O2, Organizador de ducha
MANUAL DE INSTRUCCIONES
IMPORTANTE, LEER PARA FUTURA REFERENCIA: POR FAVOR, LEER DETENIDAMENTE.
Made in China
Fabriqué en Chine
Hecho en China
Rev. 10 May 2017
Artika For Living Inc.
563 Avenue Lépine
Dorval, QC Canada
H9P 2R2
1-866-661-9606
support@artika.com
Advertisement

Subscribe to Our Youtube Channel
Related Manuals for Artika O2 Shower caddy


Summary of Contents for Artika O2 Shower caddy
- Page 1 O2, Organizador de ducha MANUAL DE INSTRUCCIONES IMPORTANTE, LEER PARA FUTURA REFERENCIA: POR FAVOR, LEER DETENIDAMENTE. Made in China Fabriqué en Chine Hecho en China Rev. 10 May 2017 Artika For Living Inc. 563 Avenue Lépine 1-866-661-9606 Dorval, QC Canada support@artika.com H9P 2R2...
- Page 2 INSTRUCTION MANUAL / MANUEL D’INSTRUCTIONS / MANUAL DE INSTRUCCIONES Included parts Pièces fournies Piezas incluidas 1. Support structure with shelf sliders 1. Structure de support avec coulisses 1. Estructura de soporte para bandejas deslizables 2. Two large trays 2. Deux grands plateaux 2.
- Page 3 INSTRUCTION MANUAL / MANUEL D’INSTRUCTIONS / MANUAL DE INSTRUCCIONES WARNING: Important information regarding the shelf sliders ATTENTION : Information importante concernant les coulisses ATENCIÓN: Información importante relativa a los soportes deslizables 1 To open the slide tab, use both 2 When you insert the tray or the 3 To close the slide tab, grasp thumbs to apply pressure to both mirror bracket into the open slide...
- Page 4 INSTRUCTION MANUAL / MANUEL D’INSTRUCTIONS / MANUAL DE INSTRUCCIONES Step 1 Étape 1 Etapa 1 Installation Installation Instalación Note: You can install the small Note : Vous pouvez installer les petits Nota: Usted puede instalar las trays and the mirror inside (option plateaux et le miroir à...
- Page 5 INSTRUCTION MANUAL / MANUEL D’INSTRUCTIONS / MANUAL DE INSTRUCCIONES Remarks: It is necessary to use 2 shelf sliders for large trays (fig.5). Remarque : il est nécessaire d'utiliser 2 coulisses pour les grands plateaux (fig. 5). Nota: Las bandejas más grandes requieren 2 soportes deslizables (fig.
- Page 6 INSTRUCTION MANUAL / MANUEL D’INSTRUCTIONS / MANUAL DE INSTRUCCIONES OPTION B OPTION B OPCIÓN B Install and adjust the trays Installer et ajuster les plateaux Instalar y ajustar las bandejas outside the frame: à l'extérieur de la structure de al exterior de la estructura de support : soporte: Open the slide tab, remove the...
- Page 7 INSTRUCTION MANUAL / MANUEL D’INSTRUCTIONS / MANUAL DE INSTRUCCIONES Installing the mirror outside the Installation du miroir à l'extérieur Instalación del espejo al exterior frame: de la structure de support : de la estructura de soporte: Open the side tab and remove Ouvrir la languette de la coulisse Abra la pestaña del soporte y retire the mirror (fig.
- Page 8 INSTRUCTION MANUAL / MANUEL D’INSTRUCTIONS / MANUAL DE INSTRUCCIONES Step 2 Étape 2 Etapa 2 Install the cups Installer les gobelets Instale los vasos Clip each cup onto the selected Accrocher chaque gobelet sur le Fije cada vaso en la bandeja tray until hear "click"...
- Page 9 INSTRUCTION MANUAL / MANUEL D’INSTRUCTIONS / MANUAL DE INSTRUCCIONES OPTION B OPTION B OPCIÓN B Shower door installation Installation sur la porte de la Instalación en la puerta de la douche ducha To adjust the thickness of the shower door fastening device you Pour ajuster l'épaisseur de Para ajustar el espesor del need to lift the clip and move the...
- Page 10 INSTRUCTION MANUAL / MANUEL D’INSTRUCTIONS / MANUAL DE INSTRUCCIONES Step 4 Étape 4 Etapa 4 Permanent (option A) or Installation fixe (option A) ou Instalación fija (opción A) o removable installation (option B) amovible (option B) desmontable (opción B) OPTION A OPTION A OPCIÓN A Permanent installation...
- Page 11 INSTRUCTION MANUAL / MANUEL D’INSTRUCTIONS / MANUAL DE INSTRUCCIONES Note: Remarque : Nota: If required, it is possible to Si nécessaire, il est possible de Si es necesario, se puede fijar el strengthen the position of the mirror renforcer le maintien du miroir espejo con un destornillador with a screwdriver (fig.
-
Page 12: Warranty
GARANTÍA WARRANTY GARANTIE Artika For Living Inc. se enorgullece Artika For Living Inc. est fière de vous de ofrecerle un (1) año de garantía. Artika For Living Inc. is proud to offrir une garantie d’un (1) an. Nous Garantizamos que nuestro producto offer you a one (1) year warranty.
Need help?
Do you have a question about the O2 Shower caddy and is the answer not in the manual?
Questions and answers