
Related Manuals for Julabo Fusion Chef Premium Sous Vide Diamond

Summary of Contents for Julabo Fusion Chef Premium Sous Vide Diamond
- Page 1 Operating manual English diamond premium sous vide collection > &...
-
Page 2: Table Of Contents
Table of contents Table of contents Sous Vide basics ................5 Safety..................... 7 Proper use............... 7 Safety notices for your Diamond......... 7 Safety notices for Sous Vide cooking .......11 Description of your Diamond ...........13 Front and rear views............13 Display and keypad............14 Accessories ................16 Attachments..............16 Accessories for cooking containers ......16... - Page 3 Table of contents Enjoying the first results..........27 Improving the results...........28 Working with your Diamond.............30 Gaining experience............30 Switching on and starting the unit ......30 Operating the unit ............30 Setting the desired temperature....... 31 Using the quick keys............. 31 Changing the stored temperatures ......32 Working with the timer ..........
- Page 4 Table of contents Changing the water ............55 Decalcifying ..............56 Cleaning the unit ............56 Confirming temperature accuracy ......59 Checking temperature accuracy ......59 Calibrating the external sensor ......... 59 Calibrating the unit in an ice water bath....61 Error messages ................64 Basic troubleshooting ..........64 Error messages.............65 Information about the unit............66...
-
Page 5: Sous Vide Basics
Proper use Sous Vide basics Important! Always exercise the greatest possible care and maintain hygienic conditions at all times. 1. Preparation Use only fresh ingredients of the highest pos- sible quality. Prepare raw ingredients prop- erly. 2. Vacuuming Place the raw, refrigerated ingredients into special bags suitable for Sous Vide. - Page 6 Sous Vide basics 5. Refrigerated Remove the cooled bag from the ice water storage and store it at 3 °C (37 °F) or colder. 6. Regeneration Warm the cooled bag in a water bath shortly before serving. Complete the cooking proc- ess and serve the food.
-
Page 7: Safety
Proper use Safety Proper use This product is designed to control the tem- perature of water in a bath tank. The product is used to prepare food in this water bath according to the Sous Vide technique (low- temperature, slow cooking of food in vac- uum-sealed packaging). - Page 8 Safety This device is not intended for use by persons (including children) with reduced physical, sensory or mental capabilities, or lack of ex- perience and knowledge unless they have been given supervision or instruction con- cerning the use of the device by a person responsible for their safety.
- Page 9 Do not attempt to use the unit if the power cord is damaged! For safety rea- sons a damaged power cord may only be replaced by the manufacturer, a fu- sionchef by Julabo service representative or a similarly qualified person...
- Page 10 Safety Allow only authorized technicians to per- form service and repair tasks. Low bath fluid safety float This unit includes a low bath fluid safety switch. Switching off this safety device (by blocking the float) can result in a hazard- ous situation.
-
Page 11: Safety Notices For Sous Vide Cooking
Safety notices for Sous Vide cooking Safety notices for Sous Vide cooking Only trained experts should attempt the Sous Vide cooking technique. It is important to follow precise and uniform work steps and maintain a hygienic environment in order to ensure adequate safety during food prepa- ration. - Page 12 Safety Observe HACCP It is also important that kitchen personnel regulations employ an appropriate HACCP (Hazards Analysis and Critical Control Points) system in order to monitor and document every step the food takes from delivery to serving. Monitor water Monitor the quality of the water in the Sous quality Vide bath and change it regularly.
-
Page 13: Description Of Your Diamond
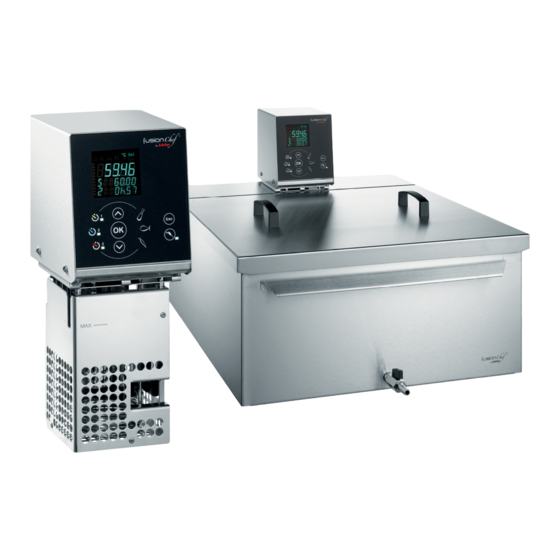
Front and rear views Description of your Diamond Front and rear views Front without protection grid Rear with protection grid VFD display (see next RS232 interface for page) computer connection Keypad (see next page) Mains switch, illumi nated Safety float switch Micro fuses Pump discharge Power cord with plug... -
Page 14: Display And Keypad
Description of your Diamond Display and keypad VFD display Status icons: Heating/Alarm Datalogger activation indicator Temperature unit display (°C or °F) temperature sensor for current tem- perature: Int for temperature sensor in water bath Ext for attached core temperature sensor Main display for current temperature value... - Page 15 Display and keypad Display line 1 for set point value Display line 2 for time value Timer buttons 1-3 Quick keys for MEAT, FISH, VEG Core temperature sensor button Keypad: Arrow keys to set temperature and timer OK key to confirm the values Key to correct settings, stop functions or enter a menu (press together with key 10)
-
Page 16: Accessories
Accessories Accessories The following accessories are available for your Diamond. Attachments Bath attachment clamp Use the bath attachment clamp to secure the Diamond to the wall of a cooking con- tainer. Max. wall Order No. thickness Attach. 60 mm 9FX1119 clamp Accessories for cooking containers Separation grid... -
Page 17: Temperature Sensor
Temperature sensor Retaining grids Retaining grids are inserted into the bath tank from above and are used to keep vacuum bags underwater. They help ensure that the food is cooked evenly from all sides. Order No. 2 retaining grids for baths S, M 9FX1125 2 retaining grids for baths L, XL 9FX1126... - Page 18 Accessories page 37 for more details on how to use the Diamond with the core temperature sensor. Order No. Core temperature sensor 9FX1150 Pt100 Notice The food that is cooked with the inserted temperature sensor may serve only as a ref- erence or retention sample.
-
Page 19: Other Accessories
Other accessories Other accessories Travel case The travel case is designed to hold your Dia- mond and accessories. Order No. Travel case 9FX1190 Timer tape Place timer tape of a particular color on the vacuum bags that are being monitored by the timer of the same color. - Page 20 Accessories USB adapter cable Use the USB adapter to connect the Diamond to a computer. Order No. USB adapter cable 9FX1161...
-
Page 21: Installation And Initial Operation
Unpacking and inspecting the unit Installation and initial operation Unpacking and inspecting the unit Unpack the unit and accessories and imme- diately check the items for any damage that may have occurred during transport. Even if only the packing has been damaged, please notify the shipping provider, railway com- pany, or postal service so they can file a damage report. -
Page 22: Adding Water To Tank
Installation and initial operation Fasten the unit in place Warning! Danger of electric shock! Carefully fasten the unit in place! If the unit is installed or fastened improperly, it may fall into the cooking container. If this happens: Pull the power plug from the power socket. -
Page 23: Beginning Initial Circulator Operation
Beginning initial circulator operation 20 mm max. 60 mm 80 mm 86 mm Optionally: Bath attachment clamp for wall thickness to 60 mm (~ 2 ⅜ inches), Order No. 9FX119. Beginning initial circulator operation Caution! Compare the available power voltage and frequency with the specifications on the type label. - Page 24 Installation and initial operation The power plug serves as a protective separator and must be easily accessible at all times. Do not touch the power plug or power cable with wet hands! Never operate a damaged or leaking unit! Do not attempt to use the unit if the power cable is damaged! Attach the unit and switch it on (power switch located on rear of unit).
-
Page 25: First Steps
Prep work First steps This chapter is intended for users with little or no experience with the Sous Vide cooking technique. If you are an experienced Sous Vide cook or professional chef, you may skip this and continue with page 30 „Working with your Diamond“. -
Page 26: Starting The Unit
First steps Starting the unit After all preparations have been completed, you can begin the cooking process. 1. Make sure that the cooking container is properly filled and the Diamond is cor- rectly installed and connected. 2. Switch on the Diamond at the rear of the unit. -
Page 27: Enjoying The First Results
Enjoying the first results... values. The following table provides a few guidelines. Temperature guidelines for beef English 56- 58 °C (132.8-136.4°F) Medium 58-60 °C (136.4…140 °F) Medium well 60-62°C (140…143,6 °F) > 62 °C (143.6 °F) Well done Starting the unit 6. -
Page 28: Improving The Results
First steps 5. Sear the meat briefly at high temperature on both sides in order to achieve an at- tractive brown color. Then serve. Enjoy your meal! Improving the results The results of the cooking process are influ- enced by many factors, including: The quality of the meat •... - Page 29 Improving the results How can I Now that you know how to use your Dia- influence the mond, careful manipulation of two major results? variables can influence the cooking process: Cooking temperature Cooking time. The following chapter explains how to adjust the temperature and monitor cooking time.
-
Page 30: Working With Your Diamond
Working with your Diamond Working with your Diamond Gaining experience Switching on and starting the unit Caution! Never operate a damaged or leaking unit! Do not attempt to use the unit if the power cord is damaged! 1. Use the power switch on the rear of the unit to turn the unit on. -
Page 31: Setting The Desired Temperature
Gaining experience Confirm your selection by pressing OK. Press the Esc key to go back one step in order to correct the previous entry or to cancel the function. Setting the desired temperature You can change the target temperature from the main view while in standby or during regular operation. -
Page 32: Changing The Stored Temperatures
Working with your Diamond 1. Press the desired quick key briefly in order to retrieve the stored temperatures. The first stored value will start blinking. 2. Continue pressing the quick key or use the arrow buttons to scroll through the temperature values stored under that quick key. -
Page 33: Working With The Timer
Gaining experience The new value will be stored at the selected location. Doing this will not change the cur- rent set point. Storing the current set point If your current set point is the optimal temperature, you can easily store this tem- perature so it can be retrieved later. - Page 34 Working with your Diamond Setting the timers Proceed as follows to set one of the timer: 1. Press and hold the timer key for at least two seconds. The timer view will appear and the most recently set timer value will blink on the bottom line.
- Page 35 Gaining experience To view a different timer, press the desired timer key once. That timer will then be shown on the lower line. After a few moments the display will automatically switch back to the timer with the least amount of remaining time. Adjusting a timer You can adjust a timer at any time while the unit is in operation, even if the signal has al-...
- Page 36 Working with your Diamond Switching off the timer You can switch off a timer at any time while the unit is in operation by pressing and hold- ing the corresponding timer key for at least two seconds. However, the used timer value will be stored and becomes the preset value the next time the timer is set.
-
Page 37: A Closer Look
A closer look The time covered by the timer will be stored and used as the preset value the next time the timer is activated. Adjusting the You can adjust the timer as described above timer after the even after the timer has run down and the signal is triggered signal has triggered. -
Page 38: Connecting The Core Temperature Sensor
Connecting the core temperature sensor We recommend using only the fusionchef by Julabo core temperature sensor, which has been calibrated at our factory and is de- signed to work with precision. 1. Plug the core temperature sensor's cable into the proper Pt100 socket on the rear of the unit. -
Page 39: Inserting The Core Temperature Sensor
A closer look Inserting the core temperature sensor Notice Although the core temperature sensor is in- serted into the vacuum bag through the special adhesive sealing tape, we cannot exclude the possibility that the food will come into contact with liquid from the water bath. -
Page 40: Switching Off The Temp. Sensor Alarm
Working with your Diamond 2. Use the arrow keys to set the desired core temperature. The alarm will signal when the temperature reaches 1 °C (33.8 °F) below the target temperature. 3. Press OK to activate the temperature sen- sor alarm. As soon as the temperature sensor alarm is activated, the temperature sensor key will illuminate and the selected alarm value will... -
Page 41: Automating Processes
Automating processes sensor alarm is activated, the Diamond will display an alarm and error message. The unit will beep and display CODE 15: EXTERNAL SENSOR WARNING - CHECK EXTER- NAL SENSOR If this occurs, make sure the temperature sensor is properly inserted or check for a bro- ken connection. -
Page 42: Starting Automatic Cooking Time Detection
Working with your Diamond 1. To access the menu, press the Esc and sensor keys simultaneously. CONFIG 2. Use the arrow keys to select the CONFIG menu entry and confirm with OK. CDETECT 3. Select CDETECT (Cooking Time Detection) and confirm with OK. 4. - Page 43 Automating processes 1. When the food reaches its optimal tem- perature, trigger the alarm by pressing and holding the temperature sensor key for at least 2 seconds. As soon as the alarm has triggered, the unit will give you the option of storing the cooking time in whichever timer you choose.
-
Page 44: Retrieving The Cooking Time
Working with your Diamond the alarm activates again will be added to the cooking time (see below). Retrieving the cooking time Retrieving a stored cooking time is very easy. 1. Press and hold the timer key with the de- sired time for at least two seconds. The timer view will appear and your preset cooking time will be displayed. - Page 45 Automating processes Consider the following example: 1. You activate automatic cooking time detection in the menu. 2. You set the temperature sensor alarm to the desired core temperature. 3. As soon as the core temperature is reached, the alarm activates. The time that passed between these two events is stored as your cooking time.
-
Page 46: Special Functions
Working with your Diamond Special functions Automatic temperature monitoring Using automatic temperature monitoring Our units are designed to achieve a precise target temperature in the water bath. Tem- perature changes, like those caused by the addition of refrigerated food, are quickly compensated for. - Page 47 Special functions 0.5 °C (33 °F), then the temperature may fluctuate from 59.5 °C to 60.5 °C (139.1 to 140.9 °F). 5. Use the arrow keys to set the appropriate temperature limits. Then confirm your se- lection by pressing OK. Temperature monitoring is now activated.
-
Page 48: Recording And Exporting Data
Working with your Diamond CODE 03: EXCESS WATER TEMPERATURE WARNING - CODE 04: LOW WATER TEMPERATURE WARNING - You may also mute this alarm. Do this the same way you mute other alarms - by press- ing OK once. The alarm message will still be visible. - Page 49 Special functions Setting the date and time You must set the date and time in order for the datalogger to record the correct data. 1. Access the menu by pressing the Esc and sensor keys simultaneously. CONFIG 2. Use the arrow keys to select the CONFIG menu entry and confirm with OK.
- Page 50 Working with your Diamond Internal datalogger modes Datalogger is switched off ALWAYS The datalogger will record at all times. When the memory is full, the oldest data will be overwrit- ten. The memory space will not be displayed and the memory will not be deleted when the data is exported.
- Page 51 Special functions Adjusting the recording interval The datalogger records data at specified time intervals. This ensures that important data will be recorded without unnecessarily filling up the memory. The factory default recording interval is five minute. You can adjust this interval if you require shorter recording intervals or if the memory fills up too fast.
-
Page 52: Additional Menu Settings
Working with your Diamond Delete the contents of the memory as fol- lows: 1. Access the menu by pressing the Esc and sensor keys simultaneously. LOGGER 2. Use the arrow keys to select the LOGGER menu entry and confirm with OK. CLR MEM 3. - Page 53 Special functions ALDELAY 3. Select ALDELAY and confirm with OK. 4. Set the desired alarm delay in seconds (10 to 999) and confirm with OK. The time delay that you set will now be adopted. Switching key tones on and off If desired, the unit will emit a short beep every time you press a key.
- Page 54 Working with your Diamond Change the temperature units as follows: 1. Access the menu by pressing the Esc and sensor keys simultaneously. CONFIG 2. Use the arrow keys to select the CONFIG menu entry and confirm with OK. UNIT 3. Select UNIT and confirm with OK. 4.
-
Page 55: Care And Maintenance
Changing the water Care and maintenance The circulator is designed for continuous op- eration under normal conditions. Regular maintenance is not required. However, you should perform the following cleaning tasks each day. Changing the water The circulator is suitable only for use with sof- tened/decalcified water. -
Page 56: Decalcifying
Care and maintenance Draining bath tanks with single units Single units must be disassembled before draining the bath tank. 1. Switch off the unit and pull the power plug. 2. Unscrew the bath attachment clamp and remove the unit from the bath tank. 3. - Page 57 Cleaning the unit Chlorine in drinking water can result in corrosion. Iron in drinking water will precipitate and result in rust formation. 1. Use water with a low surface tension. Use a soap solution to rinse the stainless steel bath tank and immersed functional parts of the unit (circulation pump, float switch, and heater).
- Page 58 Care and maintenance 4. Move the protection grid to the left. 5. Lift the protection grid Draw it over the float by turning it to the right by approx. 30° and slightly tilting backwards. 6. Turn the protection grid to the left back into the initial position and remove it.
-
Page 59: Confirming Temperature Accuracy
Confirming temperature accuracy Confirming temperature accuracy Checking temperature accuracy Fusionchef by Julabo units are precisely cali- brated and inspected before leaving our factory. The units are designed for highly pre- cise temperature control in continuous op- eration. Even over long periods of time, the sensors will retain their accuracy or become only marginally inaccurate. - Page 60 Care and maintenance 3. Access the menu by pressing the Esc and sensor keys simultaneously. SENSCAL 4. Use the arrow keys to select the SENSCAL menu entry and confirm with OK. EXECUTE 5. Select EXECUTE and confirm with OK. Sensor calibration will now start. The neces- sary steps will be shown on the display.
-
Page 61: Calibrating The Unit In An Ice Water Bath
Confirming temperature accuracy The most recent calibration of the tempera- ture sensor will be deleted. Calibrating the unit in an ice water bath Notice Perform calibration only if absolutely neces- sary or if multiple external control measure- ments have confirmed that the unit's meas- urements are inaccurate. - Page 62 Care and maintenance Performing calibration The necessary steps will be shown on the dis- play. Please follow these instructions. 1. Drain water from the bath tank until OK starts blinking (fluid level sensor = low-level warning). Confirm by pressing OK. 2.
- Page 63 Confirming temperature accuracy ERASE 3. Select ERASE and confirm with OK. The unit's most recent calibration will be de- leted and the original factory settings will be restored.
-
Page 64: Error Messages
Error messages Error messages The following table contains some of the pos- sible error messages with the associated warnings messages and resolutions. All warning messages are indicated on the display and accompanied by an audible signal. To mute the audible signal, press OK once. -
Page 65: Error Messages
If there is not enough water in the bath tank: The float switch is defective (transport damage, etc.). Sent the unit to an authorized fusionchef by JULABO re- pair facility. CODE 05: WORKING Please contact our service depart- SENSOR ALARM ment. -
Page 66: Information About The Unit
Information about the unit Information about the unit Technical data Unit type Diamond Diamond Z Diamond S Order No. 9FT2000 9FT2113 9FT2B20 Working temperature range 20°C…95° C (68 °F …203 °F) Operating temperature range 0°C…95° C (32 °F …203 °F) Temperature stability +/- 0.01K Temperature setting... - Page 67 Technical data All data assume rated voltage and rated frequency Operating temperature: 70 °C (158°F), ambient temperature: 20 °C (68°F),heat transfer fluid: water. Information subject to technical changes. Unit type Diamond M Diamond L Diamond XL Order No. 9FT2B27 9FT2B44 9FT2B58 Working temperature range 20°...
-
Page 68: Ec Compliance
Fax: 07823 / 2491 Technical Service E-mail: service@fusionchef.de If sending a product to fusionchef by Julabo: Please clean the device in order to avoid endangering the service personnel. Prepare the device for shipment with careful and proper packaging. Always include a brief description of the problem. -
Page 69: Disposal
Disposal this form and include it with the device or fax or e-mail it to us in advance. fusionchef by Julabo will not be liable for any damage caused by improper packaging. Notice During the repair process fusionchef by Ju-... -
Page 70: Warranty
Information about the unit Warranty fusionchef by Julabo warrants flawless func- tionality of this unit, assuming it has been in- stalled and used properly and in accor- dance with the directives contained in these operating instructions. The warranty time period is two years.
Need help?
Do you have a question about the Fusion Chef Premium Sous Vide Diamond and is the answer not in the manual?
Questions and answers