Table of Contents
Advertisement
Quick Links
Advertisement
Table of Contents

Related Manuals for Rane Scratch Live SL 1


Summary of Contents for Rane Scratch Live SL 1
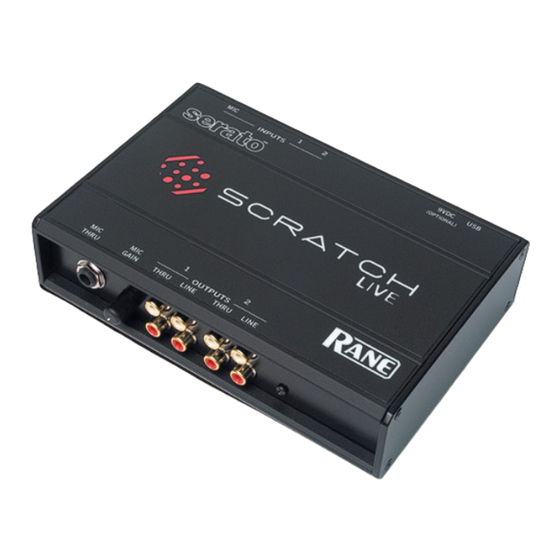
- Page 1 17356 SCRATCHLIVE SL 1 OPERATORS MANUAL 1.7.4...
- Page 2 Trademarked in the U.S. and other countries. Licensed exclu- • 2 (two) control records. sively to Rane Corporation. This software is based in part on the • 1 USB cable. work of the Independent JPEG Group, and uses libpng code, •...
-
Page 3: Table Of Contents
SERATO SCRATCH LIVE SL 1 OPERATOR’S MANUAL Version 1.7.4 Contents Getting started ..........2 Organizing your music .......14 Connections ..........3 Grouping tracks into crates .....14 Optional extra setup .........3 Subcrates ..........14 Setting up your turntables and mixer ..4 Sorting your files ........14 Setting up your CD players ......4 Using the song browser ......15 Starting the software ........4... -
Page 4: Getting Started
Getting started 1) Install the software Insert the Software Installation CD-ROM and double-click the installer icon. Windows XP and Vista 1. Insert the Software Installation CD-ROM. If Setup doesn’t start automatically, browse to the CD drive and run setup.exe. Note: Select custom install to change the directory you wish to install Scratch into. -
Page 5: Connections
Serato Scratch LIVE software. with Serato Scratch LIVE software. ©2004 Serato Audio Research ©2004 Serato Audio Research ©2004 Rane Corporation ©2004 Rane Corporation All rights reserved. All rights reserved. Connect the LINE OUTPUTS of the SL 1 to the Line Inputs on your DJ mixer, check that those inputs are switched to line level. -
Page 6: Setting Up Your Turntables And Mixer
Setting up your turntables and mixer Setting up your CD players 1. Set the tone arms to the specific recommendations of the Your CD players do not need any adjustment. Connect the out- cartridge used, such that the needle never leaves the record, but put of your CD players to Inputs 1 and 2 of the SL 1, and set the not heavy enough that it heats up significantly. -
Page 7: Live
Calibrating Scratch LIVE Place the needle on the record with the record stopped. The SL 1 interprets the signal on record and communicates with Click the button to measure the background noise and the software. The signal needs to be clear for Scratch estimate LIVE estimate the appropriate threshold. -
Page 8: Playing Your First Track
Playing your first track Preparing your files Now that you have calibrated Scratch , you are ready to play LIVE your first track. We will return to the screen later to set setup general system preferences. When you first run Scratch , your library contains only LIVE the pre-installed tracks. -
Page 9: Playing Tracks
Playing tracks When a track is loaded, the track name, artist and length are displayed in the track title bar, and the Virtual Deck shows a solid black line. The track will start playing as soon as it detects the signal from the control vinyl (or CD). The control record The control record has two sides. -
Page 10: Visual Aids
Visual aids When the track is playing several waveforms are displayed. Each shows a different aspect of the track being played. Tempo Matching display The Tempo Matching display area provides a helpful tool for beat matching. Scratch detects the beats within the track, and LIVE places a row of orange peaks (for the track on the left side) above a row of blue peaks (for the track on the right side) in the Tempo... -
Page 11: Main Waveform Display
Main Waveform display This view provides a close-up view of the track, including color- coding to show the frequency of the sound; red representing low- frequency bass sounds, green representing mid-frequency sounds and blue representing high-frequency treble sounds. You can also switch to a three-band spectrum view by holding key and clicking on the waveform. -
Page 12: Tracking Indicator
Master gain The master output of Scratch can be controlled LIVE using the control. This adjusts the output master gain volume of all tracks played. Note: for best results, set the master gain to the 12 o’clock position, and adjust the volume of individual tracks using the track gain adjustment. -
Page 13: Scratch Live Modes
Scratch modes LIVE Scratch has three different modes of operation. You can LIVE switch between these modes by clicking the mode buttons near the Virtual Deck. Absolute mode mode is the default mode, and most closely resembles the properties of normal vinyl. The beginning of the track is mapped to the start of the record, and by picking up the tone arm and moving the needle to another part of the record (needle dropping) you can move to a different position within... -
Page 14: Internal Mode
Internal mode mode allows you to play tracks without external vinyl (or CD player) control. mode has a start / stop func- tion and virtual pitch slider. Holding down the shift key moves the pitch slider slowly. Holding the ctrl key and clicking on the pitch slider resets it to 33 rpm or 45 rpm, depending on which you are closest to at the time. -
Page 15: Cue Points
Tip: The rate of cue point stuttering is controlled by your operating system key- board repeat rate settings. Windows users: Keyboard properties are in the Control Panel. Mac users: Keyboard and Mouse are in System Preferences. Tip: use the keyboard shortcuts ctrl-com- (for left) and ctrl-dot... -
Page 16: Organizing Your Music
Organizing your music To make a new crate, click the + button. To rename a crate, Scratch can support an unlimited number of tracks – the double click the crate name. You can change the order of tracks LIVE only limitation is the size of the hard drive of your computer. A within a crate by dragging them up or down. -
Page 17: Using The Song Browser
Using the song browser The song browser allows you to filter your song list by Genre, BPM, Artist and Album. To turn the song browser on or off, click the button. browse Searching Scratch includes a search function to help you find files quickly and easily. Enter text into the search box and Scratch will LIVE LIVE... -
Page 18: Prepare Window
Prepare window Status icons The prepare window is a holding area for tracks, much like The leftmost column shows the status of each track. The image to preparing a set by lifting records part way out of your record bag. the left shows 5 tracks with differing statuses. -
Page 19: Recording From A Microphone
Recording Recording from a microphone Sampling from vinyl Scratch allows you to record from the Mic Input and scratch You can use the SL 1 interface to sample from vinyl or any other LIVE it immediately as if it were on vinyl. Use the mic input level sound source. -
Page 20: Keyboard Shortcuts
Keyboard shortcuts These actions can be accessed directly from the computer keyboard. Action ctrl - L Locate the current track. This will highlight the track you most recently loaded. Pressing ctrl - L again will alternate between the tracks recently loaded on both decks. ctrl - R Reveal - the highlighted song is opened in a file browser. -
Page 21: Additional Setup
Additional setup This section covers general preferences and adjustments you can Playback make to improve the performance of Scratch . From the LIVE main screen, tick to get to this area. setup Instant doubles This allows you to quickly match the playhead position of two USB audio buffer size tracks. -
Page 22: Lock Playing Deck
Vinyl Control Song Library Track start offset Set auto gain If you find that you have cue burn at the beginning of the record, For songs with overviews built (by version 1.7.2 or later), check you will notice that the tracking will be poor at this point. Use this if you want to use the calculated auto gain value while play- the two knobs to offset the start point, so that the track will start ing songs. -
Page 23: Center On Selected Song
Center on selected song USB dropout indicator With this option on, scrolling up and down in your library holds The USB dropout indicator on the the selected track in the middle of the library panel. main screen is a useful trouble shooting tool if you have problems with audio dropouts. -
Page 24: Mixing With Only One Turntable
Mixing with only one turntable 5. Having completed the first mix, flick the reverse input The single turntable technique allows you to mix as if you had switch. The track you just mixed in will play on in control two turntables, using just one. If one of your turntables is not mode, and the physical record is now back to controlling the performing properly, or if you only have one available, you will be right hand deck in Scratch... -
Page 25: Troubleshooting And Faq
LIVE distributor. You may also order these in the online store at www. We recommend Shure M44-7 needles for use with Scratch rane.com if you are in the USA. , due to their high output volume, excellent tracking and LIVE low record wear. -
Page 26: Scope Reading And Fixes
Scope reading and fixes Most of the problems that occur with Scratch can be attributed to it not getting a good reading of the control signal from your LIVE records or CDs. These examples show what the scopes on the setup screen can look like to help solve possible problems. Some problems cause similar looking scopes, e.g. - Page 27 Record Burn Left Channel Missing Right Channel Missing This section of the control vinyl has been The left signal from the needle is not The right signal from the needle is not worn. Swap sides or use the track start reaching the SL 1.
-
Page 28: Corrupt File Descriptions And Diagnoses
This should not result in any audible audio artifacts, but could cause audio dropouts on earlier versions of Scratch LIVE ©Rane Corporation 10802 47th Ave. W., Mukilteo WA 98275-5098 USA TEL 425-355-6000 FAX 425-347-7757 WEB www.rane.com Manual-26 All features & specifications subject to change without notice. Build 17412...
Need help?
Do you have a question about the Scratch Live SL 1 and is the answer not in the manual?
Questions and answers