Table of Contents
Advertisement
Advertisement
Table of Contents

Related Manuals for Solar Storm SS48ST

Summary of Contents for Solar Storm SS48ST
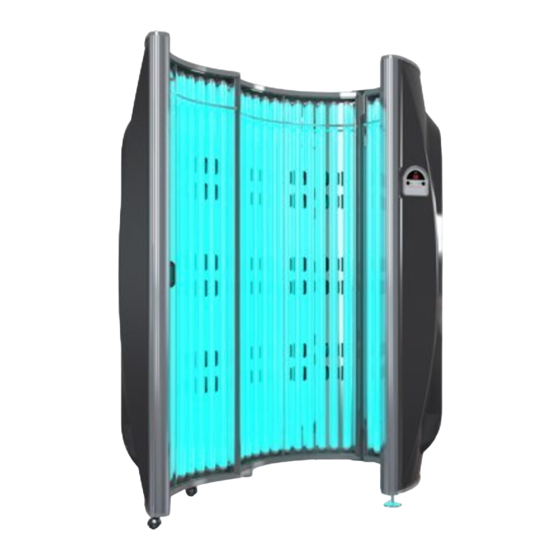
- Page 1 SS48ST Commercial Tanning Booth...
- Page 2 Commercial Tanning Bed Warranty Solar Storm warrants all of our indoor suntanning equipment to be free from defects in workmanship as follows: • 36 Months on parts- Including: Ballast, Contactors, & Timers. • 6 Months on Acrylic • 90 Days on Gas Springs •...
- Page 3 Disconnect power cord before attempting to clean, re-lamp, or engage in the maintenance of this product. This equipment must be earth grounded. DO NOT operate the tanning booth while wet or near water. Solar Storm Tanning Booth Specifications/Info. Dedicated Weight Voltage...
- Page 4 This means that your tanning booth is the ONLY electrical device operating on that circuit breaker. Your Solar Storm tanning booth will need to be hard-wired to a 50A circuit. A qualified electrician will be needed to assist in fulfilling these requirements per your local code.
- Page 5 This page intentionally left blank.
- Page 6 Solar Storm Tanning Booth Location Requirements Make sure the room is well ventilated. Air from the room is used to cool your tanning booth, which helps to ensure years of trouble free performance. Poor ventilation may cause the unit to overheat and cause discomfort to the user as well.
- Page 7 Included Hardware (continued) Attaching Hinge to Bottom of Sections 1 and 2 – Figure 1a Step 1. Lay sections one and two next to each other on a soft material (i.e. carpet) with the lamps facing down, and with the male and female power cords aligned. Section one contains the timer and main power cord.
- Page 8 Attaching Hinge to Top of Sections 1 and 2 – Figure 1b Step 1. Align the guide bolts of hinge “A” through the “1” holes in the end caps at the top end of the units as shown in figure 1b. Step 2.
- Page 9 Attaching the Door to Bottom of Section 2 – Figure 1c Step 1. Thread the casters “F” into the “3” holes in the end caps as shown in figure 1c. Tighten with the adjustable wrench. DO NOT OVER-TIGHTEN! Step 2. Align the guide bolt of hinge “B” through the “1” hole in the end cap at the bottom of section 2.
- Page 10 Attaching the Door to Top of Section 2 – Figure 1d Step 1. During this step, make sure you do not pinch the cords between the rails of the two different sections. Align the guide bolt of hinge “C” through the “1” hole in the end cap at the top end of section 2 as shown in figure 1d.
- Page 11 Pre-Tanning Guidelines Your Skin Before tanning, be sure your skin is free of any tanning oils or lotions, body lotions or cosmetics. Cosmetics or medications applied to your skin may increase your sensitivity to ultraviolet light. If you are taking any medication, or if you are especially sensitive to sunlight, we recommend that you consult a physician before using this or any tanning equipment.
- Page 12 NOTE: Timer sections 1-7 are provided directly by Applied Digital, Inc., the provider of the T-Max products and peripherals. Timer Operation Section Table of Contents OVERVIEW..........................SPECIFICATIONS............................Configuration........................... CONNECTING TO THE TANNING BED AND APPLYING POWER........... SETTING PARAMETERS............................2.2.1 Setting the Address........................... 2.2.2 Setting Delay time.............................
- Page 13 1. OVERVIEW Each T-MAX® 005 can manually control a tanning bed, be connected to a T-MAX® 3A remote front desk control or be connected with many T-MAX® timers and T-MAX® Manager or T-MAX® Manager/Pro to control many beds from a remote location. Operation is accomplished via front panel controls.
- Page 14 Then 14 three times, pauses then repeats, then the total lamp hours stored in that T-MAX® 005 is 5314. 4) Press the Up and Down buttons to change the parameter to the desired value. If you want to clear the value for that parameter, press the Up and Down buttons at the same time until the display shows “.0”.
- Page 15 Pressing and holding the Up button will cause the display to count up. Pressing and holding the Down button will cause the display to count down. Once the count reaches 100, the center period will ash rapidly. This is an indication that you are over 99. For example, if the display shows a .2 with the period ashing, this is address 102.
- Page 16 3.2 Pausing A Session To pause the session press the Start/Stop button. The ashing period on the lower right corner of the display will stop ashing and stay illuminated. To restart the session, press the Start/Stop button on the T-Max® 005. The period on the lower right corner of the display will resume ashing. Note: The session time will continue to count down.
- Page 17 Pausing During the Session To pause the session press the Start/Stop button on the T-Max® 005 in the tanning room. The ashing period on the lower right corner of the display will stop ashing and stay illuminated. To restart the session, press the Start/Stop button on the T-Max® 005. The period will continue ashing.
- Page 18 6.2 Lamp Hours To check and change Lamp Hours (or any other parameter), refer to Section 2.2. 6.3 Connecting the AP900 The AP900 allows you to connect the T-Max® 005 to the T-Max® System with out the need to run cables throughout your salon. Connect an AP900 OEM to the RJ-11 modular connector on the T-Max®...
- Page 19 7. FIGURES External Start. Connect a momentary push button to this terminal. This allows the user to press a button Figure A - Front and Rear View other than the Start/Stop botton on Of the T-Max® 005 the T-Max® 005 to start a session. RJ-22 Connections RJ-11 (for connecting to the External Speaker...
- Page 20 USE OF AMMONIA AND/OR ALCOHOL ON YOUR BOOTH WILL VOID THE WARRANTY! When using Tanning Booth Cleaner, available at your Solar Storm Authorized Dealer, spray the booth lightly, and wipe with a soft cloth. When cleaning the tanning booth, use a cotton towel which is much less abrasive than a paper...
- Page 21 Lamp Removal & Re-installation Solar Storm Lamps are rated up to 1000 hours of use. You may elect to change lamps sooner. Step 1. After removing the acrylic, grasp a lamp at one end and at middle. Turn the lamp a quarter turn.
- Page 22 Only the following lamp has been certified for use in the SS48ST tanning booth: 2655 Inferno 160X 160w You may purchase Solar Storm tanning lamps from your Solar Storm Authorized Dealer. Only use lamps specified on the Sun Bed label.
- Page 23 Warning Label Information DANGER Ultraviolet radiation. Follow instructions. Avoid overexposure. As with natural sunlight, overexposure can cause eye and skin injury and allergic reactions. Repeated exposure may cause premature aging of the skin and skin cancer. FAILURE TO WEAR 21CFR1040.20 APPROVED EYEWEAR MAY RESULT IN SEVERE BURNS OR LONG-TERM INJURY TO THE EYES.
- Page 24 FOR SUN LAMP PRODUCTS PER 21CFR878.4635 AND 21CFR1040.20. AS A RESULT, THIS PRODUCT MUST BE USED IN CONJUNTION WITH 21CFR1040.20 APPROVED EYEWEAR AND COMPONENTS. SS48ST Commercial Tanning Booth Manufactured by: LPI 506 Twin Oaks Dr. Johnson City, TN 37601 423-349-2900 Made in the U.S.A.
Need help?
Do you have a question about the SS48ST and is the answer not in the manual?
Questions and answers